
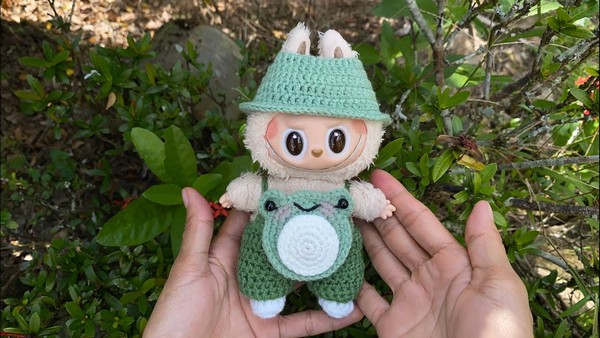
How to Crochet Frog Labubu Outfit – Labubu Overalls & Hat
Last time, we shared a guide on crocheting a bear outfit for Labubu. Now, in this post, you’ll find a tutorial on how to crochet a frog Labubu outfit that includes an overall and forehand band and works on a very similar pattern to the bear outfit, perfect for even beginners. This tutorial, again presented by MyHandmade, is divided into two parts: one for the hat and the other for the onesie. You can gift this Labubu dress set to a frog lover around you with a smiling frog appliqué on its belly.
So, if you are interested in crocheting this best-of-Labubu dress, continue reading this post till the end. There you will find the complete guide!
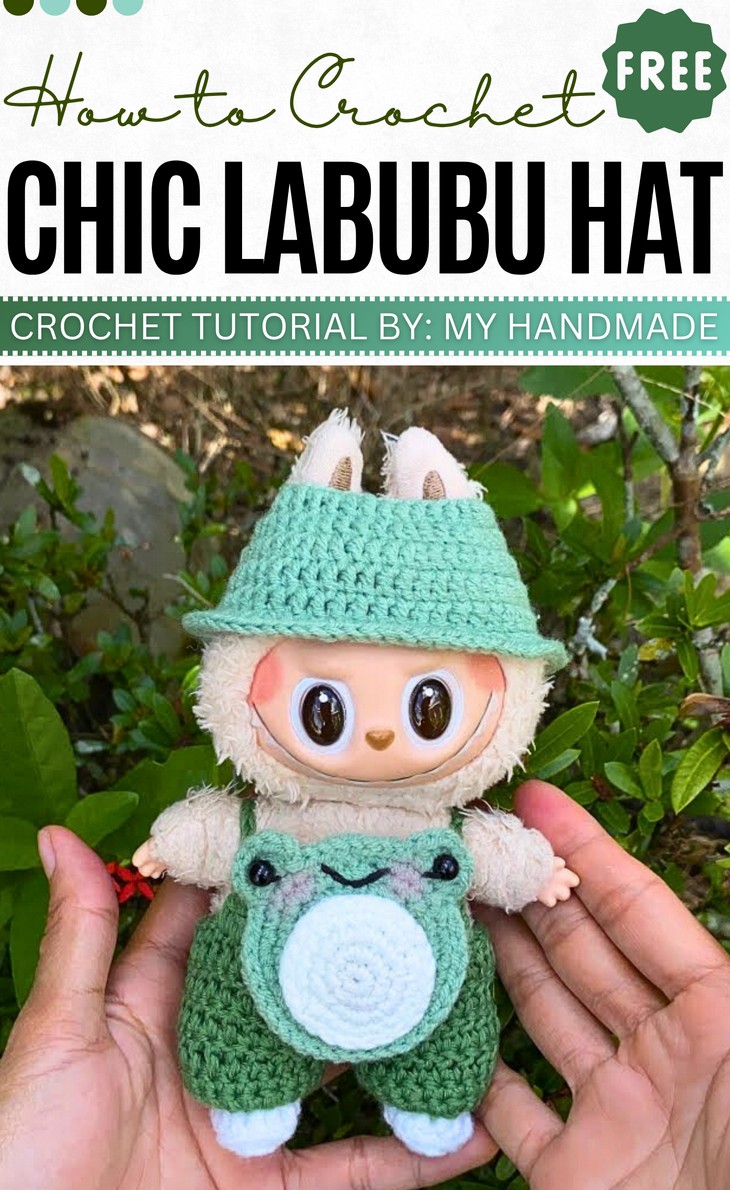
About the Designer: The designer of this Labubu accessory and outfit project is @Myhandmade– she possess just a dedicated corner in heart for the Labubu outfits and accessories which is hinted well as her whole crochet ideas library is filled with crochet Labubu accessories. This time she has crocheted a cutest Labubu dress ever like the Labubu coat!
Note: In respect for the creator’s pattern rights, there will be no provision of the written pattern. You can watch the tutorial with on-screen written instructions at the end of this post.
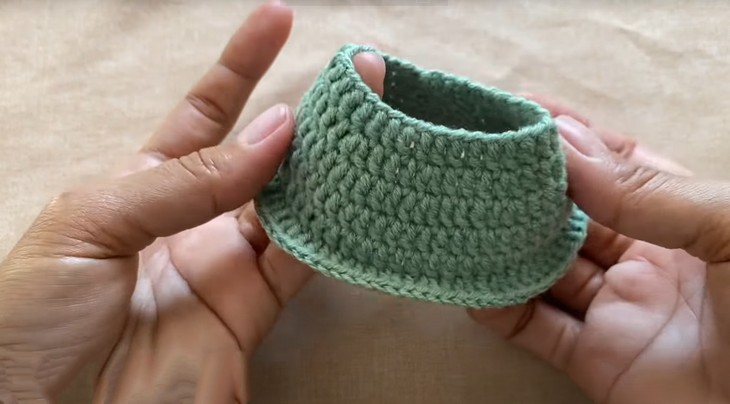
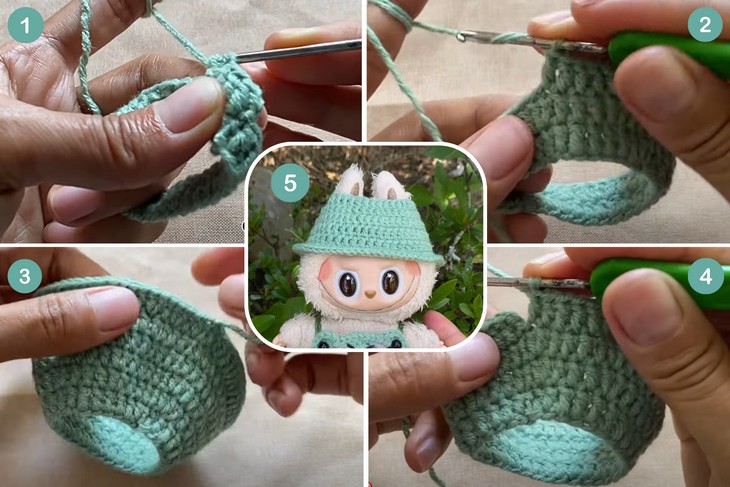
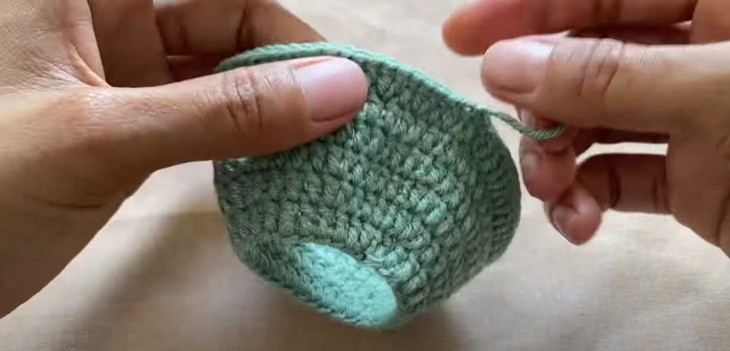
Crochet the Frog LaBuBu Clothes Tutorial
Skill Level: Beginners. You will need the basic crochet stitches like the chain stitch, single crochet, slip stitches, increase and decrease, half-double crochet, chain-skipping, and double crochet upto double treble, plus some basic sewing. The pattern is written in the US instructions.
There is no need for color changes, so you should be better at sewing since the frog appliqué with the belly will be attached in the end. Working on round will also be used.
Tutorial Timing: Approximately 28 minutes for the second part and 11 minutes for the first one. (perfect for learning the fundamentals of crocheting the dresses for the Labubu and understanding shaping while working in the rounds using six basic crochet stitches.)
Personalization Tips: You can easily adjust the size for crocheting this Labubu doll for the 24cm doll, too, by adjusting the initial chains for the hat and the legs. Measure the Labubu waist correctly before following the pattern. You can also try a cat theme by crocheting the bumps as ears instead of eyes and adding the face whiskers.
Pattern Type: An on-screen written pattern is available if you find written instructions easy to follow along with.
Materials Needed
Gather the following crochet materials and tools for crocheting this Labubu outfit for beginners:
Yarn: Baby yarn (soft and lightweight, ideal for delicate projects like baby clothes or amigurumi)
Hook Size: 2.5 mm (suitable for fine yarn like baby yarn)
- Beads
- Green, pastel green, and white.
Techniques Guide
Here’s a quick guide for each crochet abbreviation used to crochet the Labubu outfit:
- Chain Stitch (ch): Yarn over and pull through the loop on the hook to form a foundation chain.
- Single Crochet (sc): Insert the hook into the stitch, yarn over, pull through, yarn over again, and pull through both loops.
- Slip Stitch (sl st): Insert the hook into the stitch, yarn over, pull through both loops for a neat join or edging.
- Increase (inc): Work two single crochet stitches into the same stitch to grow the piece.
- Decrease (dec): Combine two stitches into one by inserting the hook into two stitches, pulling through, and finishing as one stitch.
- Half-Double Crochet (hdc): Yarn over, insert the hook into the stitch, yarn over again, and pull through all three loops on the hook.
- Double Crochet (dc): Yarn over, insert the hook into the stitch, pull through, yarn over, pull through two loops, and repeat.
- Double Treble Crochet (dtr): Yarn over the hook twice, insert into stitch, yarn over and pull through, then yarn over and pull through two loops three times.
- Chain Skipping: Skip the specified number of chains and continue crocheting into the next designated stitch.