
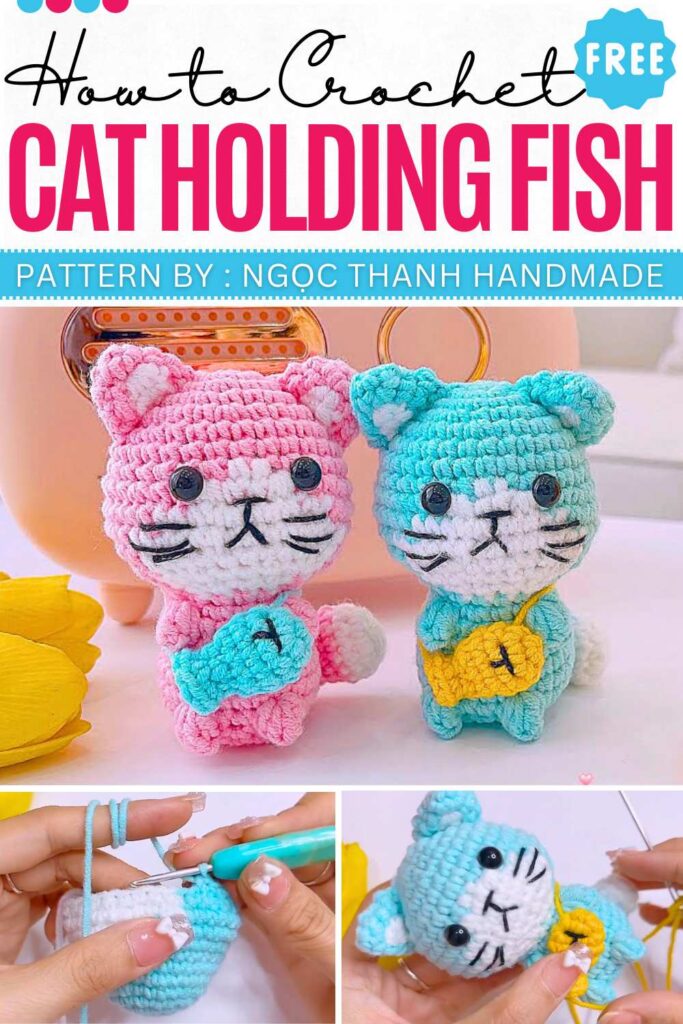
Free Crochet Amigurumi Cat Holding Fish Pattern
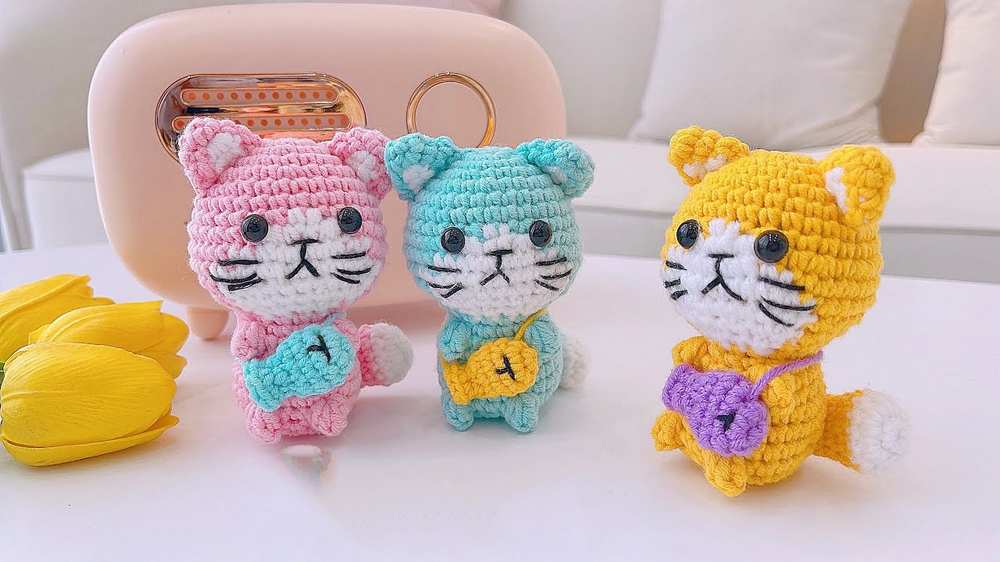
Looking for a cute summer amigurumi? Learn how to crochet this little kawaii cat holding a tiny fish amigurumi with a free and complete written pattern for absolute beginners. This will be a sitting cat amigurumi with a white part for the mouth, too. It has been designed in somewhat sad expression, but you can definitely crochet a smiling face.
You can also choose from your favorite color. Two have been shown above, including the pink and the blue. The legs and arms are not crocheted separately, but crocheted directly using the bobble stitch. I will show you both the UK and the UK pattern.
Crochet Cat Amigurumi
The designer behind this food amigurumi is @NITKA_KZ – she has quite a good grasp on kawaii amigurumi designing with added cuteness and surprises. I recommend that you all support her a lot.
Materials Needed
- Yarn: Milk Cotton (125g or 50g) in your choice of main color (e.g., Blue, Pink, or Yellow), White, and a small amount of Black for embroidery.
- Hook: 2.5mm crochet hook.
- Eyes: 7mm or 8mm safety eyes or glue-on eyes.
- Other: Fiberfill stuffing, tapestry needle, scissors, and a keychain ring.
Crochet Cat Pattern (US Terminology)
This pattern is for a mini crochet cat holding a small fish pouch, perfect for use as a keychain or backpack charm.
Head & Body (One Piece)
- R1: 6 sc in MR. (6)
- R2: 6 inc. (12)
- R3: (1 sc, 1 inc) x 6. (18)
- R4: (2 sc, 1 inc) x 6. (24)
- R5: (3 sc, 1 inc) x 6. (30)
- R6-R7: 30 sc around. (30)
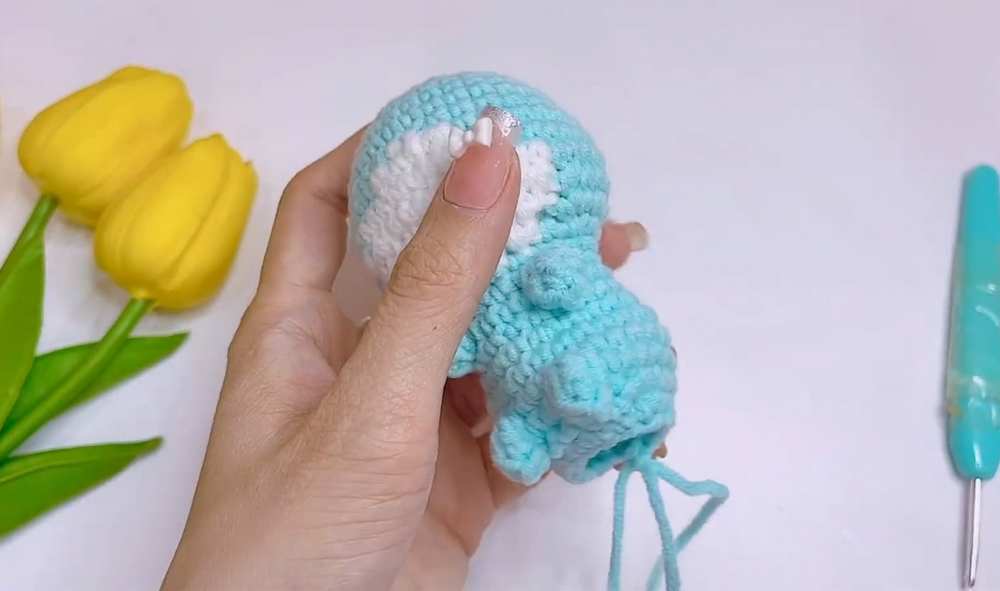
- R8: 14 sc (Main Color), 2 sc (White), 14 sc (Main Color). (30)
- R9: (Head shaping with increases) 6 sc, 3 inc, 1 sc, 1 inc, 2 sc (Main); 1 inc, 2 sc, 1 inc (White); 2 sc, 1 inc, 1 sc, 3 inc, 6 sc (Main).
- R10: 15 sc (Main), 10 sc (White), 15 sc (Main). (40)
- R11: 13 sc (Main), 14 sc (White), 13 sc (Main). (40)
- R12: (Decrease row) 3 sc, 1 dec, 3 sc, 1 dec, 3 sc (Main); 1 dec, 3 sc, 1 dec, 3 sc, 1 dec, 2 sc (White); 1 sc, 1 dec, 3 sc, 1 dec, 3 sc, 1 dec (Main).
- R13: (Further decreases) 1 sc, 1 dec, 1 sc, 1 dec, 1 sc, 1 dec (Main); 1 sc, 1 dec, 1 sc, 1 dec, 1 sc, 1 dec, 1 sc, 1 dec (White); 2 sc, 1 sc, 1 dec, 1 sc, 1 sc, 1 dec, 1 sc (Main).
- R14: (1 sc, 1 dec) repeated around, switching colors as established to close the neck.
- R15: 16 sc around (Neck). (16)
- R16: (3 sc, 1 inc) x 4. (20)
- R17: 7 sc, Arm (5-dc popcorn/bobble), 4 sc, Arm (5-dc popcorn), 7 sc. (20)
- R18: 20 sc around. (20)
- R19: (3 sc, 1 inc) x 5. (25)
- R20-R21: 25 sc around. (25)
- R22: 10 sc, Leg (5-dc popcorn), 3 sc, Leg (5-dc popcorn), 10 sc. (25)
- R23: (3 sc, 1 dec) x 5. (20)
- R24: (3 sc, 1 dec) x 4. (16)
- R25: 8 dec. Close and fasten off.
Ears (Make 2)
- R1: 4 sc in MR. (4)
- R2: (1 sc, 1 inc) x 2. (6)
- R3: 1 sc (Main), 1 inc (White), 4 sc (Main). (7)
- R4: 1 sc (Main), 1 sc, 1 inc, 1 sc (White), 3 sc (Main).
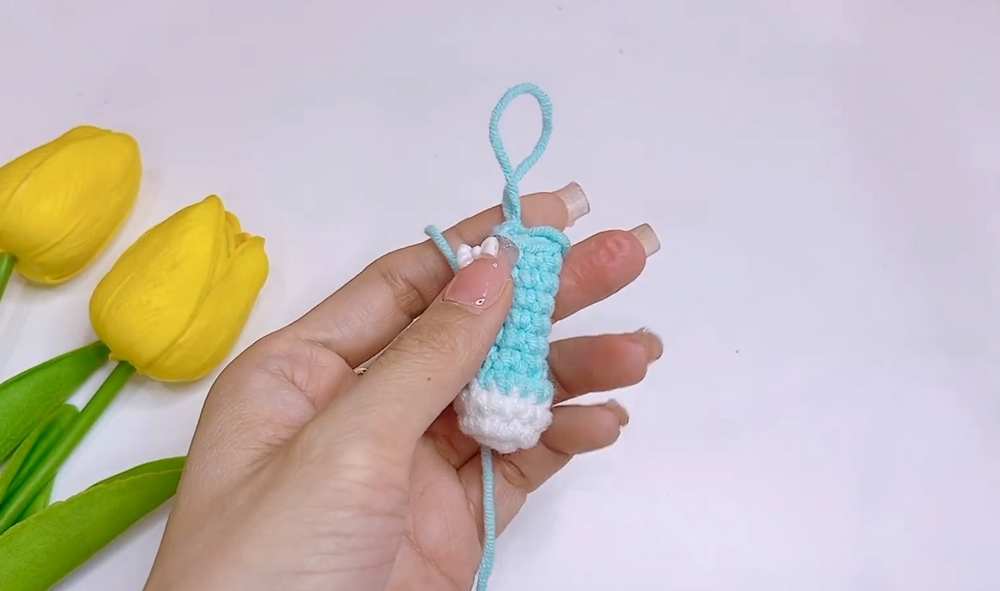
Tail
- R1: 6 sc in White MR. (6)
- R2: 6 inc. (12)
- R3: 12 sc (White). (12)
- R4: 12 sc (Main). (12)
- R5: (1 sc, 1 dec) x 4. (8)
- R6-R10: 8 sc around. (8)
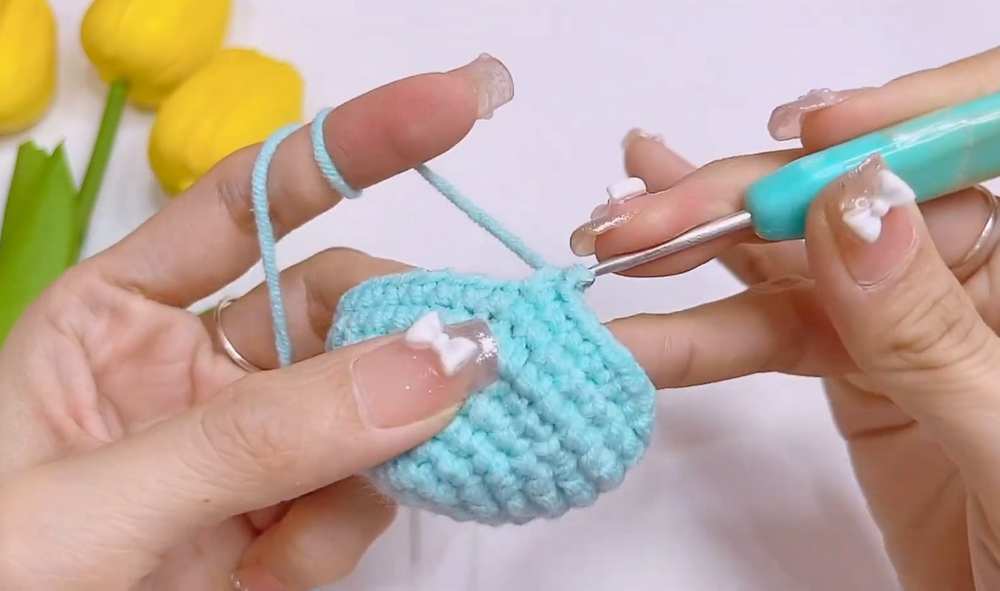
Fish Pouch
- R1: 4 sc in MR. (4)
- R2: 4 inc. (8)
- R3: (3 sc, 1 inc) x 2. (10)
- R4: 10 sc around. (10)
- R5: (3 sc, 1 dec) x 2. (8)
- R6: 4 dec. (4)
- R7: 4 inc (to create the fanned tail). (8)
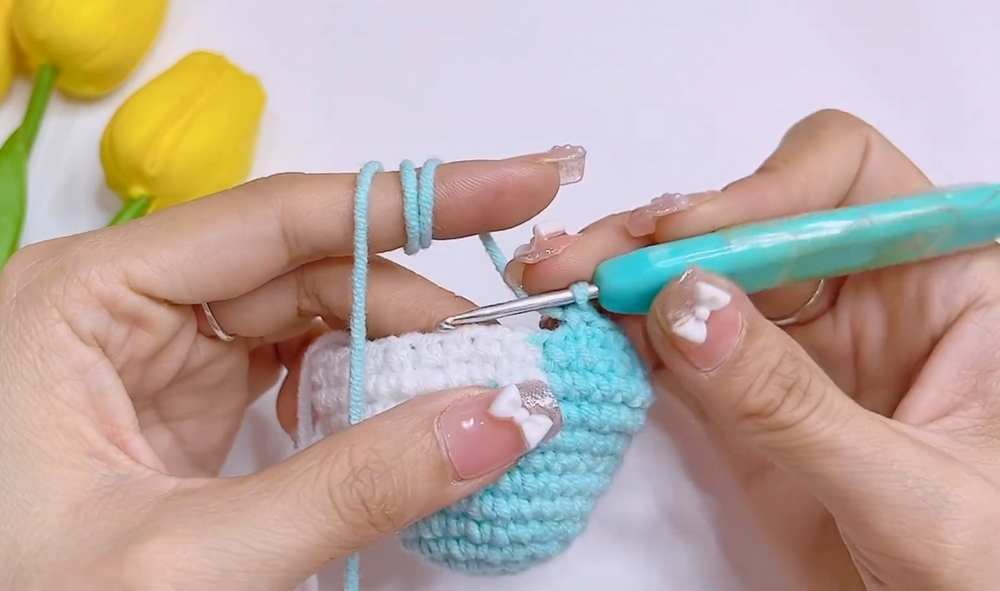
Assembly & Finishing
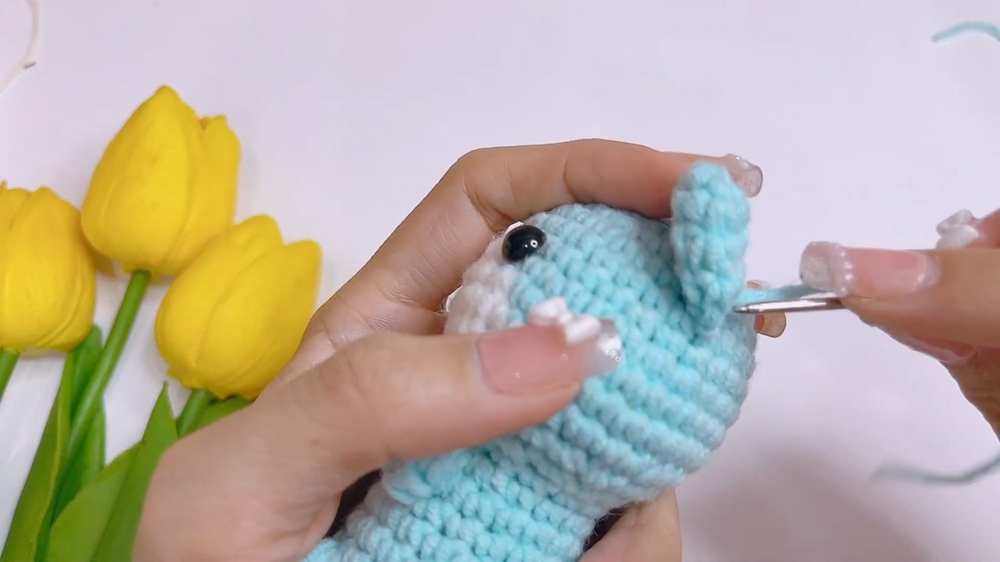
- Eyes: Position 7-8mm eyes on the second row of the white face section.
- Facial Details: Embroider a “T” shape for the nose and mouth, and add three small whiskers on each side using black thread.
- Ears: Sew ears to the top of the head at Row 2.
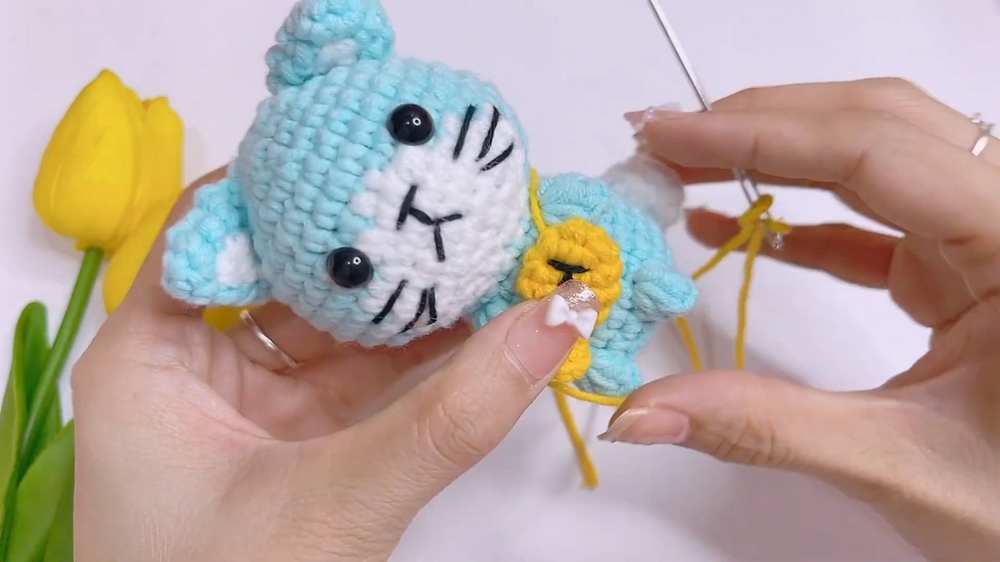
- Tail: Sew the tail to the back of the body, angling it so it’s visible from the side.
- Fish Pouch: Embroider a small eye on the fish. Place the fish on the cat’s belly and wrap the long yarn tail around the cat’s neck.
Video Tutorial
Pattern (UK Terminology)
Head & Body (One Piece)
- R1: 6 dc in MR. (6)
- R2: 6 inc. (12)
- R3: (1 dc, 1 inc) x 6. (18)
- R4: (2 dc, 1 inc) x 6. (24)
- R5: (3 dc, 1 inc) x 6. (30)
- R6-R7: 30 dc around. (30)
- R8: 14 dc (Main Color), 2 dc (White), 14 dc (Main Color). (30)
- R9: (Head shaping with increases) 6 dc, 3 inc, 1 dc, 1 inc, 2 dc (Main); 1 inc, 2 dc, 1 inc (White); 2 dc, 1 inc, 1 dc, 3 inc, 6 dc (Main).
- R10: 15 dc (Main), 10 dc (White), 15 dc (Main). (40)
- R11: 13 dc (Main), 14 dc (White), 13 dc (Main). (40)
- R12: (Decrease row) 3 dc, 1 dec, 3 dc, 1 dec, 3 dc (Main); 1 dec, 3 dc, 1 dec, 3 dc, 1 dec, 2 dc (White); 1 dc, 1 dec, 3 dc, 1 dec, 3 dc, 1 dec (Main).
- R15: 16 dc around (Neck). (16)
- R16: (3 dc, 1 inc) x 4. (20)
- R17: 7 dc, Arm (5-tr popcorn/bobble), 4 dc, Arm (5-tr popcorn), 7 dc. (20)
- R22: 10 dc, Leg (5-tr popcorn), 3 dc, Leg (5-tr popcorn), 10 dc. (25)
- R25: 8 dec. Close and fasten off.
Ears (Make 2)
- R1: 4 dc in MR. (4)
- R2: (1 dc, 1 inc) x 2. (6)
- R3: 1 dc (Main), 1 inc (White), 4 dc (Main). (7)
- R4: 1 dc (Main), 1 dc, 1 inc, 1 dc (White), 3 dc (Main).