
How to Crochet Chubby Bat Plushie Keychain for Halloween
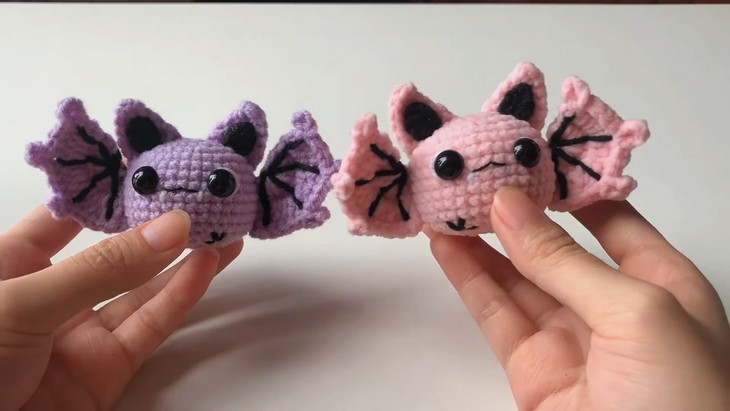
Here is a quick tutorial to crochet the cutest head-and-wings bat plushie designed by Kiwi Crochet for the upcoming Halloween. This plushie is small but features the accurate wings with black sewn veins, the large head and ears with a kawaii face, and tiny legs using embroidery. You can crochet it as a keychain or a hanging amigurumi. This chubby bat can be completed within 45 minutes thanks to bulky yarn. You can also choose from two colors: pink and purple, with the same pattern. You will especially adore its large eyes and layered ears.
So, if you are interested in crocheting this plush bat pattern, continue reading this post till the end. There you will find the complete tutorial.

About the Designer: The designer behind this small but detailed skull hat ghost project is @KiwyCrochet – she always creates cute, miniature amigurumi, often inspired by popular characters and animals. Notable tutorials include how to crochet a Chihuahua dog, a cowboy koala, a mini Doraemon keychain, and a Christmas capybara. Her capybara keychain series is also admirable. She has a small but unique playlist of Christmas, fall, and Halloween projects that are sure to check!
Note: In respect of the creator’s pattern rights, there will be no provision of the written pattern. You can watch the tutorial with on-screen and CC instructions at the end of this post.

Crochet Bat Plush Keychain Tutorial
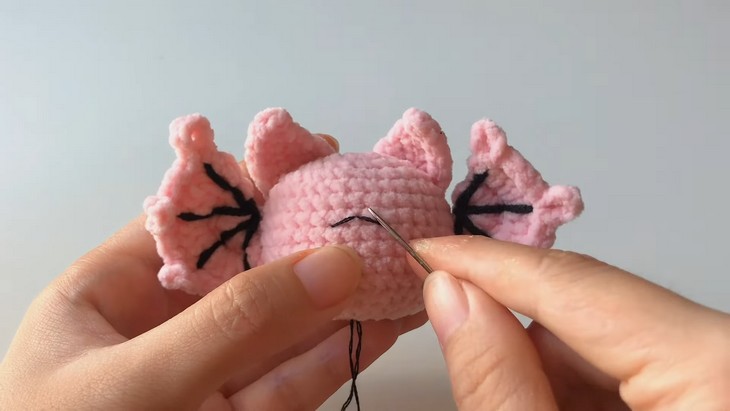
Skill Level: Beginner – Intermediate. You will crochet the body, wings, and ears of the bat mini plushie separately, with embroidery used in the bulk. Stitches include single crochet (SC), double crochet (DC), increases, decreases, and slip stitch. Techniques used include the magic ring to start, working in the rounds for the body, and turning rows for the ears and wings. Chain stitches are used for shaping wing picots. Additional embroidery adds detail to the wings and legs.
Tutorial Timing: 33 minutes only. (Perfect for learning how to work with small parts, velvet yarn, and to improve your embroidery. You will also learn the unique picot stitch for making the pointy edges in the wings. It will also help you improve your shaping and amigurumi designing!)
Personalization Tips: The bat design is very easy to customize. Change your main to light orange, grey or any light shade of a color. Add the fangs to the face for a spooky look. You can even resize the bat by switching to a thicker yarn or a larger hook.
Pattern Type: A detailed on-screen written pattern is available if you find written instructions easy to follow along with.
Materials Needed
You will have to gather the following suggested tools and materials for crocheting this bat mini amigurumi for Halloween, mentioned in the description:
- 3.0mm crochet hook
- Fluffy yarn (pink) – the medium bulky polyester
- A pair of plastic eyes (1cm)
- Stitch markers
- Polyester stuffing
- Sewing needle and scissors
Crochet Abbreviations
Here’s a one-line guide for crocheting each stitch and technique in the Halloween bat pattern:
Chain – Yarn over and pull through the loop on your hook.
Magic ring – Wrap yarn into a loop, crochet stitches into the ring, then pull tight to close.
Single crochet – Insert hook, yarn over, pull up a loop, yarn over, pull through both loops.
Increase – Work two stitches into the same stitch.
Decrease – Insert hook into the next two stitches, yarn over, pull through all loops.
Slip stitch – Insert hook, yarn over, pull through stitch and loop on hook at once.
Half double crochet – Yarn over, insert hook, pull up a loop, yarn over, pull through all three loops.
Double crochet – Yarn over, insert hook, pull up a loop, yarn over, pull through two loops twice.
Double crochet increase – Work two double crochets in the same stitch

