
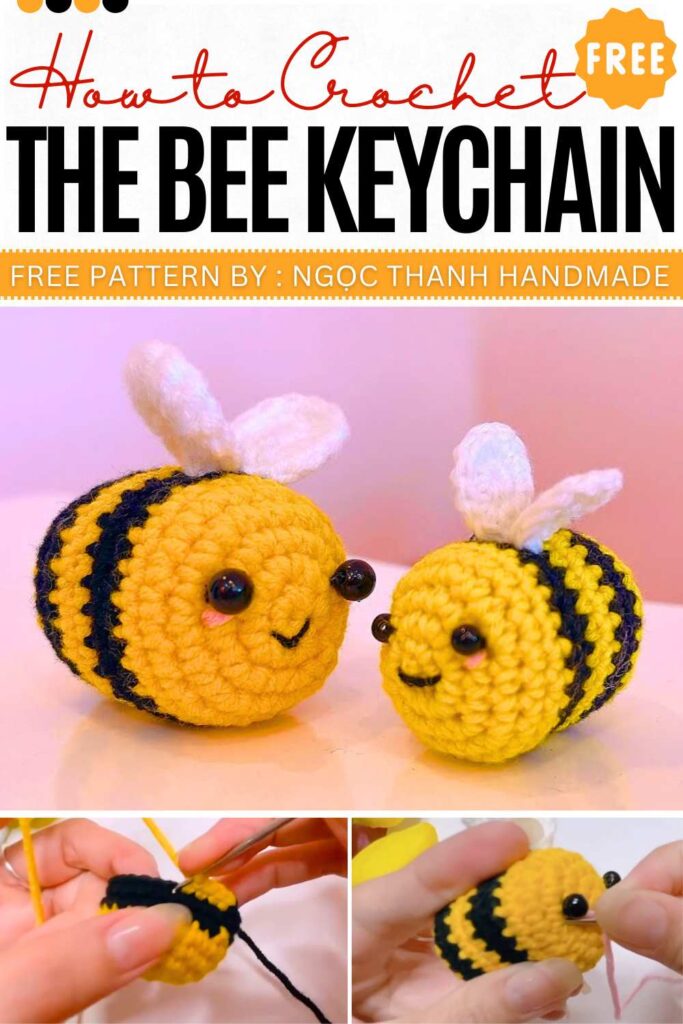
Crochet Bee Amigurumi Keychain Pattern For Spring
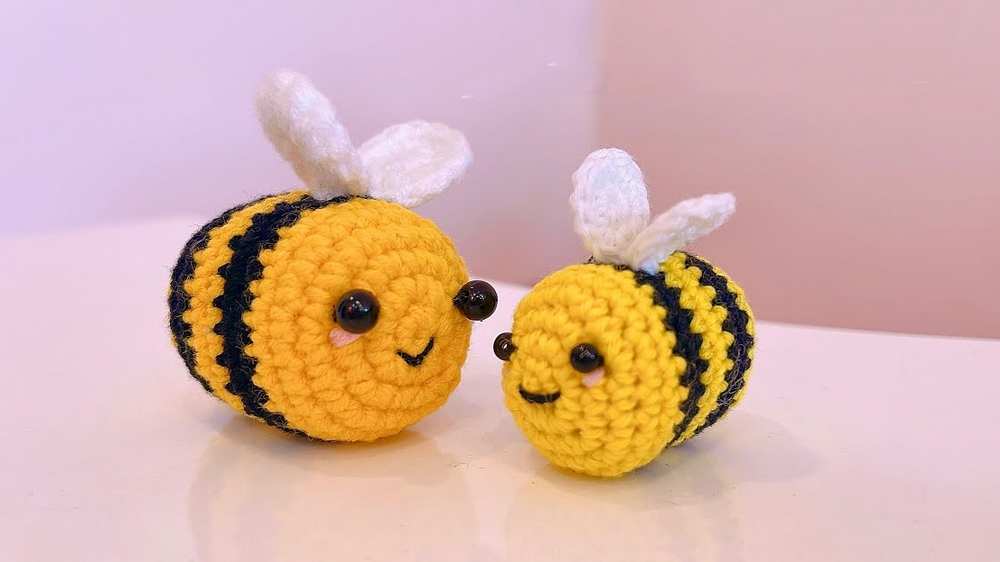
Spring is springing, and it is the good time to gift your loved ones. This crochet pattern lets you create the cutest bee amigurumi keychain that you can easily hang with your keys. The smaller versions can be used as charms and the bigger ones as playful gifts.
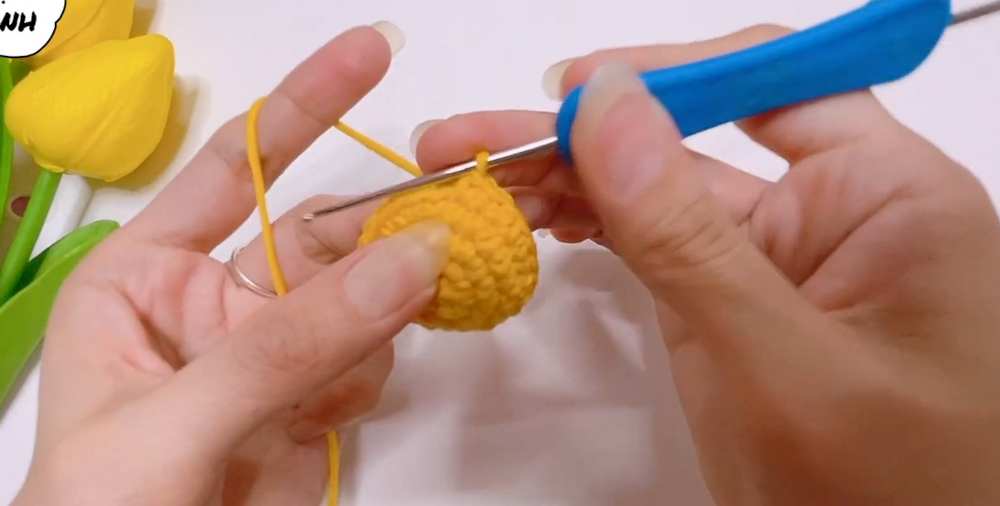
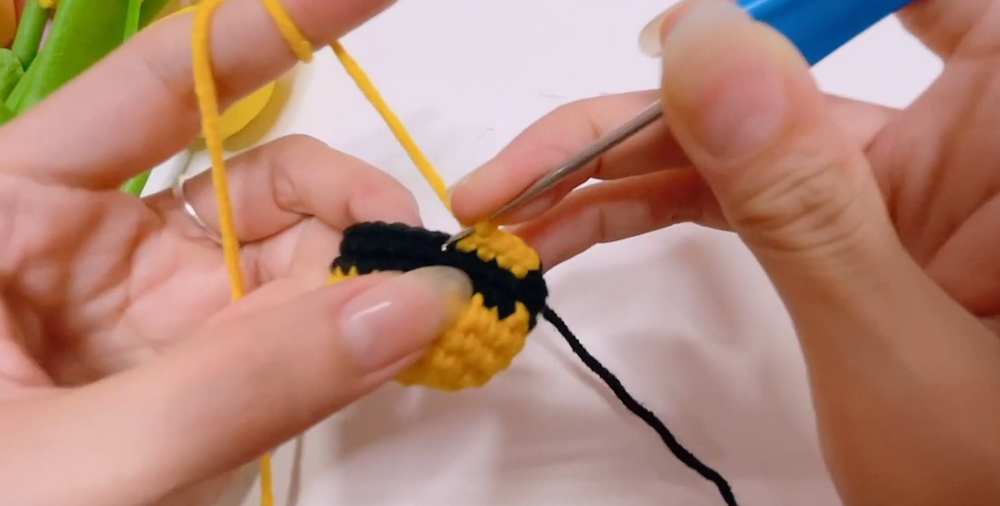
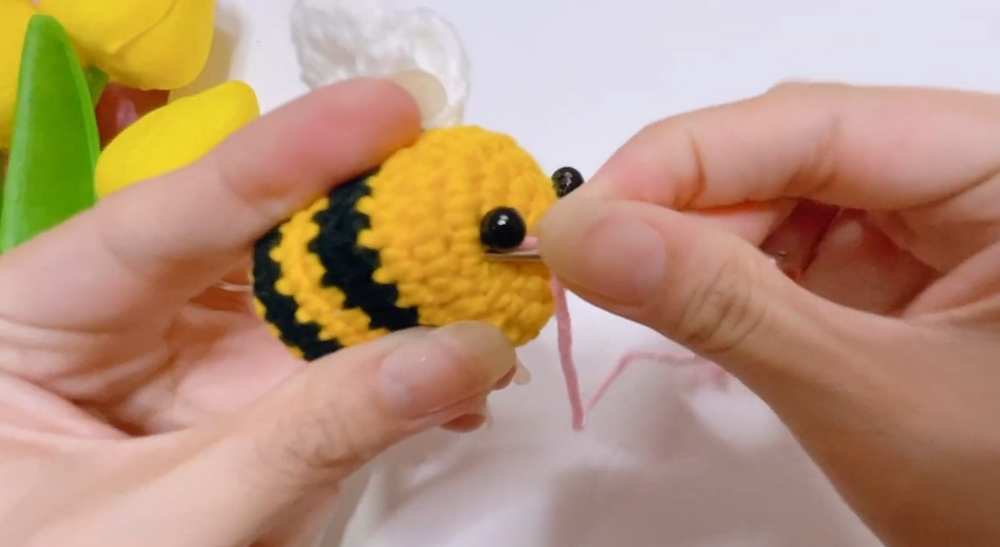
You can make the amigurumi bee by making small alternating yellow and black rings to make the body. For the head, switch to the yellow color. Add stuffing, make cute white wings, add blush, and end by adding safety eyes. Your happy bee is ready to surf on your keys!
Crochet Bee Amigurumi Keychain
The designer behind this avocado keychain is Ngọc Thanh Handmade – she has quite a good grasp on kawaii amigurumi designing with added cuteness and surprises.
How to Crochet Kawaii Bee Plushie in Just 30 Minutes
https://mycraftybasket.com/crochet-kawaii-bee-plushie/
Materials:
- Yarn: Milk Cotton (Yellow, Black, White for wings, Pink for blush).
- Hook: 1.0mm (for mini size) or 2.5mm (for standard size).
- Tools: Fiberfill stuffing, black embroidery thread, yarn needle, scissors.
Abbreviations
- MR: Magic Ring
- ch: Chain
- sc: Single crochet
- inc: Increase (2 sc in 1 stitch)
- dec: Decrease (Invisible decrease preferred)
- sl st: Slip stitch
The Pattern
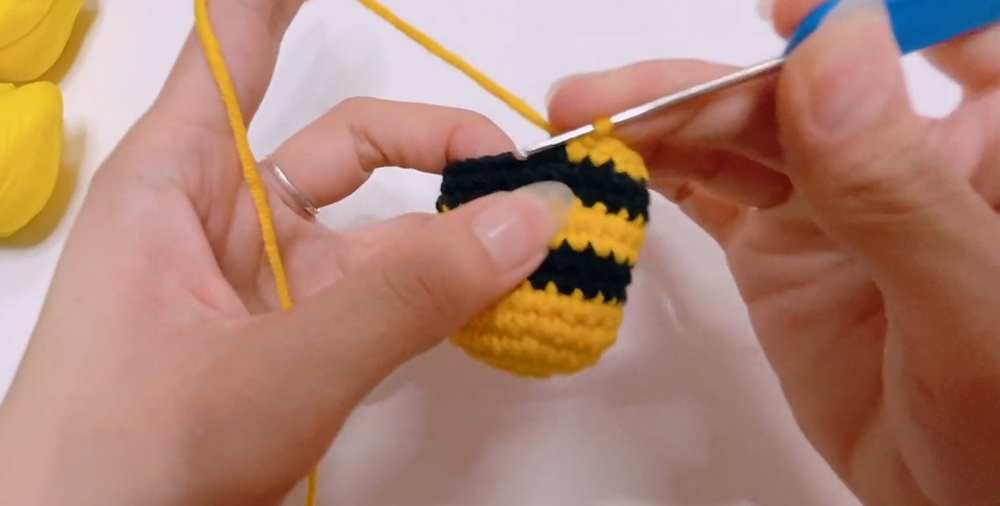
Body (Yellow & Black)
- R1 (Yellow): MR, 6 sc (6)
- R2: 6 inc (12)
- R3: (1 sc, 1 inc) * 6 (18)
- R4: (2 sc, 1 inc) * 6 (24)
- R5–6: 24 sc (24)
- R7–8 (Black): 24 sc (24) — Do not cut yellow yarn; carry it inside.
- R9–10 (Yellow): 24 sc (24)
- R11–12 (Black): 24 sc (24)
- R13 (Yellow): (3 sc, 1 dec) * 5 (19) — Cut black yarn.
- R14: (2 sc, 1 dec) * 5 (14)
- R15: (1 sc, 1 dec) * 5 (9) — Stuff the body firmly.
- R16: 10 sc (approximate to close gap).
- Fasten off, leave a tail for sewing.
Wings (White) – Make 2
- R1: MR, 8 sc (8)
- R2: (1 sc, 1 inc) * 4 (12)
- Fasten off, leave a tail for sewing.
Detailed Assembly
-
Body Closure:
- Thread the tail of the yellow yarn into a needle.
- Pass the needle through the front loops only of the remaining stitches at the tail end.
- Pull the yarn tight to cinch the hole closed, then hide the tail inside the body.
-
Wings:
- Locate the first black stripe section (R7–8).
- Position the wings on the top of the body, centered over the black stripe.
- Sew the base of the wings side-by-side with a 1-stitch gap between them.
-
Facial Features:
- Eyes: Using black thread, locate R3 or R4 on the yellow head section. Position the eyes approximately 5 stitches apart. Stitch small vertical lines or French knots.
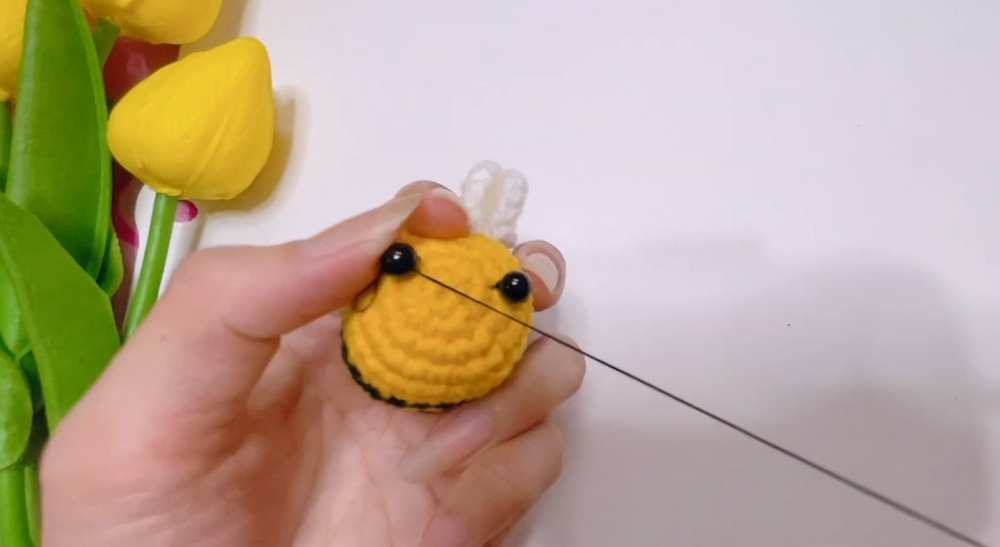
- Mouth: Position the mouth centered between and one row below the eyes. Create a small “V” shape with black thread.
- Blush: Using pink yarn, create a single small horizontal stitch directly beneath each eye.
-
Finishing:
- Ensure all color changes are aligned at the bottom of the bee to keep the top surface clean.
- Weave all remaining ends deep into the stuffing to prevent them from slipping out.
Video Pattern
Pattern (UK Terminology)
Body (Yellow & Black)
- R1 (Yellow): MR, 6 dc (6)
- R2: 6 2 dc in same st (12)
- R3: (1 dc, 2 dc in same st) * 6 (18)
- R4: (2 dc, 2 dc in same st) * 6 (24)
- R5–6: 24 dc (24)
- R7–8 (Black): 24 dc (24) — Do not cut yellow yarn; carry it inside.
- R9–10 (Yellow): 24 dc (24)
- R11–12 (Black): 24 dc (24)
- R13 (Yellow): (3 dc, dc2tog) * 5 (19) — Cut black yarn.
- R14: (2 dc, dc2tog) * 5 (14)
- R15: (1 dc, dc2tog) * 5 (9) — Stuff the body firmly.
- R16: 10 dc (approximate to close gap)
- Fasten off, leave a tail for sewing.
Wings (White) – Make 2
- R1: MR, 8 dc (8)
- R2: (1 dc, 2 dc in same st) * 4 (12)
- Fasten off, leave a tail for sewing.
Detailed Assembly
-
Body Closure:
- Thread the tail of the yellow yarn into a needle.
- Pass the needle through the front loops only of the remaining stitches at the tail end.
- Pull the yarn tight to cinch the hole closed, then hide the tail inside the body.
-
Wings:
- Locate the first black stripe section (R7–8).
- Position the wings on the top of the body, centered over the black stripe.
- Sew the base of the wings side-by-side with a 1-stitch gap between them.
-
Facial Features:
- Eyes: Using black thread, locate R3 or R4 on the yellow head section. Position the eyes approximately 5 stitches apart. Stitch small vertical lines or French knots.
- Mouth: Position the mouth centered between and one row below the eyes. Create a small “V” shape with black thread.
- Blush: Using pink yarn, create a single small horizontal stitch directly beneath each eye.
-
Finishing:
- Ensure all colour changes are aligned at the bottom of the bee to keep the top surface clean.
- Weave all remaining ends deep into the stuffing to prevent them from slipping out.