
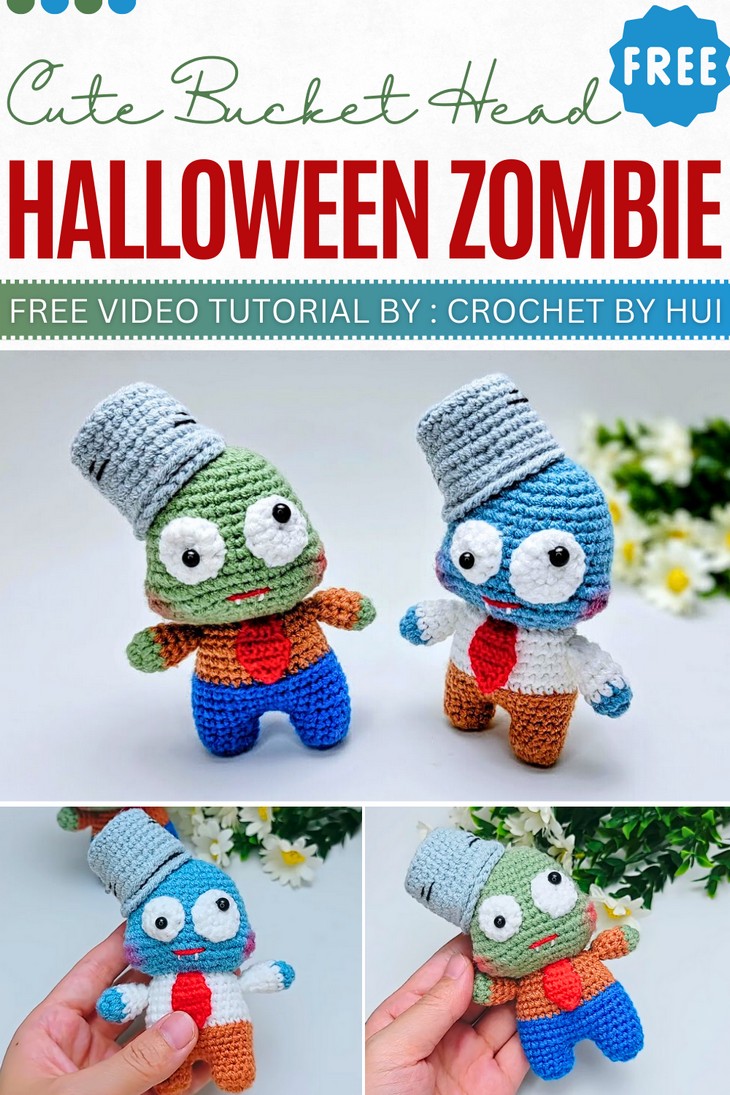
How to Crochet Bucket Head Zombie Doll Amigurumi for Halloween
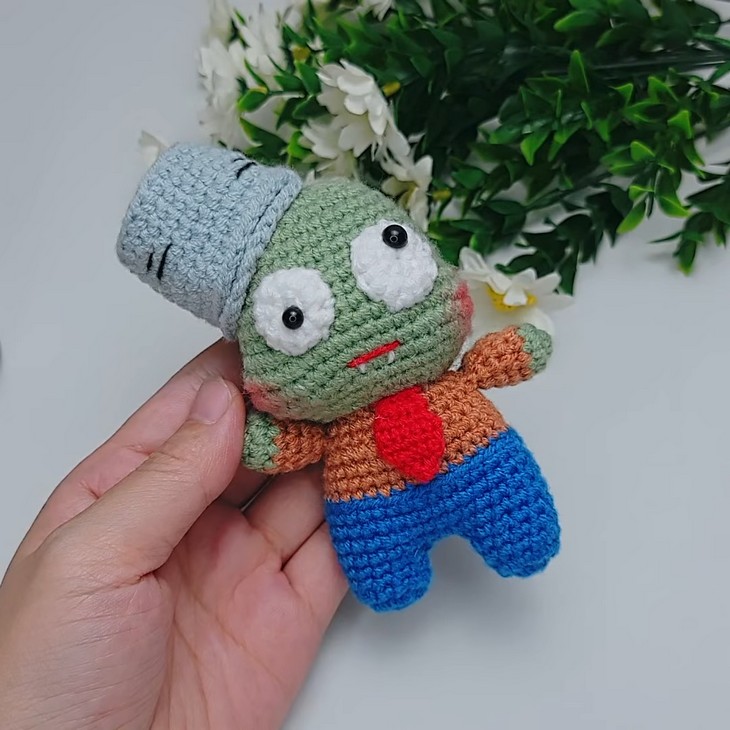
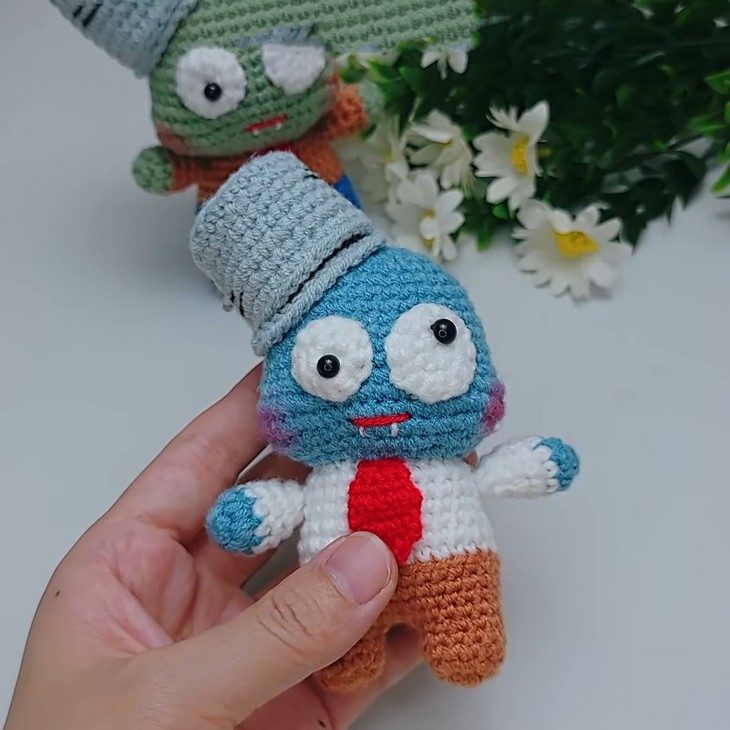
What is as funny as zombies from Plants vs Zombies for Halloween? So, learn how to crochet an absolutely no-scary Bucket Head Zombie Amigurumi doll from the game with a stitch-by-stitch tutorial from Xiao Hui and a little cuteness added. The amigurumi is divided into eight different parts, including the head, arms, legs, and body, bucket hat, eyes, and tie. You can learn the two variants that require complete same pattern. These amigurumi zombies are inspired by kawaii dolls and look so funny with googly eyes having black part at misplaced positions, the office uniform and the buckets.
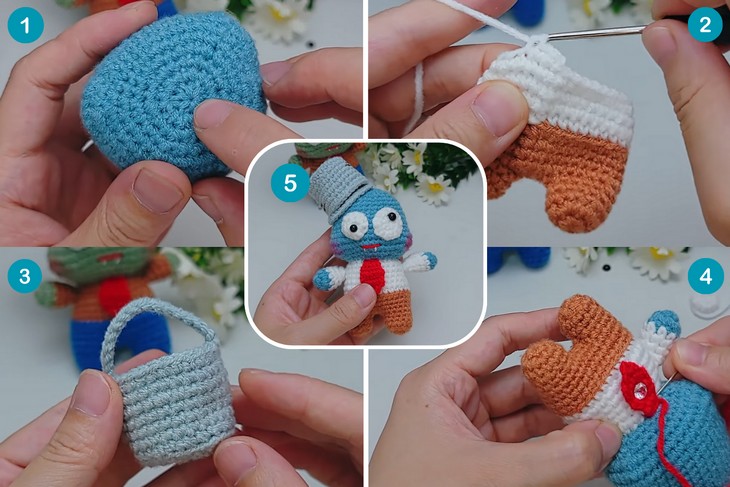
With instructions on how to assemble all the crocheted parts to complete the doll, the tutorial is worth watching. So, if you have made up your mind to crochet this colorful zombie amigurumi for little ones, continue reading this post till the end!
About the Designer: The designer behind this smiling girl doll amigurumi is @CrochetByHui – Like An_design Crafts, she has excelled at amigurumi designing. From chibi dolls and mermaids to animal keychains like dolphins and mice with a lot of creative and unique variations, her library is a top, though underrated, amigurumi library. What sets this channel apart is the creator’s commitment to making these projects accessible to absolute beginners. She thoughtfully designs with step-by-step instructions, clear camera angles that focus on hand movements, and helpful subtitles.
Note: In respect for the creator’s pattern rights, there will be no provision of the written pattern. You can watch the tutorial with on-screen written instructions at the end of this post.
Cutest Zombie Amigurumi Tutorial
Skill Level: Beginner – Intermediate. The following are used to create the doll: slip stitch, single crochet, single crochet increase, and single crochet decrease. The video also shows a technique for creating a distinct ridge by crocheting in the back loop only, color changes, and sewing. Working with smaller parts and embroidery
Tutorial Timing: Approximately 49 minutes (just the crochet basic girl doll will help you understand the basics of human character dolls, this zombie doll project will help you crochet many unique characters in the future. With the best and colorful design, the tutorial is worth watching.)
Personalization Tips: There are two color combos to choose from for the Halloween amigurumi zombie, but the second is the best: green, brown, and navy blue & blue, white, and red – the typical office man inspired. The pattern results in actually pretty small amigurumi so you can also use the plush yarn.
Pattern Type: An on-screen written pattern is available if you find written instructions easy to follow along with.
Techniques Used
To understand the on-screen instructions and the pattern for zombie amigurumi for Halloween, follow the following crochet pattern stitch guides:
- Magic Ring: Create a tight, adjustable loop to begin a project in the round.
- Single Crochet: Insert the hook, yarn over, pull through the stitch, yarn over again, and pull through both loops on the hook.
- Increase: Work two single crochet stitches into the same stitch to add a stitch.
- Decrease: Combine two stitches into a single stitch to reduce the stitch count.
- Half Double Crochet: Yarn over, insert hook, yarn over and pull up a loop, yarn over again and pull through all three loops on the hook.
- Double Crochet: Yarn over, insert hook, yarn over and pull up a loop, yarn over and pull through two loops, yarn over again and pull through the remaining two loops.
- Slip Stitch: Insert the hook into the stitch, yarn over, and pull the yarn through both the stitch and the loop on the hook to finish a round or move across stitches.
Quick summary of crocheting it
To crochet the ghost, you start with a magic ring to create the body, shaping it with increases and decreases. You then add the ruffled feet and small arms, attach safety eyes and embroider a mouth, and finally, crochet a witch hat and a keychain loop to complete the project.
Complete Video Guide