
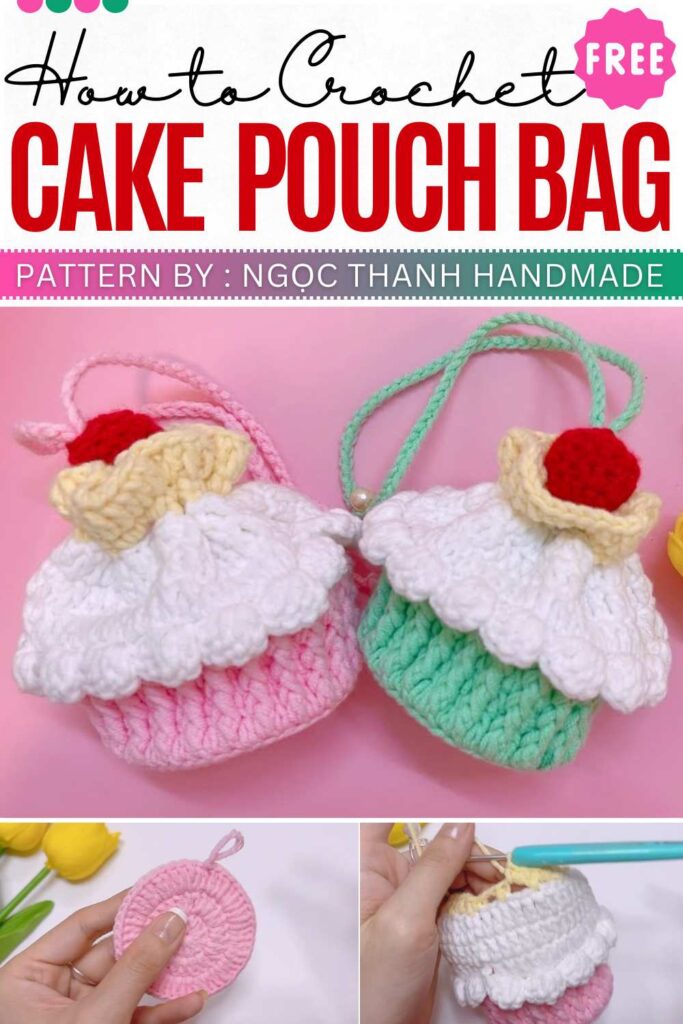
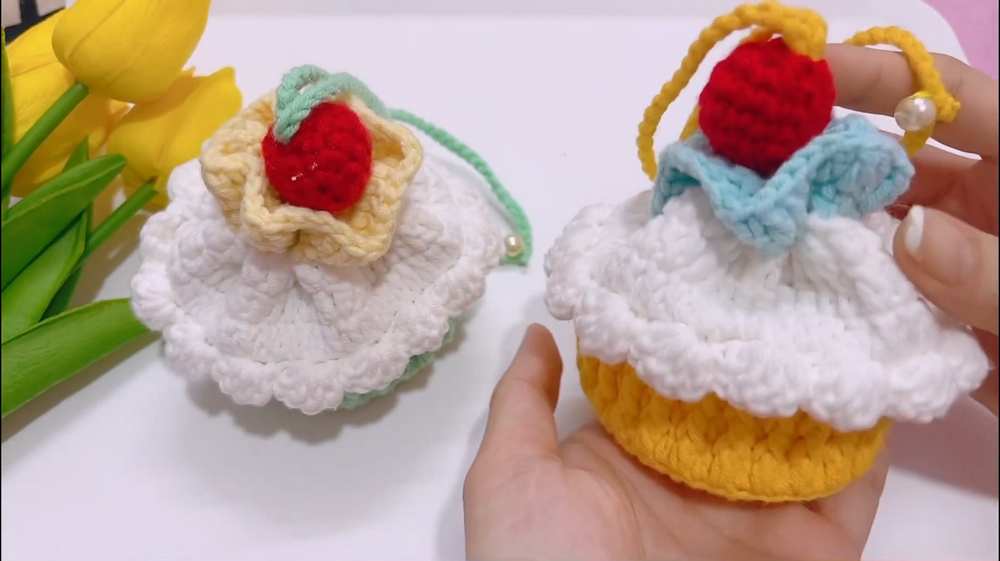
Free Crochet Cake Pouch Bag Pattern
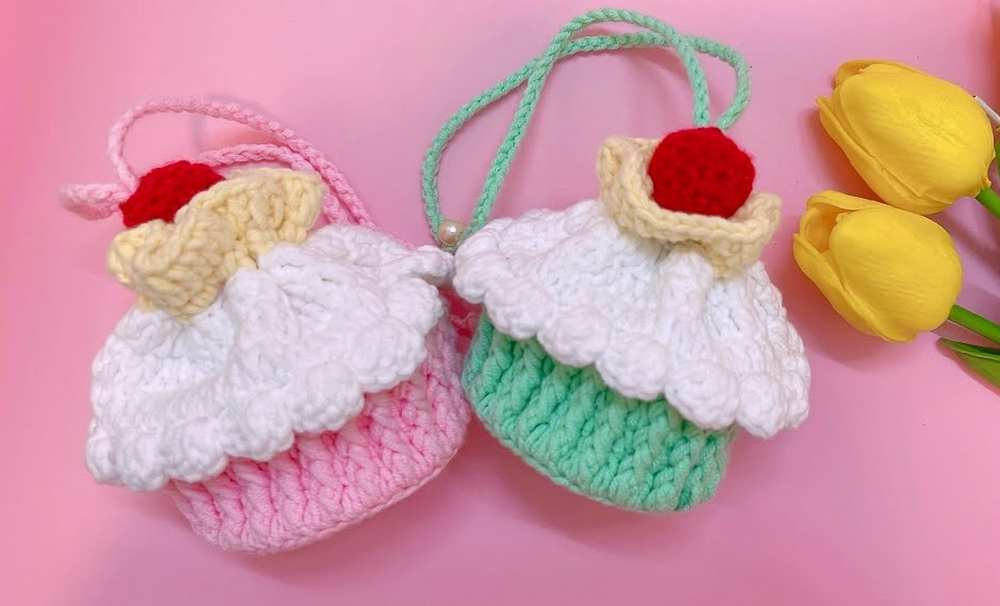
Learn how to crochet a mini cake pouch bag with an ice-cream topping, with a handle, and beautiful ribbing. A drawstring closure is also added to the design, finished with a small crocheted cherry that acts as a slider to open and close the bag. You can keep inside candy or coins and customize it in many colors, from aqua to pink.
For the icing, you will want to add the bobble stitch and crochet a small sphere for the cherry. In this post, I will share both the UK and UK patterns. If you are a foodie, never miss this.
Crochet Cake Bag
The designer behind this food amigurumi is @NITKA_KZ – she has quite a good grasp on kawaii amigurumi designing with added cuteness and surprises. More sweet tutorials:
Crochet Ice Cream Bag Pattern (US Terminology)
This pattern is for a mini Ice Cream Cake pouch/drawstring bag. It features a decorative “cake” base, a “cream” middle part, and a drawstring top with a cherry charm.
Cake Base (Pink)
- R1: 12 dc in MR. Join with sl st. (12)
- R2: ch 2, 12 dc-inc. Join with sl st. (24)
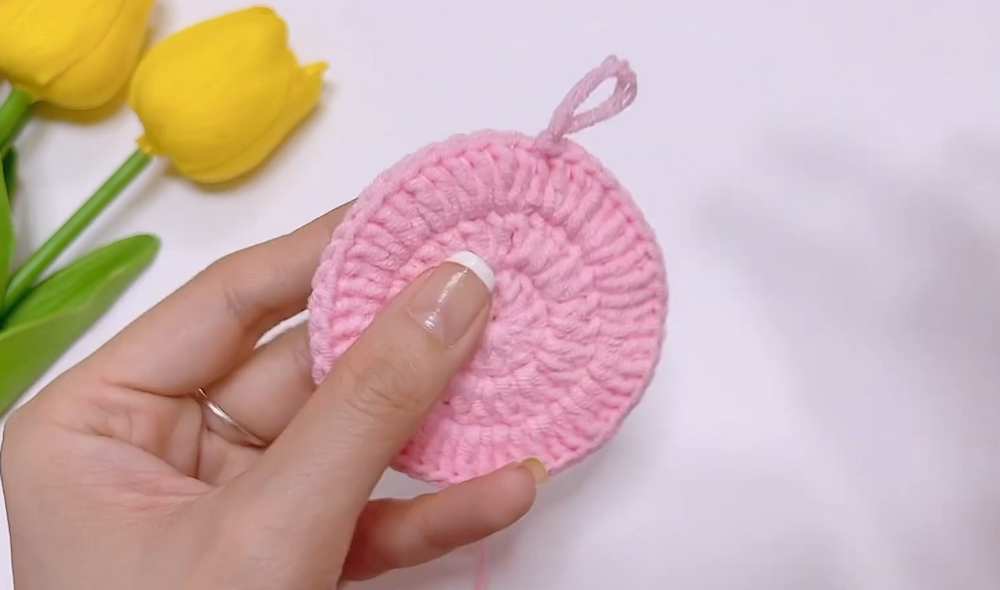
- R3: ch 2, 24 dc-inc. Join with sl st. (48)
- R4 (BLO): ch 2, 48 dc around. (48)
- R5-7: ch 2, (1 dc, 1 front-post dc) around. Repeat for 3 rounds to create texture. Fasten off. (48)

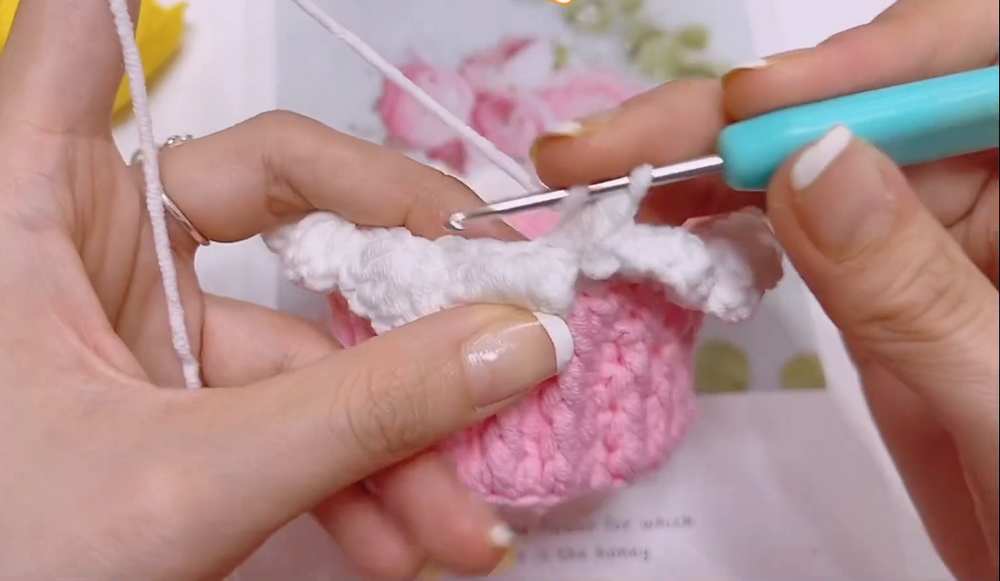
Cream Ruffle & Middle (White)
- R1: Join white yarn. 48 sc around. (48)
- R2 (FLO): ch 3, (1 sc, 4 dc in next stitch, skip 2) around to create the shell ruffle.
- R3 (BLO of R1): 48 dc around. (48)
- R4-5: 48 dc around. Fasten off. (48)
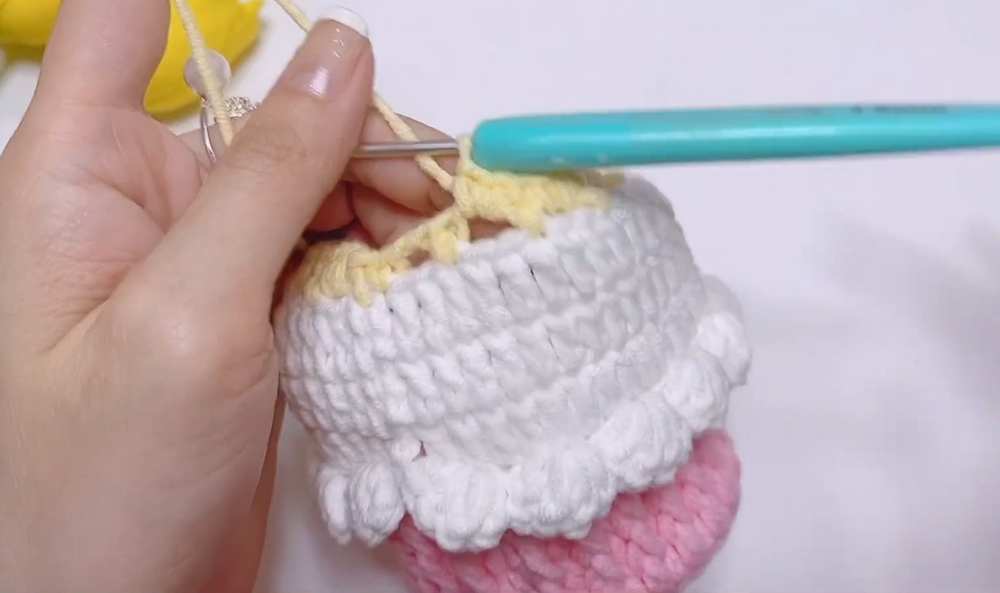
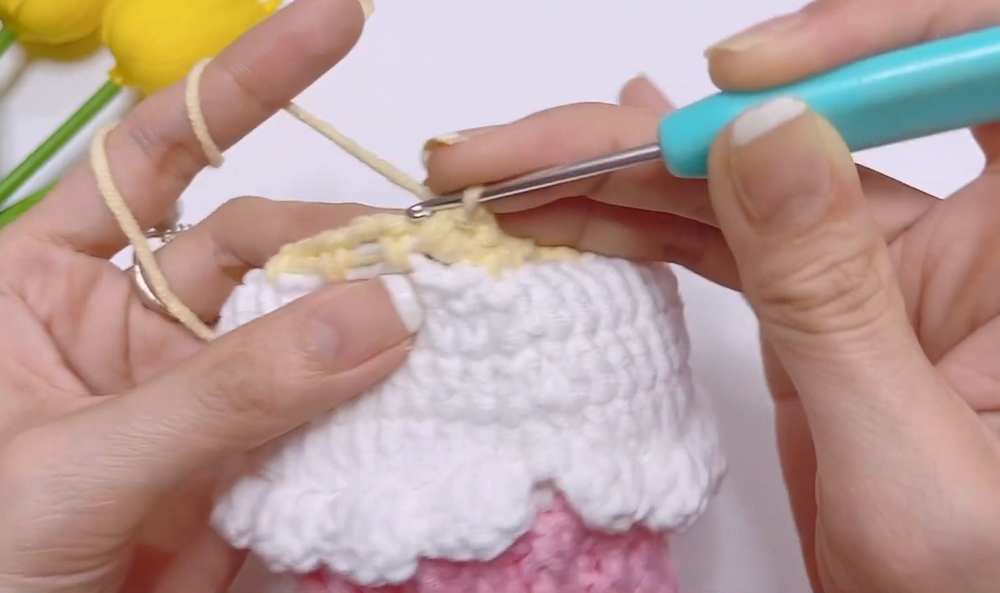
Top Pouch & Drawstring Edge (Yellow)
- R1: Join yellow yarn. (ch 2, skip 2, 1 sc) around to create drawstring loops.
- R2: Work (2 sc in ch-space, 1 sc in sc) around.
- R3: 48 dc around. Fasten off and weave in ends.
- Cherry Charm & Cord (Red & Pink)
- Cord: ch 100 with Pink. Thread through the yellow loops.
Cherry (Red)
- * R1: 6 sc in MR. (6)
- R2: 6 inc. (12)
- R3-5: 12 sc around. Stuff with fiberfill.
- R6: (skip 1, 1 sc) around to close. Attach to the end of the cord.

Assembly
- Closure: Pull the cord to close the pouch. The cherry acts as a weight and decorative toggle.
- Handle: You can add a simple chain strap if you prefer a shoulder bag style, or leave it as a hand-held pouch.
- Decoration: Ensure the white ruffle (R2) is pulled forward to sit over the pink base for a “dripping cream” effect.
Video Tutorial
Pattern (UK Terminology)
Cake Base (Pink)
- R1: 12 tr in MR. Join with sl st. (12)
- R2: ch 2, 12 tr-inc. Join with sl st. (24)
- R3: ch 2, 24 tr-inc. Join with sl st. (48)
- R4 (BLO): ch 2, 48 tr around. (48)
- R5-7: ch 2, (1 tr, 1 front-post tr) around. Repeat for 3 rounds. Fasten off. (48)
Cream Ruffle & Middle (White)
- R1: Join white yarn. 48 dc around. (48)
- R2 (FLO): ch 3, (1 dc, 4 tr in next stitch, skip 2) around for the shell ruffle.
- R3 (BLO of R1): 48 tr around. (48)
- R4-5: 48 tr around. Fasten off. (48)
Top Pouch & Drawstring Edge (Yellow)
- R1: Join yellow yarn. (ch 2, skip 2, 1 dc) around for loops.
- R2: Work (2 dc in ch-space, 1 dc in dc) around.
- R3: 48 tr around. Fasten off and weave in ends.
Cherry Charm & Cord (Red & Pink)
- Cord: ch 100 with Pink. Thread through the yellow loops.
Cherry (Red):
- * R1: 6 dc in MR. (6)
- R2: 6 inc. (12)
- R3-5: 12 dc around. Stuff with fiberfill.
- R6: (skip 1, 1 dc) around to close. Attach to the end of the cord.