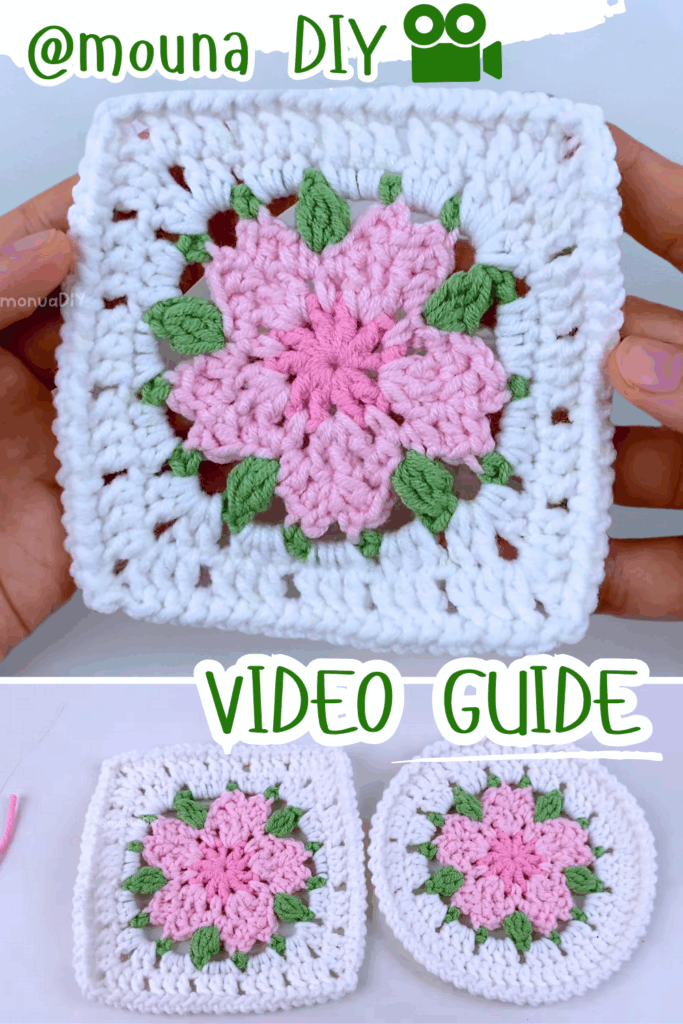
How to Crochet Cherry Blossom Granny Square & Coaster
Granny square is undeniably the best way to crochet Sakura, as it will be a lot more useful and can be turned into anything! So, learn how to crochet this colorful and oh-so cute cherry blossom granny square + cherry blossom round with a stitch-by-stitch tutorial for beginners. Using two shades of pink, white, and green, the finished Sakura squares can be joined to make tops, blankets, and even bags. The five-petal round can be used as a dining table charm – a coaster. You will learn both with guide from Monua DIY.
It features the same pink flower in the centre, with a round of crochet leaves, and then the white background!
Once you crochet the round version, the grannysquare will be easy, so try it for sure. So, if you have made up your mind to crochet this Sakura project by yourself, continue reading this post till the end.
About the Designer: The designer behind Cherry Blossom Coaster is @monuastuff – she crochets so cute mini amigurumi and bag charms with step-by-step tutorials but this time she is crocheting something unique – the granny square. The channel is run by siblings who enjoy sharing their creations with others. You can find tutorials for items like whale, shark, Platypus and orca plushies, a mochi cat keychain, and a capybara bag pin and much more. She also provides free written patterns. All of her crochet creations are just adorable!
Note: In respect of the creator’s rights, there will be no provision of the written pattern. You can watch the tutorial with on-screen written instructions at the end of this post.
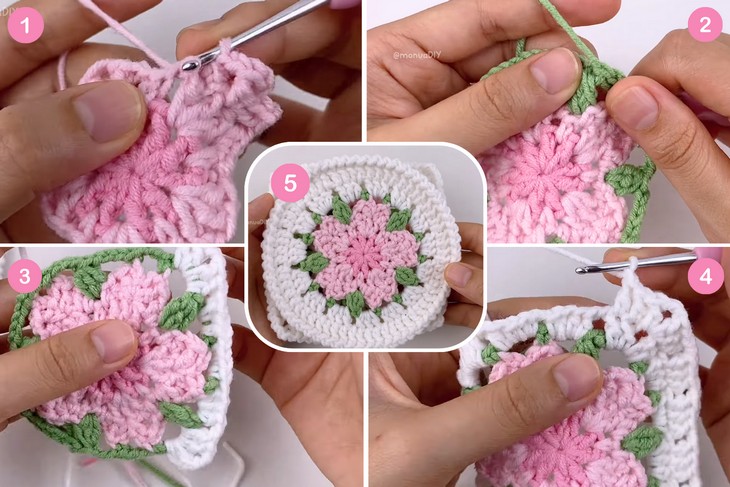
Granny Square Sakura Tutorial
Skill Level: Intermediate. This granny square project starts by either chaining four and joining with a slip stitch to create a ring or by using a magic ring. The pattern primarily uses double crochet stitches, along with single crochet and half double crochet stitches in different rounds. To create a specific texture, the tutorial includes instructions for making clusters of three double crochets together.
For the corners of the square, the triple stitch is used. Finally, the video demonstrates a technique called steam blocking to finish the squares and give them a perfect shape.
Tutorial Timing: Approximately 30 Minutes Only. (perfect for learning the colors-changes, adding to your granny square collection, and how to convert a crochet round into a square. This can be done by using stitches of different heights along the circle.)
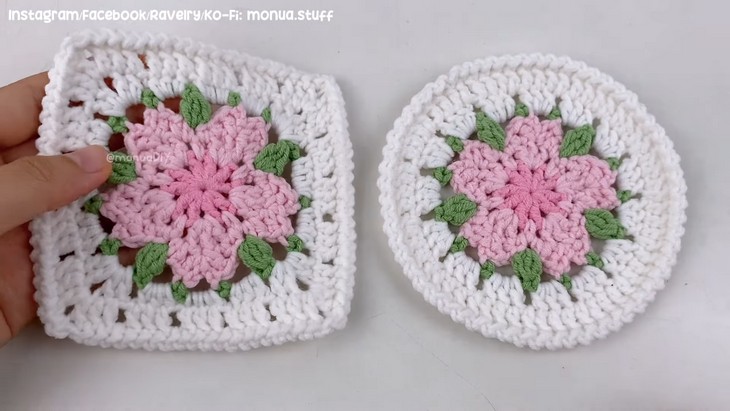
Personalization Tips: Join the Sakura squares to crochet a large centerpiece for the dining, and make 6 of them or as you need, the rounds as a coaster. The five-petal is so versatile for crocheting a rose granny square, too.
Pattern Type: An on-screen written pattern is available if you find written instructions easy to follow along with. English instructions are available.
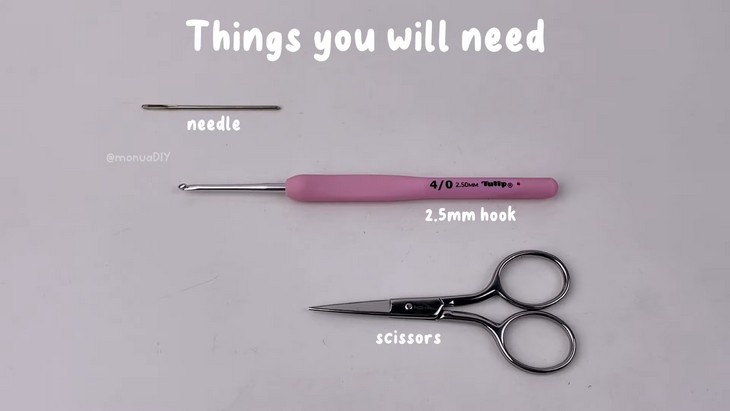
Supplies Needed
Gather the following crochet materials and tools for crocheting the Sakura motif:
Techniques and Stitches
The following are the crochet techniques that the tutor will use for crocheting this crochet cherry blossom coaster:
MR (Magic Ring) – Form a loop with the yarn, crochet into it, then pull the tail to close the ring.
ch (Chain) – Yarn over and pull through the loop on your hook to make a chain.
sc (Single Crochet) – Insert hook into stitch, yarn over, pull through, yarn over, pull through both loops.
hdc (Half Double Crochet) – Yarn over, insert hook, yarn over, pull through, yarn over, pull through all loops.
dc (Double Crochet) – Yarn over, insert hook, yarn over, pull through, yarn over, pull through two loops twice.
dc3tog (3 Double Crochet Together) – Partially work 3 dc in the next stitches, leaving last loop of each on hook, then yarn over and pull through all loops.
slst (Slip Stitch) – Insert hook, yarn over, pull through stitch and loop on hook in one motion.