How to Crochet Christmas Tree Bear Amigurumi for Cosplay
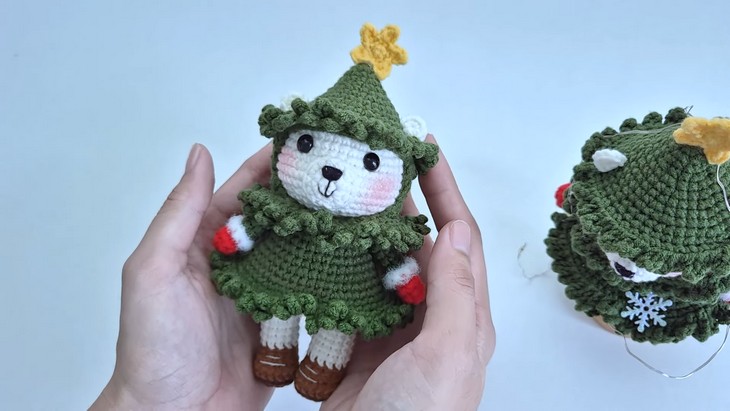
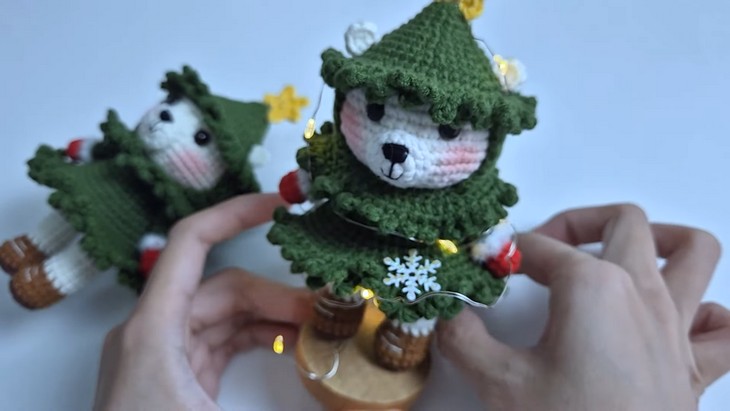
Last time, we shared a tutorial on crocheting tiered 3 Christmas trees that also included a bear variation. But NHÀ LEN has brought this idea to the next level with a much more detailed, realistic version. So, learn how to crochet this medium-sized cosplay bear Christmas tree doll with a stitch-by-stitch tutorial that will turn into a Christmas joy, whether as a costume buddy or a lighted and standing Christmas tree neighbor. This finished polar bear doll will stand 13 cm high but has so many features to list. You will love the idea that the bear is wearing a Christmas tree costume with shoes and red mittens, also.
You will also find the tiered edging, the star top, and blush cheeks very admirable. It will be perfect if you are looking for a truly dedicated gift for someone this Christmas. So, if you have made up your mind to crochet this Christmas tree doll, continue reading this post till the end. There you will find the complete tutorial!
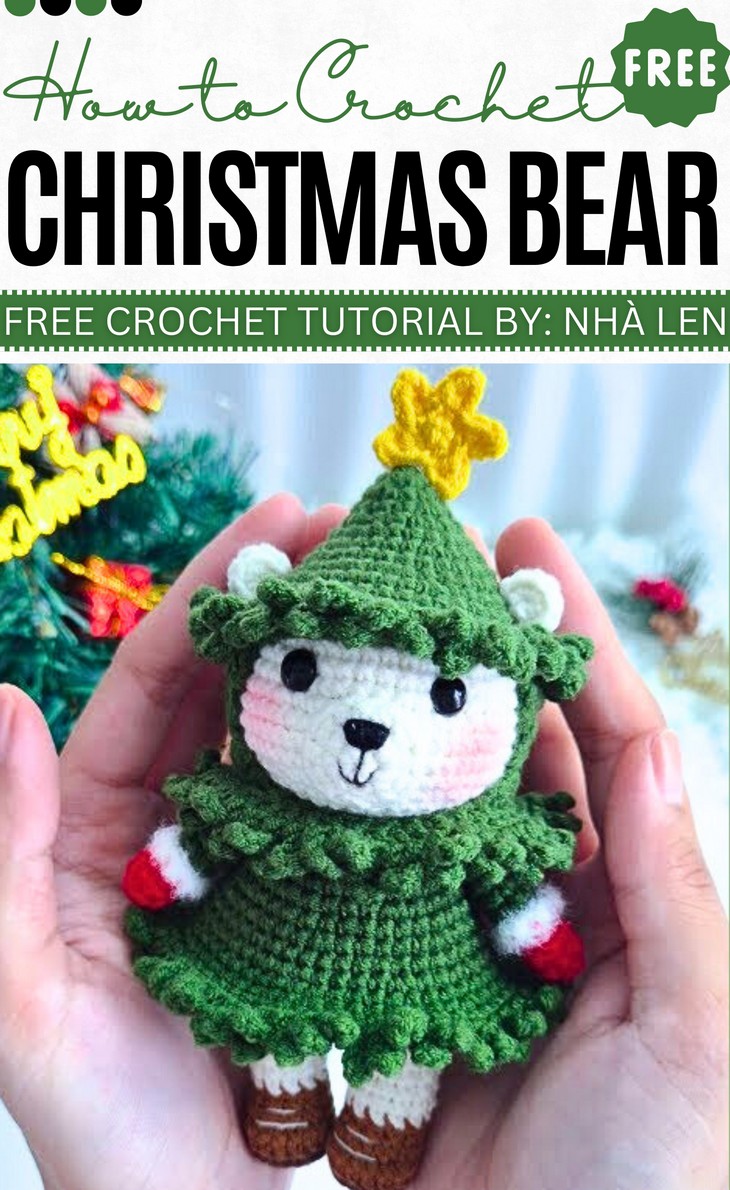
A bit about the Designer: The designer behind this amigurumi Christmas tree buddy is @nhalen, which translates to “A House Full of Yarn” – she is one of my favorite amigurumi designers, not to mention An_design, including dolls, but mostly mini plushies that are always super detailed and cute. From mini animals to popular characters like Harry Potter and holiday amigurumi, her library is one of the most diverse. With tutorials for projects like a couple of bunnies and various florals, her library offers a rich resource of crochet projects. You will also find her Christmas amigurumi series truly awesome!
Note: In respect of the creator’s pattern rights, there will be no provision of the written pattern. You can watch the tutorial with on-screen written instructions at the end of this post.
Crochet Christmas Tree Bear Tutorial
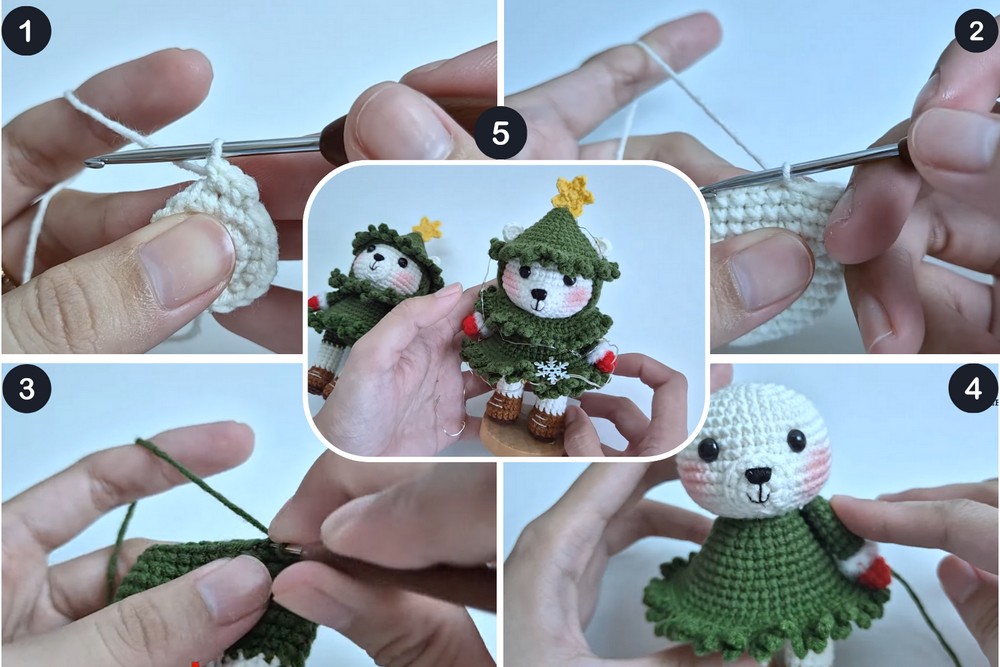
Skill Level: Intermediate – Advanced. Even though it looks seamless, this Christmas tree polar bear is crocheted in many parts: head, body with base and tree bottom, and Christmas hat. You will crochet the head as a basic sphere using single crochet, increase, decrease, slip stitch and chain. Embroidery using a sewing needle and attaching eyes. The mouth or muzzle will be basically a crochet circle that is sewn onto the head. Ears, too, are small crochet rounds. Arms are basic cylinders with color-change for the mittens, and using fuzz yarn, the thumb.
Star will also be worked in the rounds using stitches of different heights, like half-double crochet for points. For the body, you will start with crocheting two legs and then work the body around them. Also, crochet the Christmas tree skirt by surface stitching. The ruffle surface-stitching needs picot stitches.
Tutorial Timing: About 1 hour and 39 Minutes (everything is taught in detail, which makes the tutorial a bit longer, but the written instructions will make it easy to follow along. You will learn so many amigurumi techniques, including the popular doll base from crochet legs and the surface stitching like used in other crochet Christmas trees. You will also learn the picot stitch that is popular in making borders in decorations and mini dresses. Plus, learn how to work with fuzz yarn and improve embroidery.)
Personalization Tips: For a grizzly bear Christmas tree, you should use a bit of light shade of brown for a better contrast, though dark brown, too, will look awesome. If you crochet the Christmas tree hat in red, it will look like a perfect Santa hat. For the Christmas tree edging, you can also use the ruffle or shell technique, like in animal Christmas trees. It will give a bit cleaner view.
Pattern Type: An on-screen written pattern is available if you find written instructions easy to follow along with. The written instructions are written using US terms.
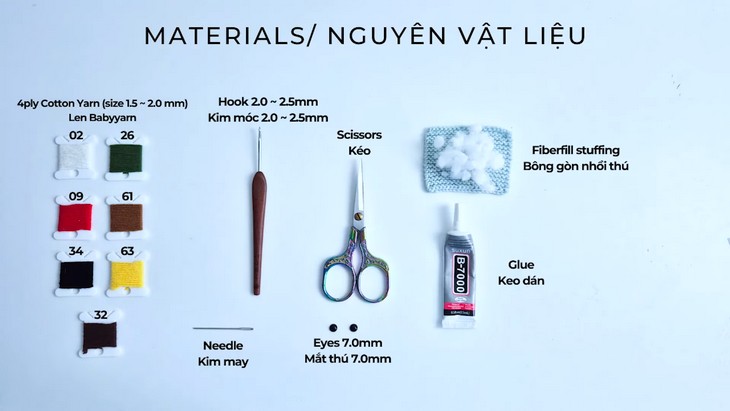
Material Suggestion
- Yarn (cotton or acrylic recommended): You can use the Milk Cotton yarn, which is a blend of cotton and milk protein
- Crochet hook – usually 2.0mm–2.5mm for amigurumi (check yarn thickness).
- Stuffing – polyester fiberfill.
- Safety eyes (or black yarn for embroidered eyes).
- Tapestry needle – for sewing parts together and embroidering details.
- Scissors.
- Stitch markers (optional, to keep track of rounds).
Stitches Used
Here’s a list of crochet guide for crocheting each stitch and technique in the Christmas amigurumi pattern:
- Single Crochet (sc): Basic stitch for amigurumi. Insert hook, yarn over, pull up loop, yarn over, pull through both loops.
- Increase (inc): 2 sc in the same stitch (makes the piece wider).
- Decrease (dec): Crochet 2 sc together (makes the piece narrower). Use invisible decrease for neatness.
- Chain (ch): Foundation stitch or used for joining pieces (like star or accessories).
- Slip Stitch (slst): To close rounds or move yarn to another position.
- Half Double Crochet (hdc): Yarn over, insert hook, pull up loop, yarn over, pull through all loops (used for ruffles/hat brim).
- Picot Stitch: Chain 3. Insert the hook into the first chain made. Yarn over, pull through both loops.