How to Crochet Lacy Coquette Bow for Fall (Butterfly Bow)
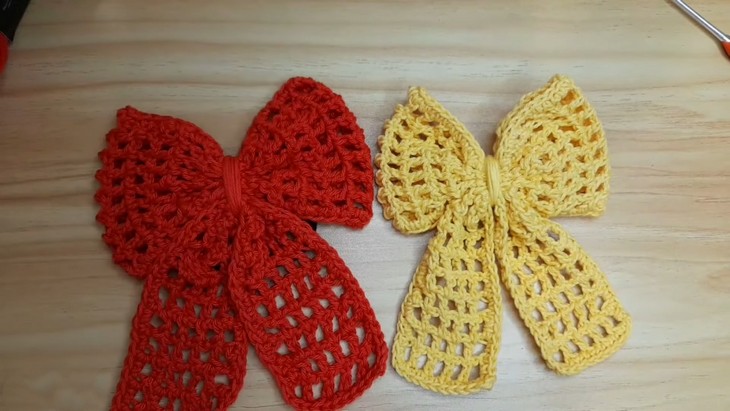
Coquette or butterfly bows look so elegant on hair. So, this fall, learn how to crochet these mesh Coquette bows in either red or yellow with a stitch-by-stitch tutorial for beginners. These are the same oversized bows with a beautiful lace texture and thread center. These bows are super lightweight, and the pattern is easy to adjust in size.
You will love wearing them all over the fall. So, if you are interested in crocheting one Coquette bow for yourself or a friend, continue reading this post!

About the Designer: The designer behind this crochet butterfly bow project is @tejidosjossropa – from sweater to scruchies and cowls, everything she crochets is admirable. She always shows professionalism in her crochet designs and always choose a right color-combo.
Note: In respect for the creator’s pattern rights, there will be no provision of the written pattern. You can watch the tutorial with on-screen written instructions at the end of this post.
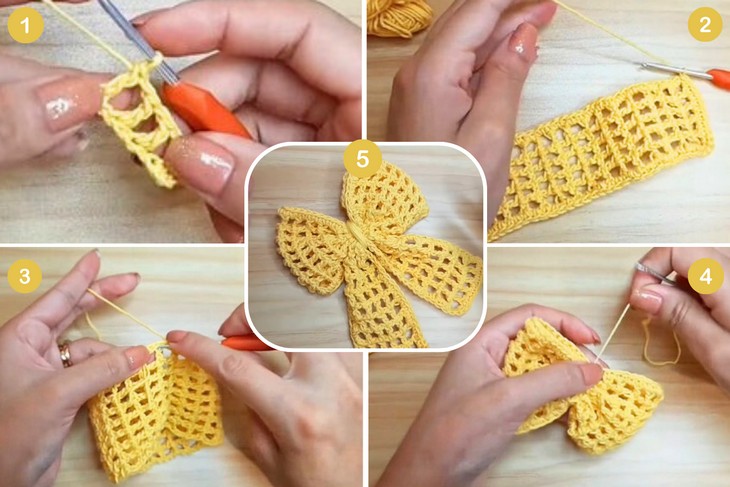
Coquette Crochet Bow Tutorial
Skill Level: Beginners-Intermediate. Basic techniques like creating chains, chain-spaces, double crochet, single crochet, and slip stitches are used throughout. The project also introduces a bit of shaping and assembly, which is manageable for beginners with some practice. Overall, the project is easy for beginners.
Tutorial Timing: Approximately 16 minutes. (Perfect for learning the mesh stitch and basic lace techniques, plus shaping a crochet fabric by wrapping a yarn around)
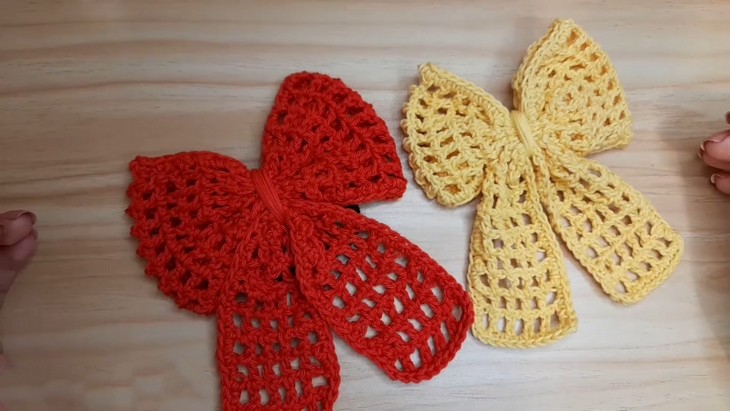
Personalization Tips: Choose from red, yellow, or any fall color, and even girls’ favorite pink, this hair tie ribbon will look oh-so cute. Additionally, try using different yarn materials (like silk, bamboo, or metallic threads) to give your creation a distinct texture or shine.
Adjust the size of your crochet hook for tighter or looser stitches, which can influence the overall size and look of the piece.
Pattern Type: The on-screen written pattern is available if you find written instructions easy to follow along with.
Supplies Needed
Gather the following crochet supplies for crocheting this crochet butterfly bow and hair tie:
-
Cotton Thread (100% cotton, 2mm thickness)
- Colors: Red and Yellow
-
Crochet Hooks
- Sizes: 2.5mm, 3mm, and 3.5mm
- Scissors
- Wool Needle
- Stitch Separators
- Liquid Silicone or Hot Silicone
-
Hair Accessories
- Hairclip
- Ponytail elastic/bun
Techniques Used in the Tutorial
Here are the techniques used for crocheting this butterfly bow for beginners:
- Starting a Base with Chains: Begin by creating an odd number of chains plus additional chains for turning (e.g., 15 chains + 5 chains for turning).
- Double Crochet (DC): Yarn over, insert your hook into the necessary stitch, yarn over again, pull through, yarn over, pull through two loops, and repeat to complete the double crochet.
- Creating Mesh Squares: Alternate double crochet stitches with chains (skipping one stitch between) to create open squares.
- Building Rows with Double Crochet: Repeat double crochet stitches on top of previous double crochets while chaining to maintain the square pattern.
- Adding a Border with Single Crochet: Insert your hook into each desired stitch, yarn over, pull through, and yarn over again to complete the single crochet around the edge.
- Joining Ends Seamlessly: Use a yarn needle to sew the edges, taking one stitch from each side until completely joined.
- Turning Work Right-Side Out: Flip the crocheted rectangle right-side out after stitching the edges together.
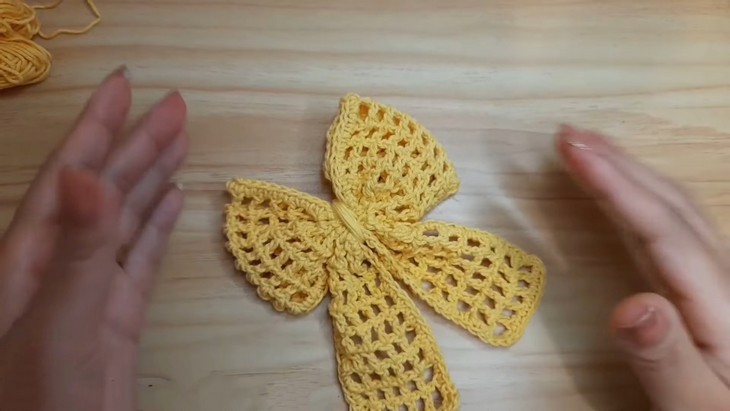
- Creating the Bow Shape: Pinch the middle of the crocheted piece and secure it tightly with yarn to create the bow structure.
- Making the Bottom Layer of the Bow: Crochet with a smaller number of chains and rows, creating a thinner rectangle for the bottom portion.
- Attaching Accessories (Hair Clip/Ponytail Holder): Use hot silicone or liquid adhesive to attach the accessory securely to the back of the crochet bow.
- Hiding Loose Ends: Use a yarn needle to weave in leftover thread into the stitches for a clean and professional finish.