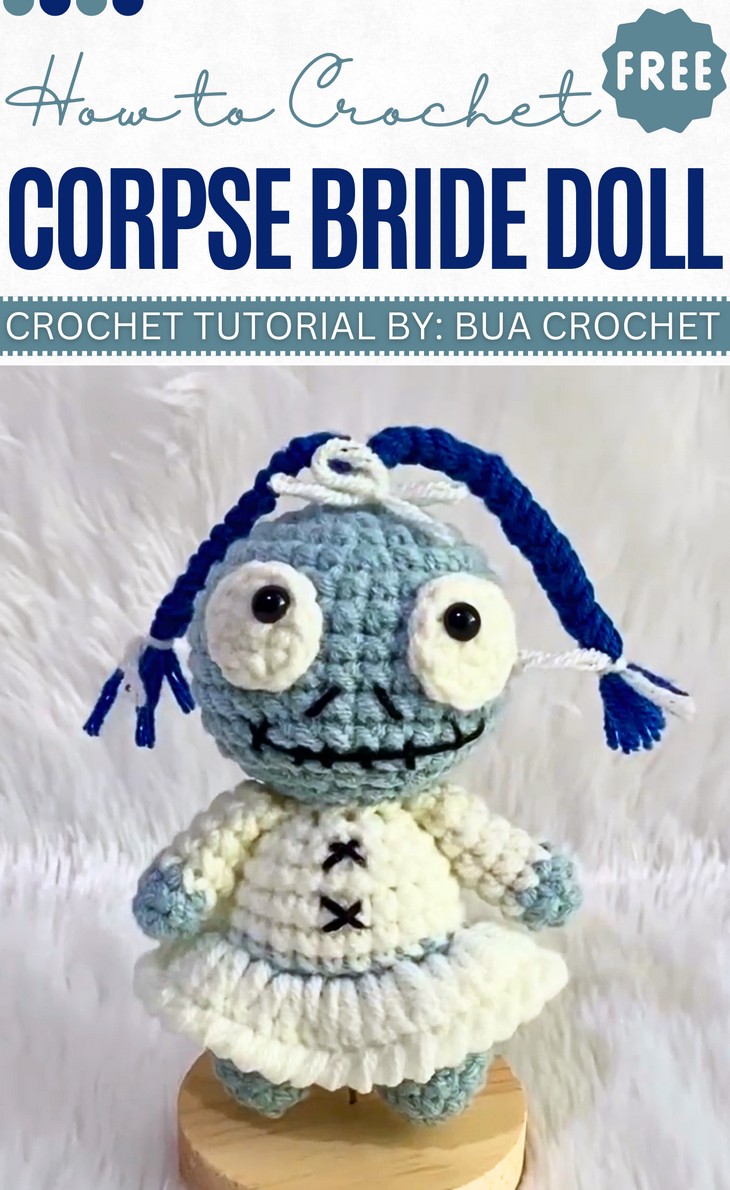
How to Crochet Corpse Bride Ghost Doll for Halloween
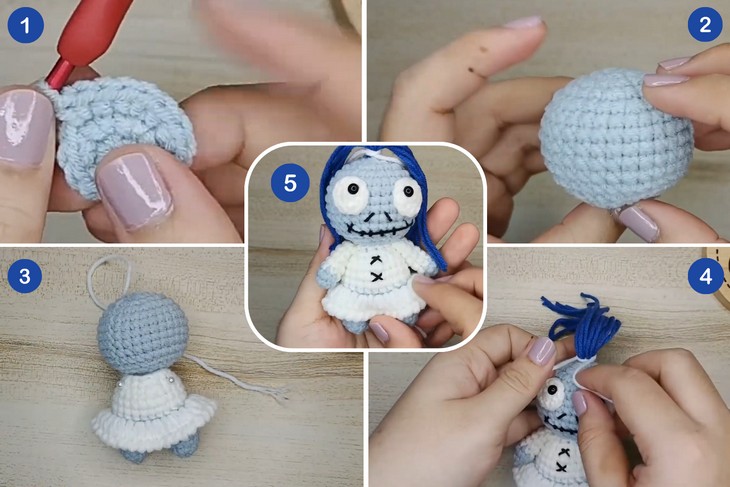
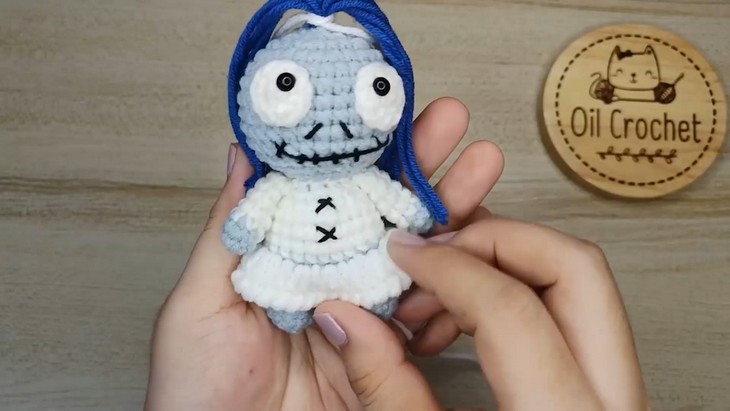
Here is a third custom character doll project for Halloween! With a stitch-by-stitch tutorial, learn how to crochet the corpse bride ghost doll amigurumi with a lovely blue color combo. This amigurumi doll is both scary and cute, and kids will certainly love this ghost doll. With the googly eyes, a unique hairstyle, stitched mouth, and kawaii doll form as special features, it is worth crocheting. The finished amigurumi doll is just 10 cm high, so you can crochet it within an hour.
So, if you have made up your mind to crochet this scary doll amigurumi for Halloween, continue reading this post till the end!

About the Designer: The designer behind this crochet custom Halloween doll project is @PikHandicraft – Its crochet library includes small, decorative items such as bags, wallets, keychains, and a wide range of hair accessories and flowers, including daisies, roses, and tulips. Her popular themes are crochet flowers, granny squares, and decorations. Many may remember her with her previous name as Oil Crochet. With that said, check her library for sure. But this time she has crocheted these three Halloween dolls.
Note: In respect for the creator’s pattern rights, there will be no provision of the written pattern. You can watch the tutorial with on-screen written instructions at the end of this post.
Crochet Halloween Ghost Amigurumi Tutorial
Skill Level: Beginner – Intermediate. You will need the same basic amigurumi techniques like the magic ring, single crochet, increase and decrease, chain stitch, FLO & BLO, and slip stitch for crocheting the legs, head, arms, and bride dress. For the body, you will also be using the color changes to make a part of the outfit. Surface stitching for getting a 3D look for the female outfit. Seamless sewing is also essential.
But the most important part is creating the stitched smile and eyes using an embroidery needle. Cutting the thread for the hairs!
Tutorial Timing: Approximately 11 minutes (the tutorial is quick and perfect for practicing the complicated embroidery and learning how to design the amigurumi. It will help you learn the fundamentals of a kawaii doll, too)
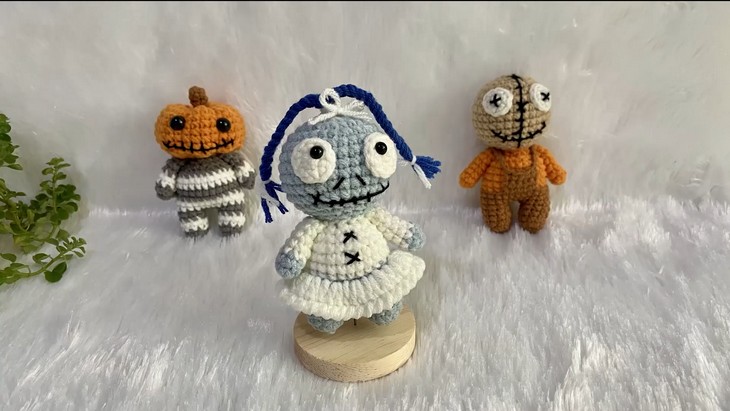
Personalization Tips: The tutor uses the shades of blue, but you can also use shades of orange and red. You can also crochet it using plush yarn.
Pattern Type: An on-screen written pattern is available if you find written instructions easy to follow along with.
Finished size: Height 10 cm. Width 5 cm. (if you use the same crochet hook and yarn weight)
Supplies Used
Here is the list of what you need for crocheting this amigurumi ghost bride doll for Halloween celebrations:
- Cotton Yarn 4ply size 2 mm.
- Crochet Hook No.4 size 2.5 mm.
- Eye size 6 mm.
- Polyester fiber
- Glue
Techniques and Guides
Here is a quick guide for crocheting each stitch that the tutor uses for crocheting this Halloween doll:
- mr (Magic Ring): Form a loop, insert the hook into the center, pull up a loop, and crochet into the ring.
- ch (Chain): Yarn over, pull through the loop on the hook to create a chain stitch.
- sc (Single Crochet): Insert the hook, yarn over, pull up a loop, yarn over, pull through both loops on the hook.
- dec (Decrease Single Crochet): Insert the hook into the first stitch, yarn over, pull up a loop, repeat in the next stitch, yarn over, pull through all loops.
- inc (Increase Crochet): Work two single crochet stitches into the same stitch to increase the count.
- flo (Front Loop Only): Insert the hook under the front loop of the stitch and work the desired stitch.
- blo (Back Loop Only): Insert the hook under the back loop of the stitch and work the desired stitch.
- slst (Slip Stitch): Insert the hook, yarn over, pull through both the stitch and the loop on the hook.