How to Crochet Cutest Gnome for Christmas
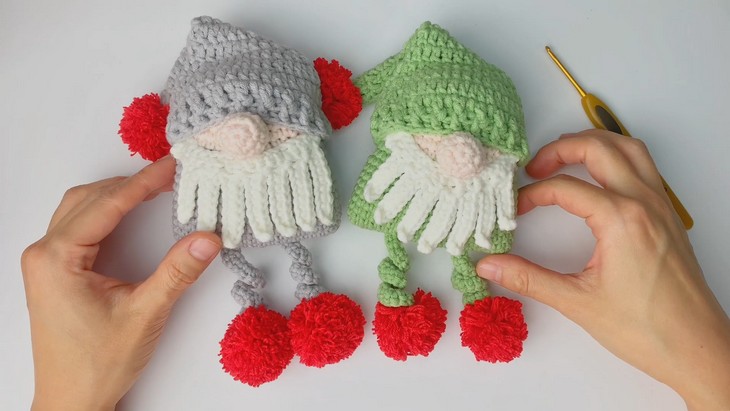
Maggie’s Christmas gnome is very funny, unique, and comes in two lovely color variations. So, in this post, I will share you the video tutorial on how to crochet this gnome amigurumi for Christmas decorations that looks oh-so cute with an elf hat and other quirky features. You will especially love the twisted legs with pom pom feet and the unique way of crocheting its beard.
This gnome is medium-sized and is crocheted in multiple parts with a pom pom for the hat. It will bring fortune when gifted this year. The slouchy hat gives it a very nice and realistic feel. Along with the two variations, you will also find inspiration for three other ones in the tutorial.
Crochet Christmas Gnome Tutorial

Whichever color combination you choose, this crochet gnome is simply worth crocheting and gifting. There are many ways to customize this further. So, if you have made up your mind to crochet one for the upcoming Christmas, continue reading this post till the end. There you will find the complete tutorial.
About the Designer: The designer behind this another Christmas accessory project is @CrochetGoStudio – her crochet library is all about the cute and mini plushies, keychains, and accessories for many occasions, mostly with the set of variations and combos like fruit animal from autumny_crochet.
She has so many things in the crochet Christmas series that include a Christmas tree bag, reindeer and snowman dolls, and much more.
The Suggestions for Materials
Meggie has asked to gather the following tools and materials for crocheting the cutest gnome in the same size:
- Hook: 2.5 mm crochet hook
- Yarn: 5-ply milk cotton yarn in at least two colors (e.g., green for the body/hat and a skin tone for the face area)
- Embellishments: Pre-made yarn balls or pompoms for the feet and the tip of the hat
Other Notions:
- Stuffing: Cotton or polyester fiberfill to stuff the body and nose
- Tools: Stitch marker, scissors, darning needle for weaving in ends, and pins.
- Adhesive: Hot glue or similar adhesive for final assembly

Crochet Christmas Ornaments Tutorial
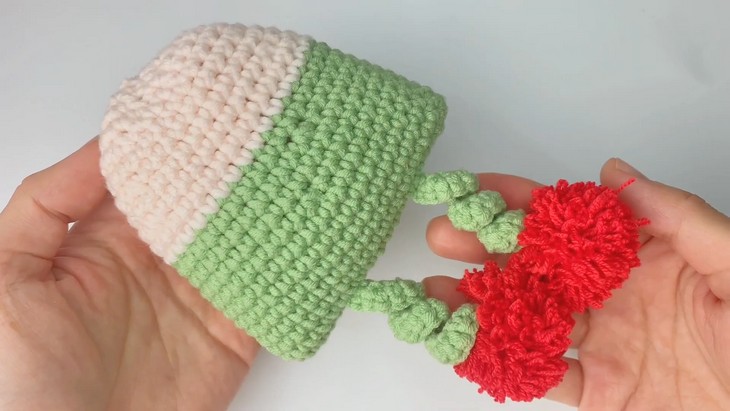
Quick Summary & Skill Level: Intermediate. The gnome is crocheted in separate parts: the legs, the body, the hat, the beard, and the nose. The legs begin with a chain and are shaped to curl using crochet increases, with pompoms tied to the ends. The body of the gnome starts with an oval base, and when you reach halfway, insert the legs from the bottom.
The hat is crocheted with double crochet, increasing, and finished with a textured post-stitch brim. The beard is worked on a long chain foundation, crocheting many looped strands. The nose is a small, stuffed ball.
Once all pieces are completed, they are pinned, then sewn and glued to the body in the final assembly. The body also needs color changes for the head.
Tutorial-Timing: 15 Minutes only
Quick Tips: You can also use yarns like velvet or fuzzy yarn for the beard and hat, like in the previous Christmas gnome. For the hat and feet, instead of yarn pompoms. Here are the color-combos to choose from:
- Light Green
- Yellow
- Red
- Purple
- A rusty shade
Quick Guides for Special Stitches
To understand all the advanced stitches used in this crochet Christmas gnome, follow through with these quick crochet guides:
- Double Crochet: Yarn over, insert the hook, yarn over, pull up a loop, yarn over, pull through two loops, yarn over, and pull through the final two loops.
- Front Post Double Crochet: Yarn over, insert hook from front to back around the post of the stitch, yarn over, and complete as a regular double crochet.
- Back Post Double Crochet: Yarn over, insert hook from back to front around the post of the stitch, yarn over, and complete as a regular double crochet.