
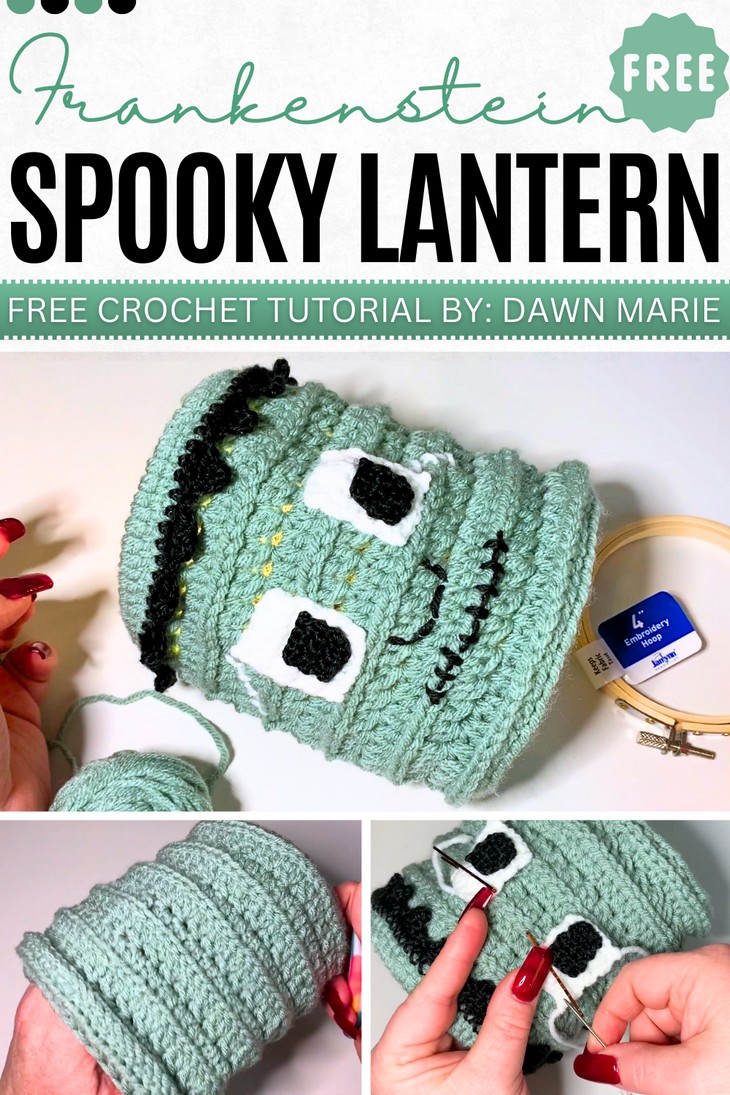
How to Crochet Frankenstein Basket & Lantern for Trick-or-Treating
Bored with Jack-o-Lanterns and need a unique Halloween lantern that can be used for years? With a stitch-by-stitch tutorial, learn how to crochet a large Frankenstein lantern and bucket that has a maintained structure thanks to the use of a wooden ring as a base and doubles as a trick-or-treating bag. This monster bucket has a cute Frankenstein face, handle, ribbing, and detailed embroidered hair. This tutorial will teach you a lot to improve your skills. This lantern will light well and features a separate crocheted basket inside that holds either a battery pack for string lights or a tea light.
So, if you have made up your mind to crochet this complete Halloween Lantern pattern, continue reading this post till the end. There you will find the complete tutorial!
About the Designer: The designer behind this is Halloween Frankestein project is @CustomComfyCrochet – run by Dawn Marie, she has a wide range of interesting tutorials, including how to crochet different appealing borders, motifs, and stitches, step-by-step guides for amigurumi projects like puppies and spiders, and patterns for seasonal items such as Halloween pumpkins and ghosts. Her crochet Napkin holder, spiderweb wrist cuffs, and pumpkin purse had been my favorite projects!
Note: In respect of the creator’s pattern rights, there will be no provision of the written pattern. You can watch the tutorial with on-screen written instructions at the end of this post.

Crochet Halloween Lantern Tutorial
Skill Level: Beginners – Intermediate. The techniques include the magic circle to start, the slip stitch to join rounds, and the chain stitch for starting rows and creating hair. The tutorial also uses a special technique of working in back loops to give the crochet monster lantern’s body a sturdy feel. The main stitches used are single crochet for the initial row and hair, double crochet for the lantern body, and treble crochet for the hair. You will also crochet the layered eyes using the flat work in back-and-forth rows.
Tutorial Timing: Approximately 43 Minutes. (worth the time as you will learn many new techniques, including working and closing around the wooden ring, detailed embroidery, making a strap, hiding yarn ends, and surface-stitching. It will also help you improve your sewing. You will also learn how to make the Frankenstein monster face!)

Personalization Tips: You can also add the wound stitches and sew the bolts to complete the face. Use triangles of random lengths for a life-like hairstyle, longer triangles, or curvy shapes. For more dramatic lighting, use the lighter but brighter yarn like the parrot. You can also add the fabric patches and adjust the eyes to cross embroidery and even safety eyes. Adjusting the size just needs changing the base row number or the height rows.
Pattern Type: A detailed on-screen written pattern is available if you find written instructions easy to follow along with.
Materials Needed
You will have to gather the following suggested tools and materials for crocheting this large monster Lantern for Halloween, mentioned in the tutorial:
- Worsted weight yarn
- 5 mm hook
- 4mm hook
- Embroidery hoop 4’
- Scissors
- Darning needle
- Led light

Crochet Abbreviations
Here’s a one-line guide for crocheting each stitch and technique in the Halloween bucket guide:
- Magic Ring: Loop yarn, crochet into the ring, and pull tight for a seamless circle.
- Single Crochet: Insert hook, yarn over, pull through, yarn over, and complete the stitch.
- Double Crochet: Yarn over, insert hook, pull through, yarn over, go through two loops twice.
- Back-Post Single Crochet: Insert the hook from back to front and crochet around the post.
- Double Crochet Two Together (Decrease): Yarn over, start two double crochets, and finish them together.
- Slip Stitch: Insert the hook, yarn over, and pull through the stitch and the loop on your hook.