How to Crochet Frankenstein Pouch for Halloween (Key Pouch & Treat Bag)
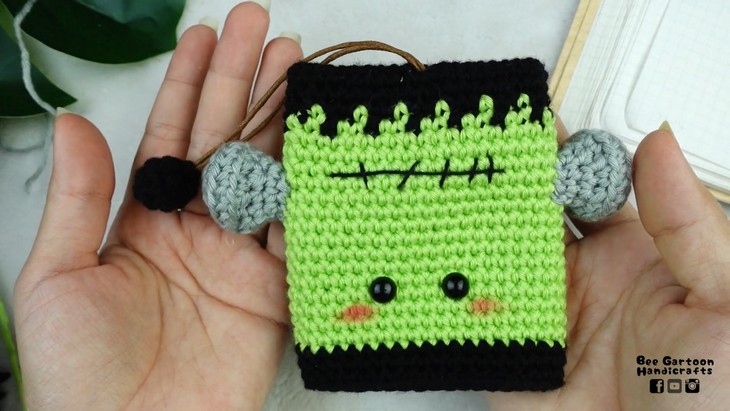
Here is a last-minute, easy, and super versatile Frankenstein project for kids! Just learn how to crochet this oh-so cute Frankenstein key pouch and candy bag for Halloween’s trick-or-treating with a stitch-by-stitch tutorial for beginners. You can also attach it to a large bag or other accessories. This Frankenstein pouch, designed by Bee Garton, is in an adorable mouthless Frankenstein head with blush, larger-than-life bolts, and the same signature hairs. For functionality, this crochet pouch features a string with a crochet handle that will help you hide your keys. You can easily finish it with flat and amigurumi features in an hour!
So, if you have made up your mind to crochet this Frankenstein pouch pattern, continue reading this post till the end. There you will find the complete tutorial.

About the Designer: The designer behind this Frankenstein face pouch is @beegartoonhandicrafts – she has specialized in particularly amigurumi dolls and bag charms, but also tried many irresistible flat projects like a frog hairclip, hat, and this pouch. She has tried almost all popular characters, including Hello Kitty, Mickey Mouse, and Chip and Dale, plus animals like a crochet cat, a capybara, a bear, a pig, a penguin, and many more. She even has a sushi tutorial and holiday-themed projects like a Christmas bauble. You will simply love to explore her library that spreads cuteness!
Note: In respect of the creator’s pattern rights, there will be no provision of the written pattern. You can watch the tutorial with on-screen written instructions at the end of this post.
Crochet Frankenstein Pouch Tutorial
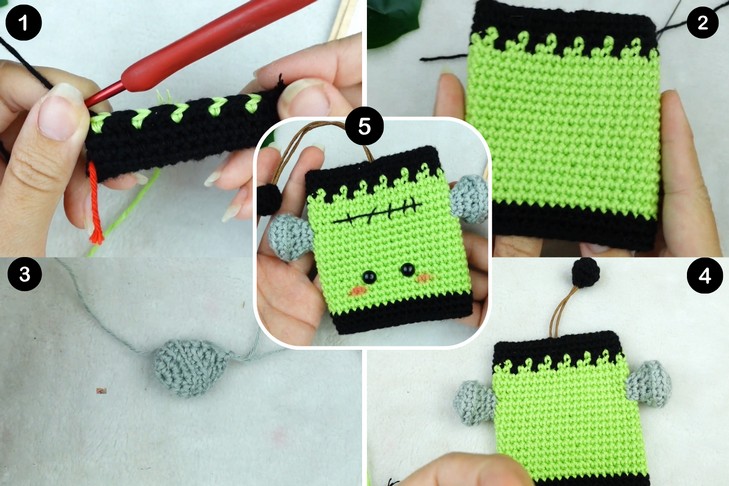
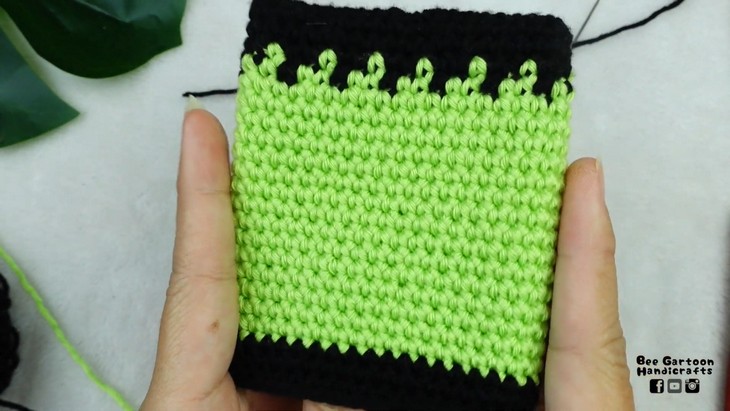
Skill Level: Beginner – Intermediate. The pouch pattern is worked from hair to the bottom using a long crochet oval as a base. You will also work two colors simultaneously, like the tapestry for the hair. The main stitch throughout the pattern is the single crochet. To shape the key cover, the tutorial uses the increase and invisible decrease techniques. The tutorial also uses the chain stitch at the beginning of rows. Other methods include crocheting in the back loop only and changing yarn colors. You will also work in rounds for crocheting the bolt amigurumi.
Tutorial Timing: 34 minutes only (perfect for learning the basic tapestry and the basic mini pouch pattern. You will also learn the oval base pattern used in other Halloween projects, such as candy, watermelon keychains, and crochet bags. The most important technique is to add key hiding functionality, which was also used in the Crochet Ghost Key Pouch and Snowman Key Pouch. Plus, learn the best sizing!)
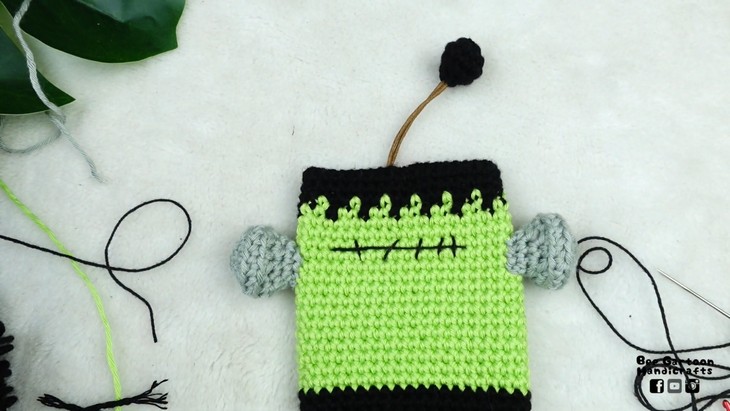
Personalization Tips: Also sew an embroidered smile to your crochet Frankenstein pouch for a more finished look. To your Frankenstein head, you can also add the multiple wound stitch detail and change the placement from the forehead. Crocheting a larger pouch is also very easy by simply adjusting the length of the oval! You can adjust the size of the eyes to your and use a small amount of blush on the cheeks to give the character a “cute” look.
Pattern Type: An on-screen written pattern is available if you find written instructions easy to follow along with. The pattern is written in US terms.
Materials Suggested
The tutor has mentioned this list of materials and tools for the pouch project for beginners. Gather all for similar results:
- Yarn: Milk cotton yarn in green, gray, and black.
- Crochet Hook: A 4/0 (2.5 mm) crochet hook.
- Safety Eyes: 8 mm size safety eyes.
- Stuffing: A small amount of stuffing.
- Glue: All-purpose glue.
- Blush: A small amount of blush to add color to the cheeks.
- Brushes: A small brush or cotton swab for applying blush.
- Embroidery Thread: Cotton thread for sewing the mouth.
- Key Cover Cord: A special cord used for key covers.
Techniques Used
The following are the crochet techniques that the tutor will use for crocheting this Frankenstein bag:
Chain stitch (ch): Yarn over, pull through loop on hook to form a chain.
Single crochet (x): Insert hook, yarn over, pull up a loop, yarn over, pull through both loops.
Increase (v): Work 2 single crochets into the same stitch.
Invisible decrease (a): Insert hook through front loops of next 2 stitches, yarn over, pull through, yarn over, pull through both loops.
Back loop only (blo): Work the stitch into the back loop of the stitch only.
Changing yarn colors: Complete the last yarn-over of a stitch with the new color, then continue with it.
Weaving in yarn tails: Thread yarn on a needle and weave it through stitches on the inside to secure.