How to Crochet Gingerbread Man Christmas Puppet Doll
A cute variation of the Christmas puppet by Hui Crochet is here for absolute beginners. So, follow this stitch-by-stitch tutorial to crochet a quick and no-sew mini gingerbread man doll and finger puppet that is easier than the baby Christmas tree puppet. This small gingerbread man. Thanks to the unstuffed body, it will double as a small desk buddy and a fun finger puppet for Christmas cosplay. The pattern is so basic that you can complete crocheting it in less than 30 minutes. You will especially love its bow, the icing hair, the shiny button,s and blush finish. You can also make it a gift charm or itself a gift.
So, if you have decided to crochet these Christmas puppets by yourself, continue reading this post till the end. There you will find the complete tutorial. It is worth crocheting!

About the Designer: The designer behind this smiling gingerbread puppet doll is @CrochetByHui – Like An_design Crafts, she has excelled at amigurumi designing. From chibi dolls and mermaids to animal keychains like dolphins and mice with a lot of creative and unique variations, her library is a top, though underrated, amigurumi library. What sets this channel apart is the creator’s commitment to making these projects accessible to absolute beginners. She has also made a whole playlist of crochet Christmas projects, from hats to puppets of Santa, so check them for sure!
Note: In respect of the creator’s pattern rights, there will be no provision of the written pattern. You can watch the tutorial with on-screen written instructions at the end of this post.
Gingerbread Man Finger Doll
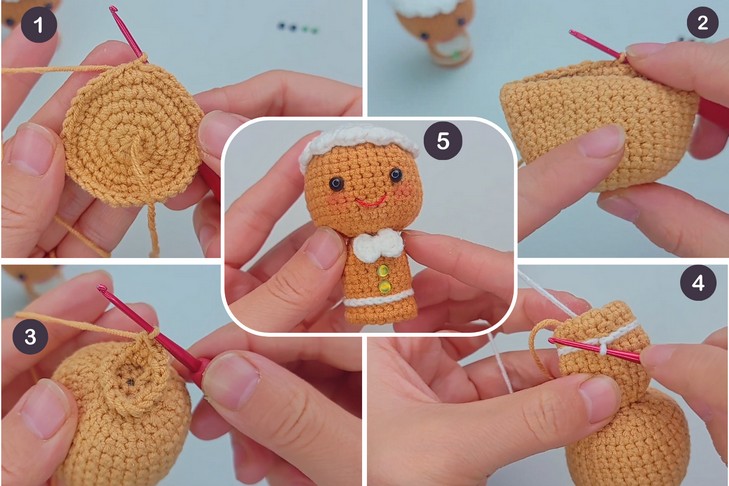
Skill Level: Beginner. Just as the Christmas baby, the puppet pattern is worked from the head to the bottom as a single piece by working in the round. The head is simply a sphere, with an increase and decrease of single crochet. The pattern also involves working into the inner loop only (often called back loop only) and outer loop only (front loop only) to crochet the starting and working of the fingerless body and the color stripe. For the crochet bow, you will be working flat, starting with the slip knot and making a knot to tie the bow.
Use the slip stitch and chain stitch for joining rounds and starting the project. Finally, different pieces are joined together through sewing, and a face is added through embroidery. Color changes, weaving in the ends, and a little sewing are needed.
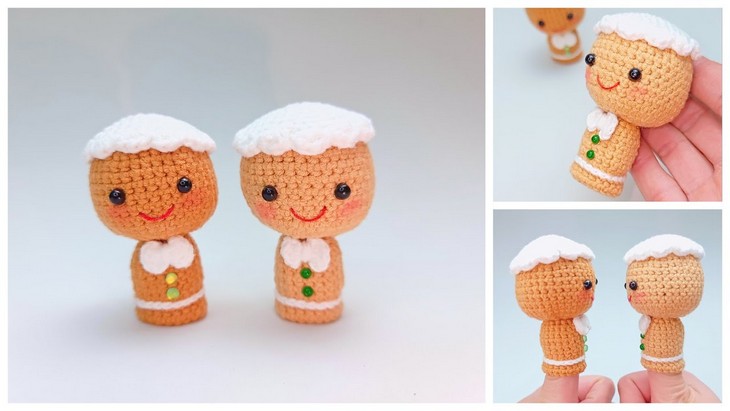
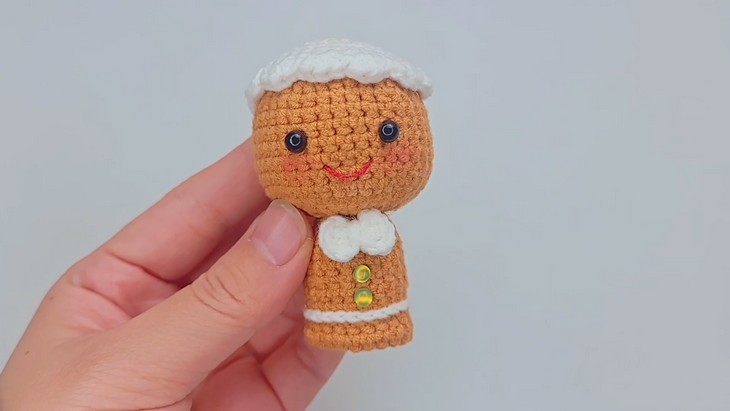
Personalization Tips: You can easily customize your gingerbread man by changing the color of the “icing” (the head cover and trim) or the bow tie, like the red and green, or pink. Instead of the small decorative buttons, you can embroider them or crochet and attach the black circles or a tiny vest. To make it a hanging ornament instead of a finger puppet, simply attach a loop of yarn to the top of the head.
The tutor shows two versions – one with light brown and the other with a bit darker one. You can also crochet the colorful sprinkles on the icing.
Tutorial Timing: About 15 Minutes only (You will learn crocheting a base pattern for crocheting a finger puppet that can be easily adapted for crochet animals, and later in the crochet Santa puppet. Plus, learn how to crochet a bow tie that can be adapted for large wearable sizes, like in the coquette bow tutorial. Also, the shell edging makes this quick tutorial worth watching!)
Pattern Type: A detailed on-screen written pattern is available if you find written instructions easy to follow along with. The pattern is written in US terms.
Materials Needed
You will have to gather the following suggested tools and materials for crocheting this mini kawaii puppet and ornament, mentioned in the tutorial:
- Yarn: Milk Cotton Yarn (4-ply)
- Hook: 1.8 mm crochet hook
- Eyes: 5 mm safety eyes
- Buttons: 4 mm decorative buttons (or beads)
- Notions: Stuffing, Tapestry needle, Scissors, and blush for cheeks.
Techniques Used
The following are the crochet techniques that the tutor will use for crocheting this amigurumi puppet for beginners:
Chain Stitch: Yarn over and pull through the loop on the hook to create a chain.
Slip Stitch: Insert hook, yarn over, and pull through both the stitch and the loop on the hook.
Single Crochet (Short Stitch): Insert hook, yarn over, pull up a loop, yarn over, pull through both loops.
Increase (Single Crochet Increase): Make two single crochet stitches in the same stitch.
Decrease (Single Crochet Decrease): Insert hook into two stitches, yarn over, pull through both, yarn over, pull through two loops.
Half Double Crochet: Yarn over, insert hook, yarn over, pull up a loop, yarn over, pull through all three loops.
Back Loop Only (BLO): Insert hook into the back loop of the stitch only and work as usual.
Front Loop Only (FLO): Insert hook into the front loop of the stitch only and work as usual.