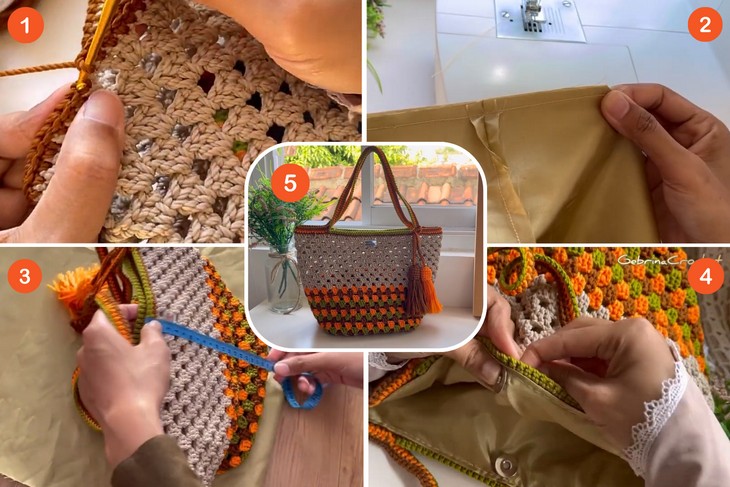
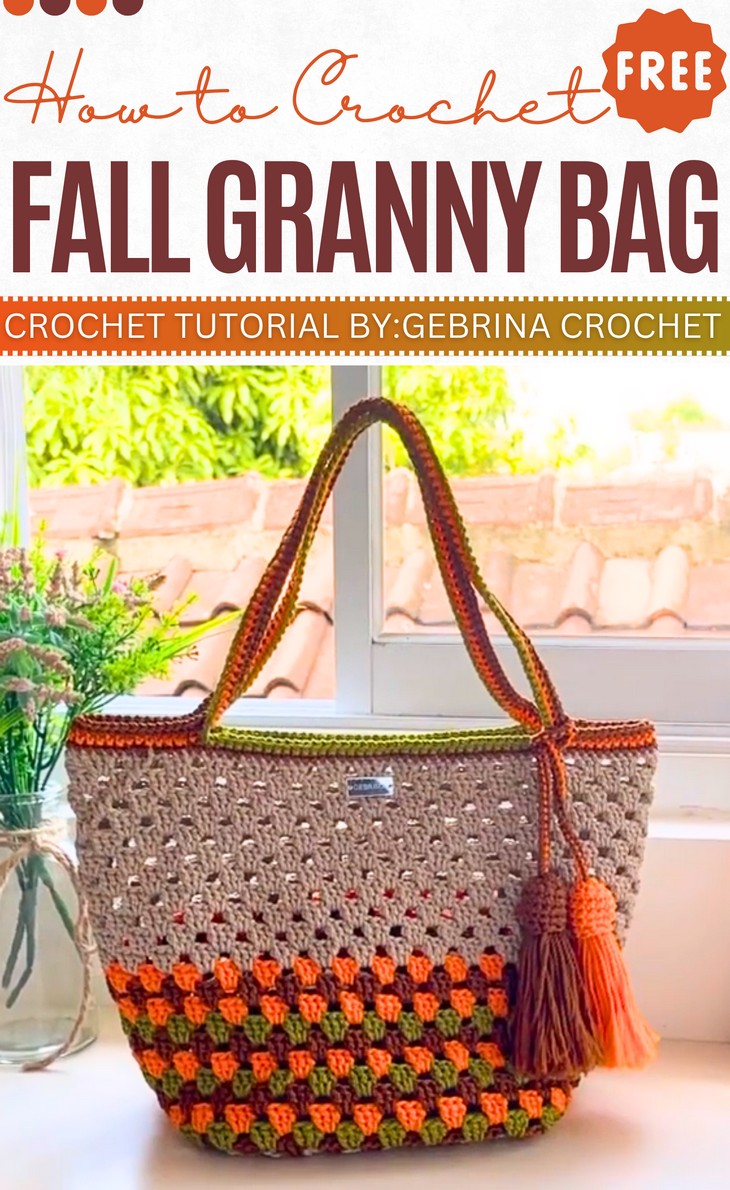
How to Crochet Granny Square Fall Bag With Lining
Be ready for a lightweight, easy, and elegant bag for fall! Here is a stitch-by-stitch tutorial to crochet the fall granny stitch handbag with autumn colored stripe work and oh-so-cute tassels. The bag also features an appealing edging for the top and striped handles without needing to sew them. With the tutorial, you will also learn how to line the bag and attach magnet buttons for improving security. That’s why the guidance is divided into two parts, perfect for beginners.
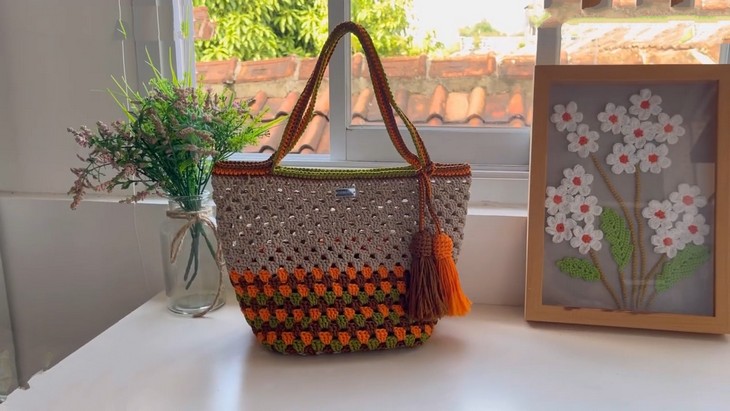
Named the Sunset bag by the designer, this granny stripe bag is worth crocheting this fall within an hour. So, for the complete tutorial from Gebrina Crochet, continue reading this post till the end!
About the Designer: The designer behind this striped bag project is @GebrinaCrochet– Her tutorials mostly focus crochet bags and other accessories. From tote bags to waist bags and coin purses, there are always vivid and bright designs with lovely stitch textures. The Sometimes, she also crochets blankets, keychains, and flower motifs. Whether you are an expert or beginner, you will find something of your level.
Note: In respect for the creator’s pattern rights, there will be no provision of the written pattern. You can watch the tutorial with on-screen written instructions at the end of this post.
Skill Level
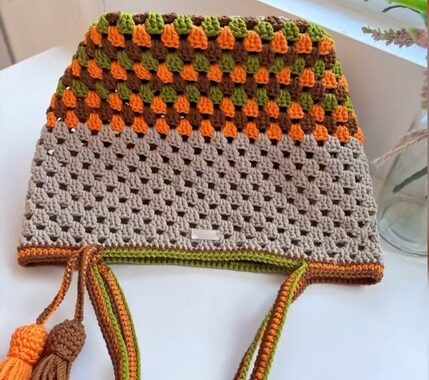
Intermediate. A magic ring is used to begin the base of the bag as it uses granny squares, not the granny stripe stitch, which is worked in rounds. The whole pattern needs one large granny square. You will be using the double crochet stitch clusters of three to form the pattern of the granny squares.
You will also change colors for the bottom part at least. A tapestry needle is used for sewing the foam base to the bottom of the bag. In the second part, the primary stitch is single crochet (SC), which is used for the body and the handles.
The video also uses a slip stitch to finish a round before fastening off, and a chain stitch to create the handles. Other techniques include fastening off to secure the yarn and sewing a lining into the bag by hand. The creator also demonstrates how to install a magnetic snap closure in the lining using pliers.
Tutorial Timing
Approximately 20 minutes + 24 minutes. (perfect for learning your first granny square and changing the colors while crocheting it. In the second part, you will learn the most important technique for crochet bags – the lining of the interior of the bag. So, the tutorial will improve your skills.
Personalization Tips
You are free to choose different colors like yellow, green, and brown for the sunflower theme.
Pattern Type
The on-screen written pattern is available if you find written instructions easy to follow along with. Also, the tutorial is slow-paced.
Supplies Used
- Yarn: Polyester yarn (specifically the “polyap” brand). The tutorial uses four colors, with one skein of each. If you use three colors, you’ll need two skeins of the dominant color.
- Hook: Crochet hook size 5 or 6 (the tutorial uses a size 5).
- Other tools: Tapestry needle (7 cm), scissors, and a lighter to melt the yarn ends.
- Lining: The video mentions a lining (furring) but doesn’t specify the material.
- Stiffener: A stiffener material, such as foam, is used for the base of the bag and is cut to 18 cm.

Stitches Used
Learn the following crochet techniques and stitches used for this granny bag:
- Magic Ring: Create a loop, insert hook and yarn over, pull through to form a ring, then crochet the first round into the ring.
- Chain Stitch (CH/Rantai): Yarn over and pull through the loop on the hook.
- Double Crochet (DC): Yarn over, insert hook into stitch, yarn over, pull through stitch, yarn over, pull through two loops, yarn over, pull through remaining two loops.
- Slip Stitch (SL ST): Insert hook into stitch, yarn over, and pull through both the stitch and loop on the hook.
- Single Crochet (SC): Insert hook into stitch, yarn over, pull through, yarn over again, and pull through both loops on the hook.
- Sewing Stitch: Use a needle and thread to attach fabric pieces by passing the needle through both fabrics repeatedly.