How to Crochet Horse Plushie – Softest Crochet Toy
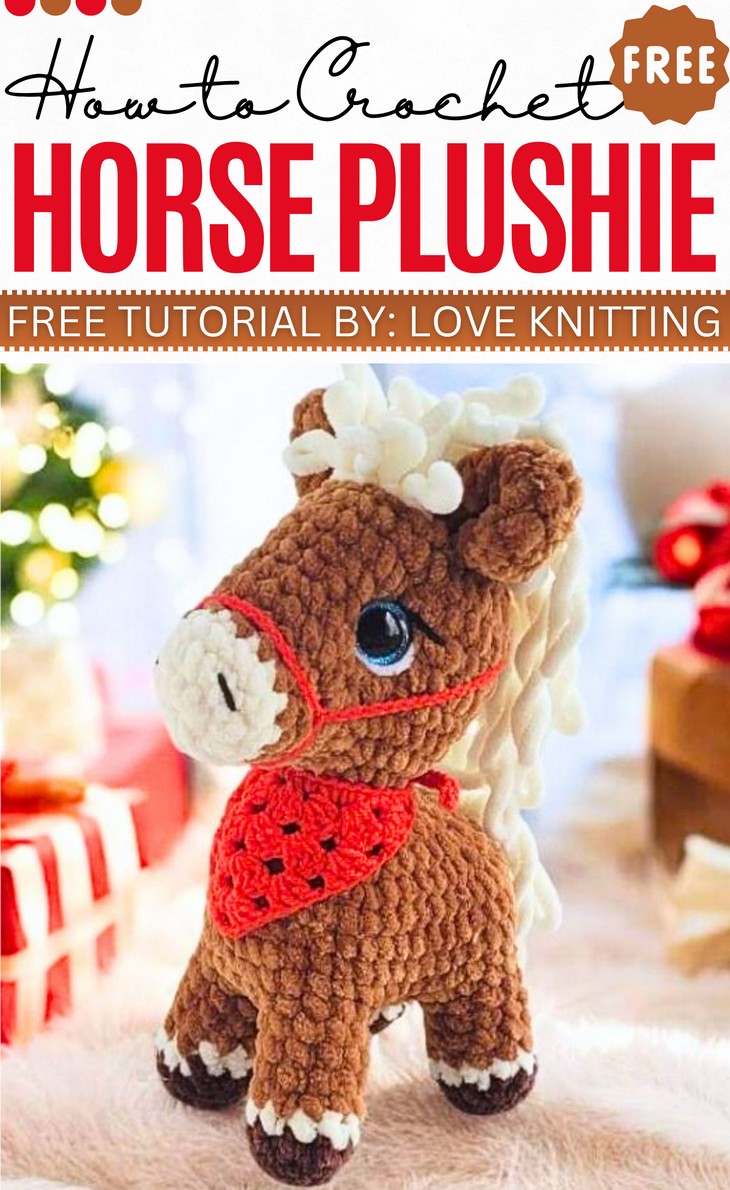
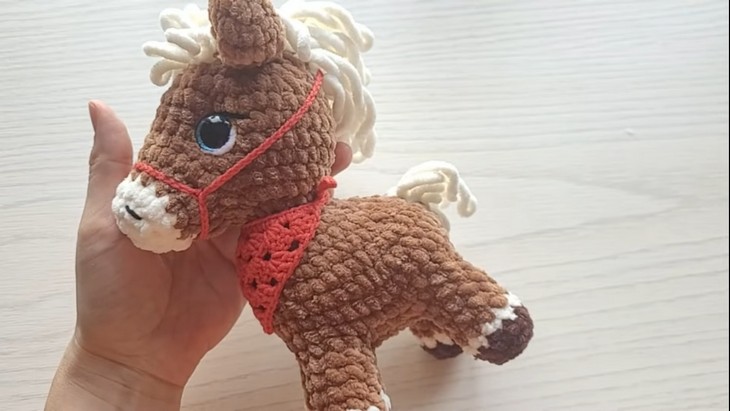
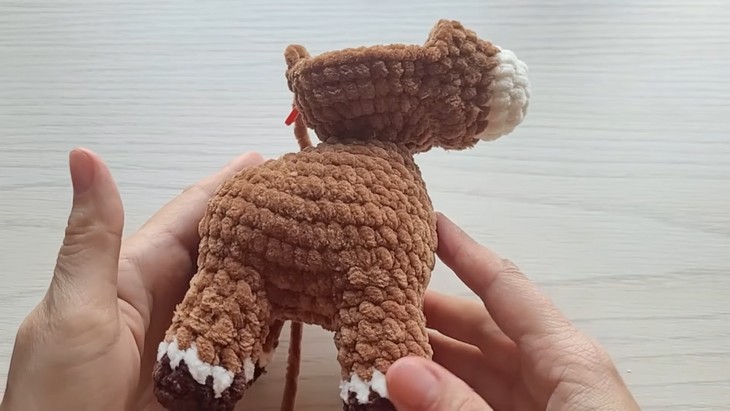
I am here with another must-have plushie tutorial. This time, you will learn how to crochet an oh-so cute horse plushie that is just about 21 cm when finished, and also wears accessories. It is crocheted as a baby horse with a fluffy yarn mane and tail, and super adorable glittery eyes. You won’t believe the complete horse is crocheted as a single piece (no sewing needed) with so beautiful chest bandana and harness in red.
So, you can also crochet this horse for gifting at Christmas, and believe me, it is irresistible. The hairs of this horse are actually quite long, which simply adds to the cuteness. So, crochet today!
Crochet Horse Plushie Tutorial
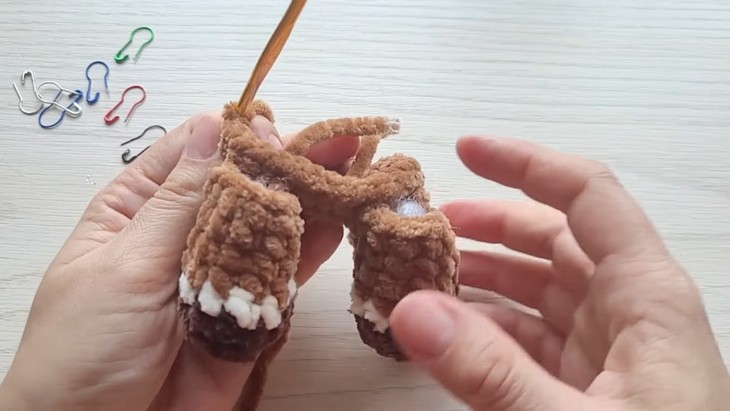
My favorite part of this amigurumi is its clever construction: the four legs are crocheted separately, then joined and crocheted directly into the main body, which continues right up into the head. It simply decreases the sewing.
For the legs, you will also be using color changes. Luckily, this baby horse plushie can stand on its own. Hence, with all of its cuteness, it will help you welcome your guests.
So, if you have made up your mind to crochet this new animal horse plushie for beginners, continue reading this post till the end. There you will find the complete tutorial!
About the Designer: The designer of this Christmas plushie is @love-knitting –with her 1k tutorials, she is an all-arounder in crocheting whose super bulky yarn and Christmas series is my favorite. You can also check her other plushies on the channel!
Note: In respect of the creator’s rights, there will be no provision of the written pattern. You will watch the tutorial at the end of this post.
Material List for Horse Plushie
To follow through with the baby horse plushie tutorial, gather the following suggested supplies:
- Main Yarn: Plush yarn (e.g., 100g/120m).
- Contrasting Yarn: Plush yarn in a secondary color (e.g., milky white) for the muzzle and hooves.
- Crochet Hook: 4 mm.

Other Notions:
- Stuffing: Polyester fiberfill (or similar) to stuff the body and limbs.
- Safety Eyes: 16 mm or 18 mm.
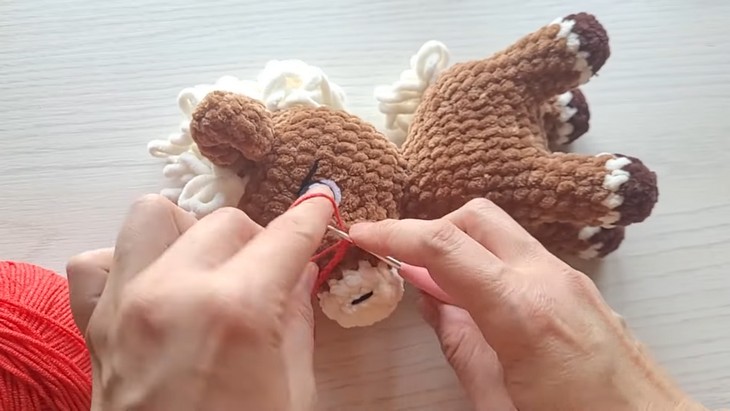
- Needle: Tapestry needle for weaving in ends, assembly, and facial sculpting.
- Optional: Semi-cotton yarn (e.g., red) for the harness and bactus/scarf.
About Crochet Horse Plushie
Quick Summary & Skill Level: Beginner. You will crochet a medium-sized horse in the following main parts: muzzle, legs, body/head, ears, and accessories. First, crochet the muzzle in a contrasting color. Then make all four legs with hooves in the contrast color and switch to the main color.
Crochet the body in the round, attaching the legs as you go. Continue into the head, attach the muzzle, stuff, and close. Add ears, safety eyes, embroidery, and sculpting, then finish with the mane and tail using the loop technique.
Stitches for Horse Plushie
The following are the quick guides for the crochet stitches that the tutor will use for crocheting this Christmas horse:
- Single Crochet (SC): Insert hook, yarn over, pull up a loop, yarn over, and pull through both loops.
- Increase (INC): Make two single crochet stitches in the same stitch to widen the piece.
- Invisible Decrease (DEC): Crochet two stitches together through front loops to reduce stitch count smoothly.
- Back Loop Only (BLO): Work into the back loop of each stitch to add texture or shaping.
- Joining Limbs (J-Limb): Crochet through both body and limb stitches to attach them seamlessly.
- Extended Loop Stitch (ELS): Pull up a long loop and secure it to form mane or tail strands.