
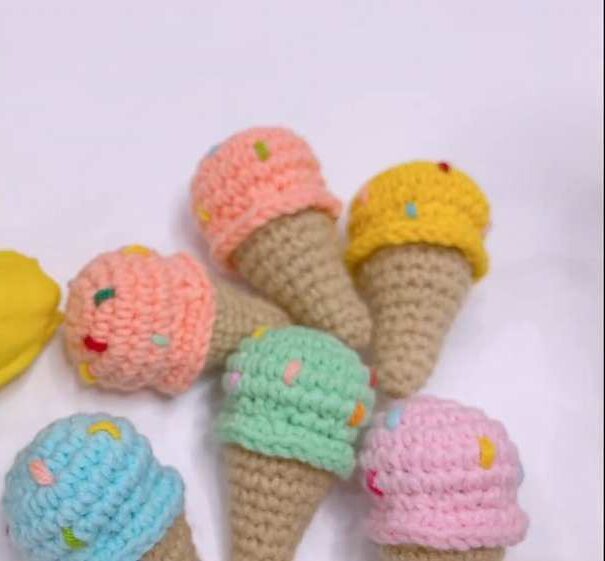
Free Crochet Ice Cream Cone Keychain Pattern
Ice cream is undoubtedly the best crochet summer theme. In this post, I will share a free written pattern to crochet a pair of ice cream cone keychains with rainbow sprinkle embroidery and an option to choose blueberry and strawberry flavours. It is crocheted into two main parts that will be joined later: the cone (the body) and the scoop.
You can also make it a tiered scoop. There is also an edging that covers the top of the cone. This makes it look life-like and authentic. I will share both the UK and US patterns here.

The designer behind this amigurumi cone is @NITKA_KZ – she has quite a good grasp on kawaii amigurumi designing with added cuteness and surprises. I recommend that you all support her a lot.
Crochet Ice Cream Cone Tutorial
Materials Used
- Yarn (Milk cotton or wool in cone and scoop colors)
- 2.5mm crochet hook
- Fiberfill / Stuffing
- Yarn needle
- Scissors
- Keychain ring (optional)
Abbreviations (English)
- MR: Magic Ring
- ch: Chain
- sc: Single Crochet
- inc: Increase (2 sc in one stitch)
- dec: Decrease (Invisible decrease recommended)
- sl st: Slip Stitch
- R: Round
Pattern Instructions
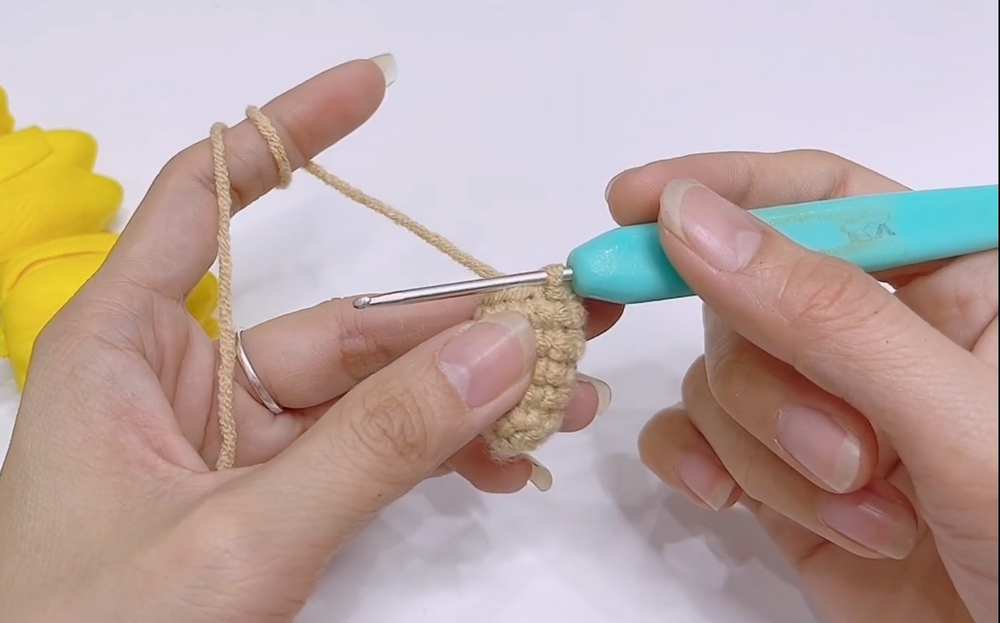
Cone (Body)
- R1: MR, 6 sc, sl st (6)
- R2: ch 1, 6 sc, sl st (6)
- R3: (2 sc, 1 inc) x 2, sl st (8)
- R4: 8 sc, sl st (8)
- R5: (3 sc, 1 inc) x 2, sl st (10)
- R6: 10 sc, sl st (10)
- R7: (1 sc, 1 inc) x 5, sl st (15)
- R8: 15 sc, sl st (15)
- R9: (4 sc, 1 inc) x 3, sl st (18)
- R10: 18 sc, sl st (18)
- R11: (8 sc, 1 inc) x 2, sl st (20)
- Fasten off and hide the yarn tail inside.

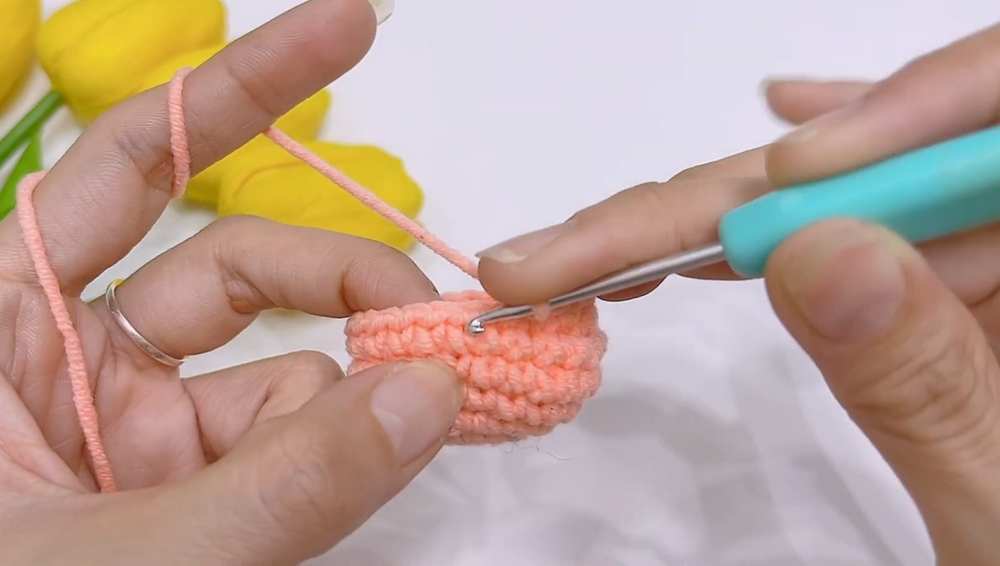
Ice Cream Scoop (Top)
- R1: MR, 6 sc, sl st (6)
- R2: ch 1, 6 inc, sl st (12)
- R3: (1 sc, 1 inc) x 6, sl st (18)
- R4: (2 sc, 1 inc) x 6, sl st (24)

- R5: 24 sc, sl st (24)
- R6: 24 sc, sl st (24)
- R7: (2 sc, 1 dec) x 6, sl st (18) — Use invisible decrease.
- R8 (Ruffle): (1 sc, 1 inc) repeat until the end of the round, sl st.
- Leave a long yarn tail for sewing.
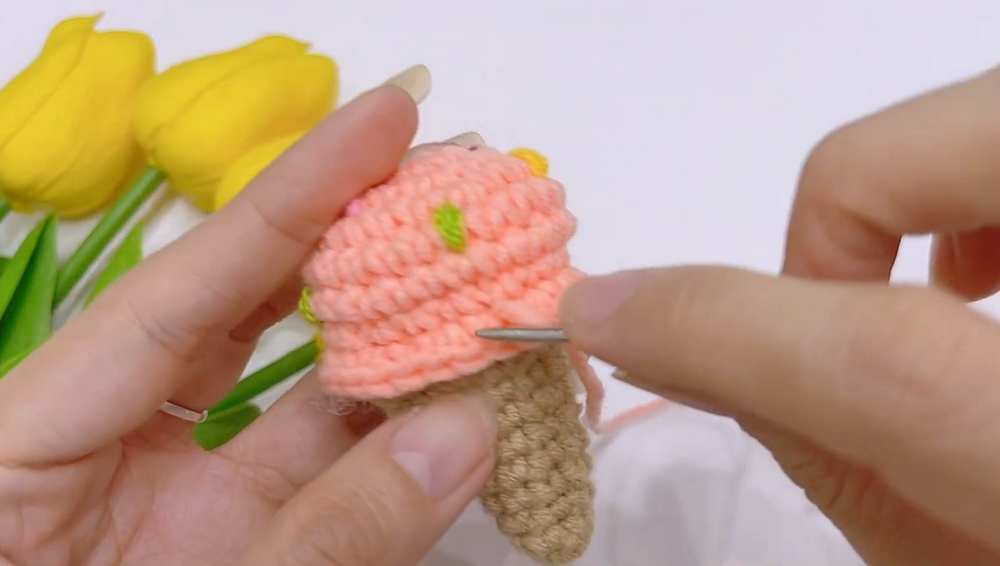
Stuffing: Firmly fill both the cone and scoop with fiberfill.
Position & Align: Place the scoop on top of the cone, aligning seam lines at the back.
Sewing: Using the long yarn tail from the scoop, stitch the base of the scoop ruffle to the top edge of the cone.
Secure & Finish: Center the scoop, pull the yarn tight, tie a knot, and hide the tail inside the stuffing. Trim excess yarn.
Optional: Add embroidered sprinkles or attach a keychain ring to the top.
Video Tutorial
Pattern Instructions (UK Terms)
Cone (Body)
- R1: MR, 6 dc, sl stg (6)
- R2: ch 1, 6 dc, sl stg (6)
- R3: (2 dc, 1 inc) x 2, sl stg (8)
- R4: 8 dc, sl stg (8)
- R5: (3 dc, 1 inc) x 2, sl stg (10)
- R6: 10 dc, sl stg (10)
- R7: (1 dc, 1 inc) x 5, sl stg (15)
- R8: 15 dc, sl stg (15)
- R9: (4 dc, 1 inc) x 3, sl stg (18)
- R10: 18 dc, sl stg (18)
- R11: (8 dc, 1 inc) x 2, sl stg (20)
- Fasten off and hide the yarn tail inside.
Ice Cream Scoop (Top)
- R1: MR, 6 dc, sl stg (6)
- R2: ch 1, 6 inc, sl stg (12)
- R3: (1 dc, 1 inc) x 6, sl stg (18)
- R4: (2 dc, 1 inc) x 6, sl stg (24)
- R5: 24 dc, sl stg (24)
- R6: 24 dc, sl stg (24)
- R7: (2 dc, 1 dec) x 6, sl stg (18) — Use invisible decrease.
- R8 (Ruffle): (1 dc, 1 inc) repeat until the end of the round, sl stg.
- Leave a long yarn tail for sewing.