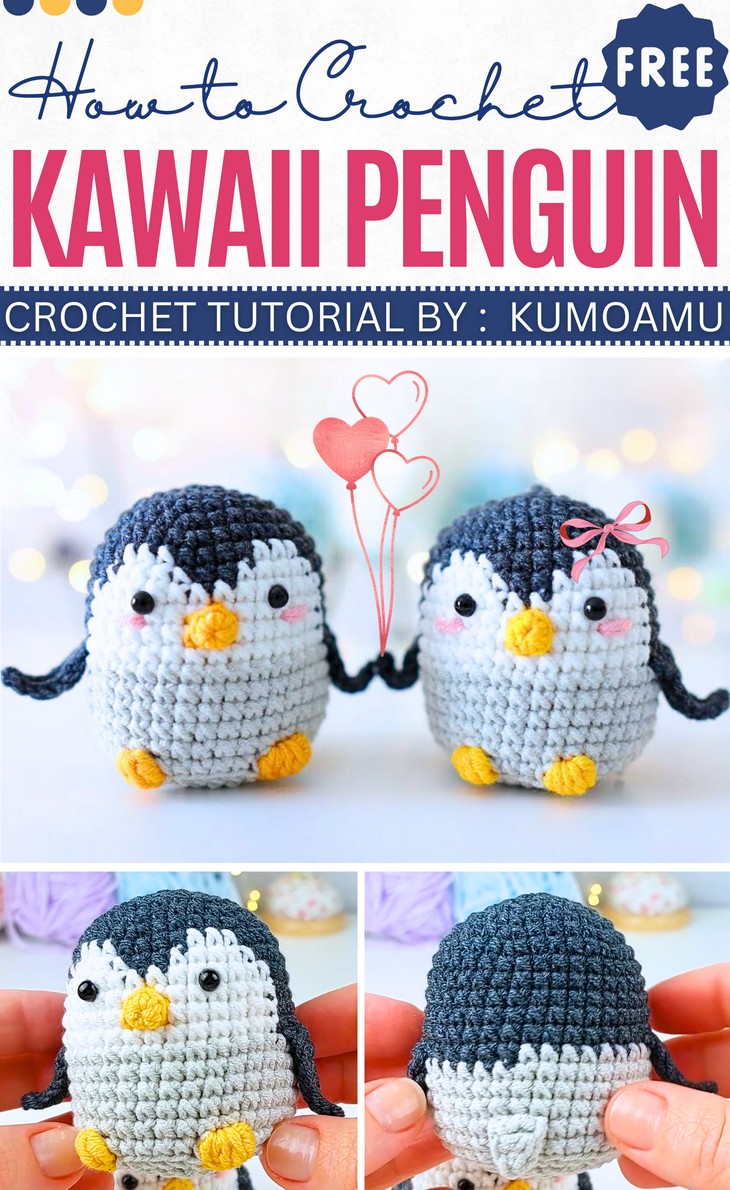
How to Crochet Kawai Penguin Amigurumi for Beginners
The penguin tutorial we previously shared was much more detail-centric, but here is an easier and quicker penguin project. You will follow the KumoAmu’s tutorial to crochet a mini kawaii penguin amigurumi that can sit and has a lovely, chubby body (make it your next great support toy!). Christmas is also around the corner, so you can complete it with little Christmas accessories and presents as a gift. This penguin pattern is much easier and almost no-sew. The designer’s suggestions are to use it as a desk decoration or even a baby mobile toy. Everything is simple and customizable.
So, if you are convinced of crocheting this mini winter amigurumi by yourself, continue reading this post till the end. There you will find the complete tutorial for absolute beginners.
The Designer: @KumoAmu
About the Designer: The designer behind this new penguin amigurumi for kids is @KumoAmu – Hannah’s channel, KumoAmu, is currently quite new, but her festive plushie set tutorials are out of this world! As you may have seen, she also tried other kawaii animal plushies that were all in the box. For future projects, she will focus on similar “kawaii” (cute) plushies: Christmas reindeer, a spider, a capybara, and a frog head plushie. The tutorials are described as “beginner-friendly” and “last-minute.” So, follow her since watching the unique concept, her future projects seem to be oh-so cute and must-haves. And she has proved that!
Note: In respect of the creator’s rights, there will be no provision of the written pattern. You can watch the tutorial with on-screen written instructions at the end of this post.
Crochet Easy Penguin Amigurumi Tutorial
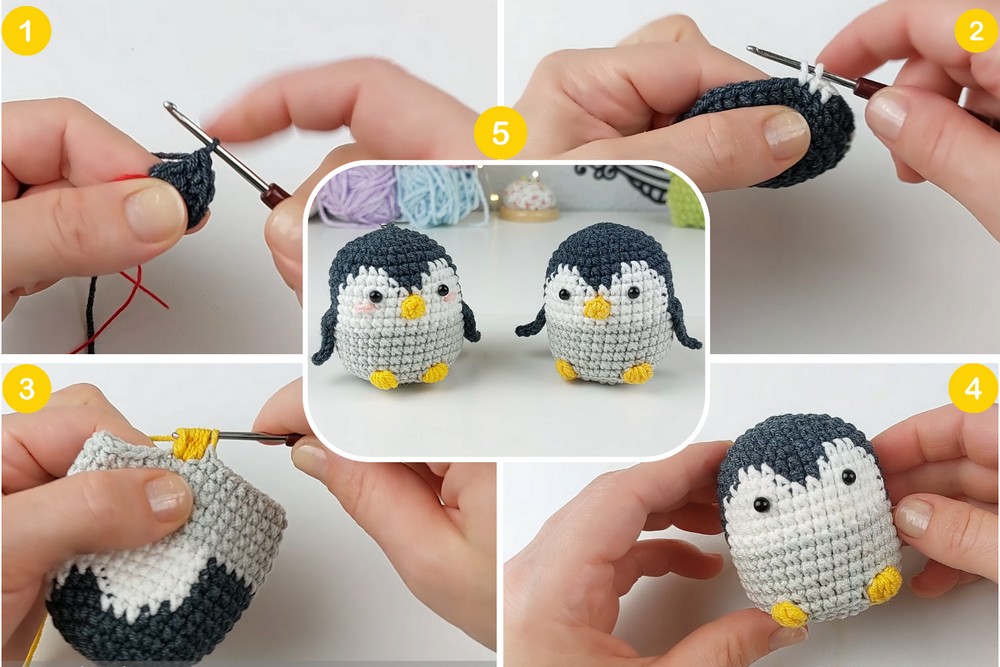
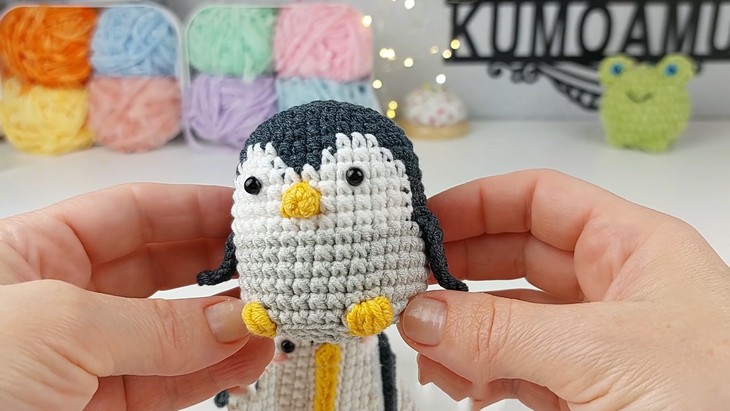
Skill Level: You will crochet the main penguin body similar to a dressed penguin. That is, working in the rounds from the bottom upward using three colors, and as a single piece. You will be using single crochet, increasing, and decreasing. Color changes are frequently used for the black, white, grey, and yellow parts of the penguin’s body and face. You will also work BO (bobble stitch) for crocheting the beak and legs.
Crochet separately the pointy wings using stitches of different heights, the single crochet, half-double crochet, slip stitch, half treble, and treble. In the end, you will sew the flaps and attach them to the body. Use the sewing needle for perfecting the beak, too.
Tutorial Timing: Just about 26 Minutes (first, you will learn how to crochet a basic chubby body like in Peach and Goma cats, and the popular crochet animal belly and head color-changes as used in the reindeer puppet. Plus, how to crochet the small legs and a beak, and working with more than one yarn strand at a time.
To me, the flapper pattern will help you understand the heights of different basic stitches. So, the tutorial is worth watching to improve your amigurumi skills.)
Personalization Tips: One of the tutor’s versions of this mini penguin in a short video shows large-than-life glittery, realistic eyes that look awesome. You can also try it. Like in the dressed crochet penguin, you can also make a Christmas scarf and a Santa hat, whose tutorials are already shared. Instead of traditional black/grey, blue and pink penguins have been very popular patterns.
You can also use the blush brush for the cheeks, but the sewn ones are permanent. The one in velvet yarn will have a much better finish.
Pattern Type: A detailed on-screen written pattern is available if you find written instructions easy to follow along with. The pattern is written in US terms.
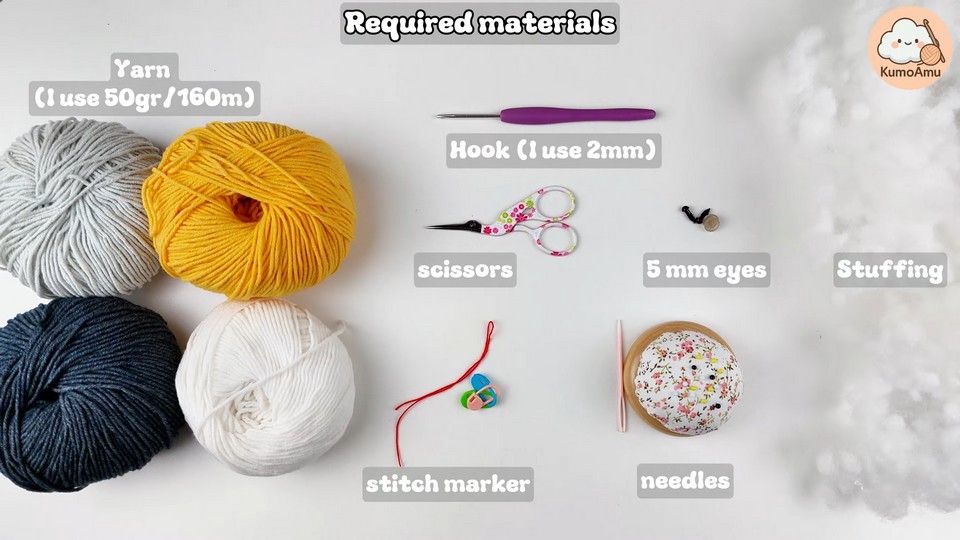
The Materials Needed
Collect the following tools and materials in the stash for crocheting this penguin amigurumi, as mentioned and suggested in the tutorial:
Yarn – (50g / 160m each)
Colors shown: grey, yellow, dark blue, and white
Hook – 2 mm
Scissors
5 mm safety eyes
Stuffing (polyester fiberfill)
Stitch marker
Needles (for sewing pieces together)
Stitches Required
The following are the crochet techniques that the tutor will use for crocheting all of these Christmas amigurumi:
ch (Chain): Yarn over and pull through loop on hook.
sc (Single Crochet): Insert hook, yarn over, pull through, yarn over, pull through 2 loops.
sl st (Slip Stitch): Insert hook, yarn over, pull through stitch and loop on hook.
dec (Decrease): Insert hook in 2 stitches, yarn over, pull through, yarn over, pull through all 3 loops.
inc (Increase): Work 2 single crochets in the same stitch.
BO (Bobble Stitch): Yarn over, pull through stitch, repeat 4–5 times in the same stitch, then yarn over and pull through all loops.
sk (Skip Stitch): Skip the stitch and move to the next.
hdc (Half Double Crochet): Yarn over, insert hook, yarn over, pull through, yarn over, pull through 3 loops.
dc (Double Crochet): Yarn over, insert hook, yarn over, pull through, yarn over, pull through 2 loops, yarn over, pull through 2 loops.
tr (Treble Crochet): Yarn over twice, insert hook, yarn over, pull through, yarn over, pull through 2 loops (3 times).
htr (Half Treble Crochet): Yarn over, insert hook, yarn over, pull through, yarn over, pull through 3 loops.
BLO (Back Loop Only): Work stitch only in the back loop of the stitch.