
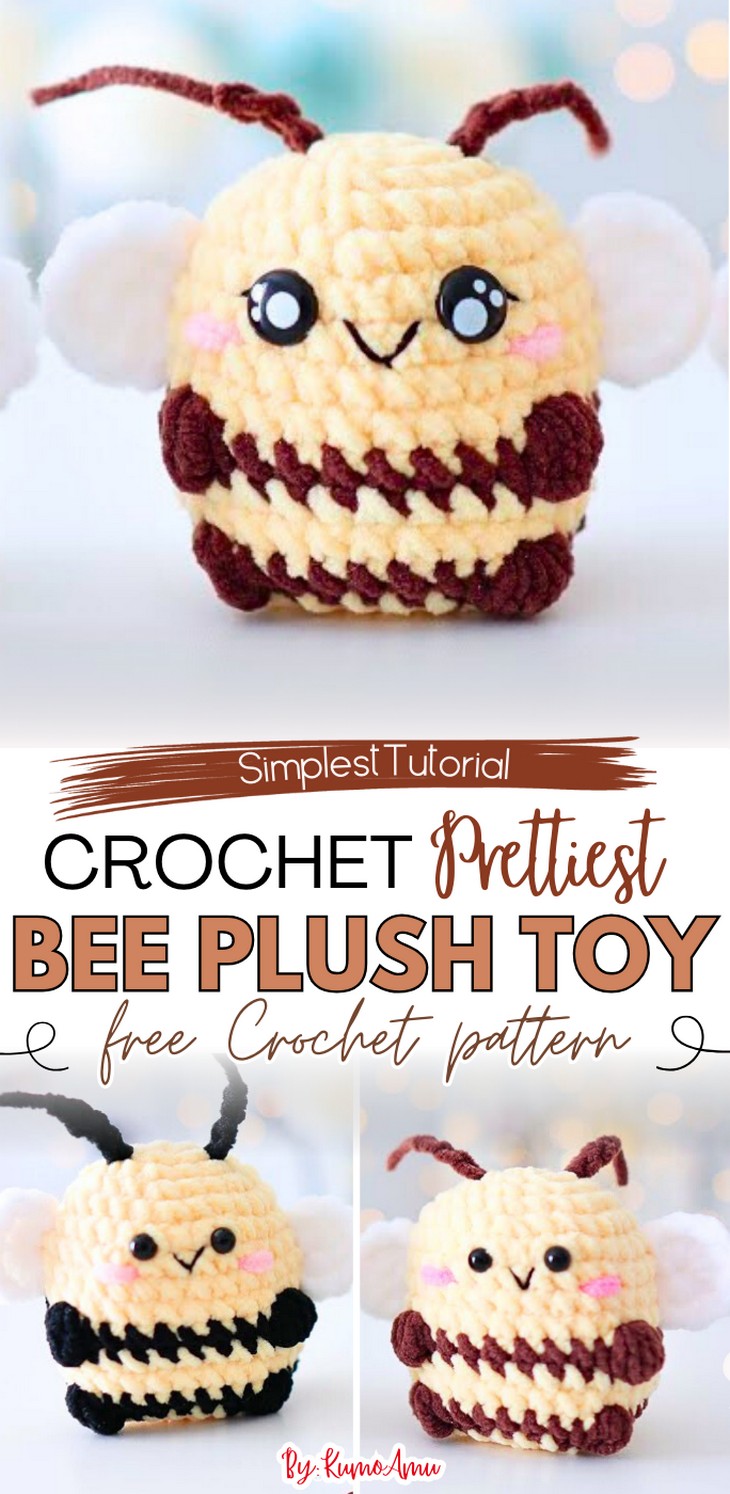
How to Crochet Kawaii Bee Plushie in Just 30 Minutes
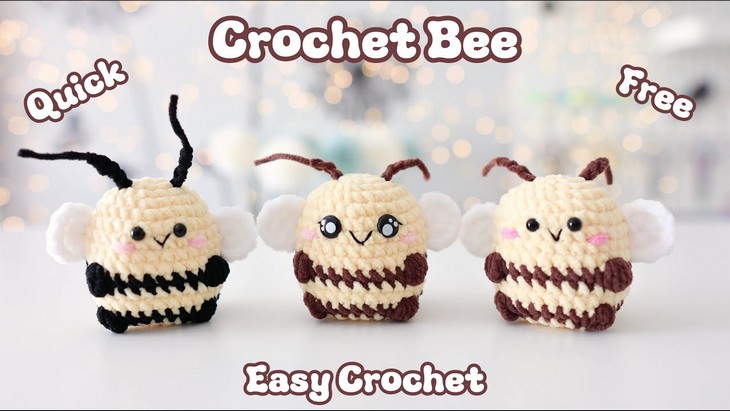
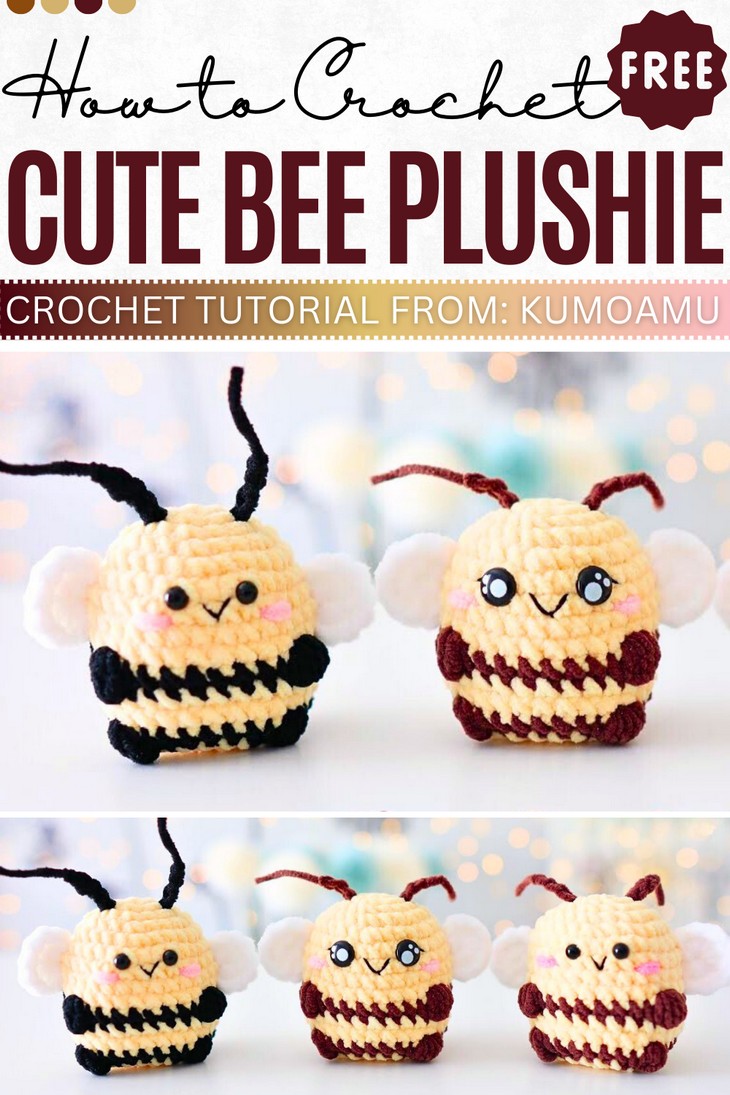
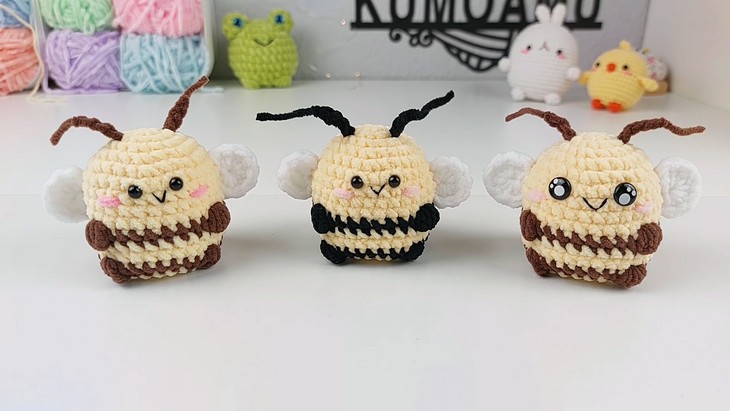
Kawaii animal amigurumi are always irresistible and a must-have! So, learn how to crochet this quick and easy kawaii bee plushie as your next desk buddy with a stitch-by-stitch tutorial from KumoAmu. This bee plushie is chubby, no-sew, and features the kawaii safety eyes that look simply oh-so cute! You can crochet it in three versions: a yellow and brown bee, black and yellow bee, and a bee with simple eyes. You will especially love its long antennae the blush and the wings separately attached. You can complete crocheting this as a gift in just 30 minutes, whether you are a beginner or an expert.
So, if you have made up your mind to crochet this version of bee amigurumi plushie, continue reading this post till the end. There you will find the complete tutorial.
About the Designer: The designer behind this bee amigurumi for kids is @KumoAmu – Hannah’s channel, KumoAmu, is currently quite new, but her festive plushie set tutorials are out of this world! For future projects, she will focus on similar “kawaii” (cute) plushies: Christmas reindeer, a spider, a capybara, this Santa keychain, and a frog head plushie. The tutorials are described as “beginner-friendly” and “last-minute.” So, follow her since watching the unique concept, her future projects seem to be oh-so cute and must-haves.
Note: In respect of the creator’s rights, there will be no provision of the written pattern. You can watch the tutorial with on-screen written instructions at the end of this post.
Crochet Kawaii Bee Amigurumi Tutorial
Skill Level: Beginner. The crochet bee’s main body is worked from the bottom up to the top as a single piece by working in the round and the signature stripe work. For clarity of watching, you will learn it using a thin yarn. You will be using the same single crochet, chain, slip stitch, increase, and decrease, along with the BO (bobble stitch) for crocheting the arms and the legs.
The crochet antennae are simply the chains tied at the end and sewn in the end. For the wings, you will crochet an incomplete circle of double crochet stitches. This also needs sewing.
Personalization Tips: If you want a sleek, velvety finish, use the chenille yarn, and for a regular amigurumi, the cotton yarn. A thin yarn will result in a smaller bee plushie, while the thick yarn will result in a large size, much larger if you use super bulky yarn. You can also crochet it in other mochi colors like the Matcha, Strawberry, Mango, Red Bean, Black Sesame, Taro, Coconut, Chocolate, Coffee, and Ube, along with the black as a must!
You can also inspire it as a Christmas bee plushie by crocheting a Santa hat with a previous tutorial.
Pattern Type: A detailed on-screen written pattern is available if you find written instructions easy to follow along with. The pattern is written in US terms.
Materials Needed
You will have to gather the following suggested tools and materials for crocheting this mini kawaii bee plushie, mentioned in the tutorial:
Hook: 2.5mm (Size used by creator)
Yarn: 50gr / 160m. You can choose the Milk Cotton Yarn (it is a lovely blend of cotton and the milk protein, and it is suggested by so many amigurumi designers). Use the chenille yarn 2ply for a plush version.
Notions: stitch marker, 5 mm eyes, sensors, Stuffing
- use the kawaii eyes or safety beads
- Embroidery thread
Needles
Techniques Used
The following are the crochet techniques that the tutor will use for crocheting this bee amigurumi plushie for beginners:
ch (chain): Yarn over, pull through loop on hook.
sc (single crochet): Insert hook, yarn over, pull through, yarn over, pull through both loops.
sl st (slip stitch): Insert hook, yarn over, pull through stitch and loop on hook.
dec (decrease): Insert hook in stitch, yarn over, pull up loop, repeat in next stitch, yarn over, pull through all loops.
inc (increase): Work 2 single crochets into the same stitch.
hdc (half double crochet): Yarn over, insert hook, yarn over, pull up loop, yarn over, pull through all loops.
BO (bobble stitch): Work multiple half-finished dc into the same stitch, yarn over, pull through all loops.
-
DC (Yarn over, pull through two loops, yarn over, and pull through the final two loops to create the stitch height.
!) FLO (front loop only): Work stitch into the front loop only of the stitch below.
BLO (back loop only): Work stitch into the back loop only of the stitch below.