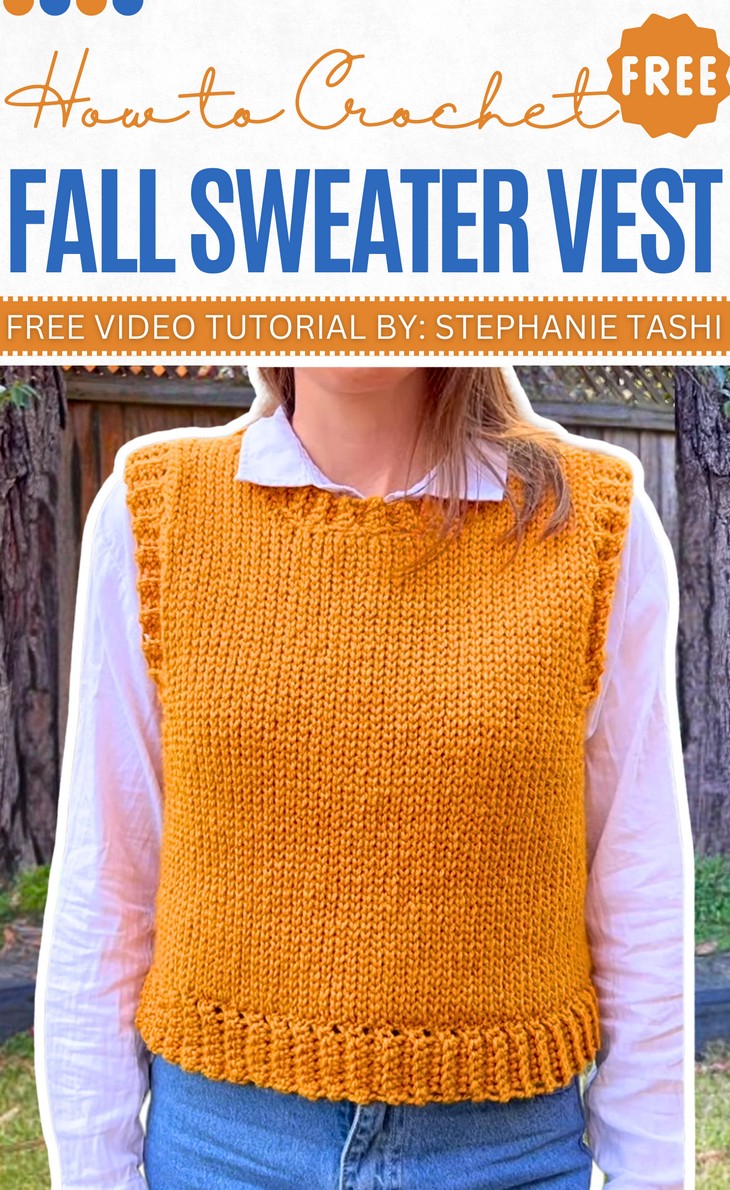
How To Crochet Knit Look Sweater Vest with Size Adjustment Guide
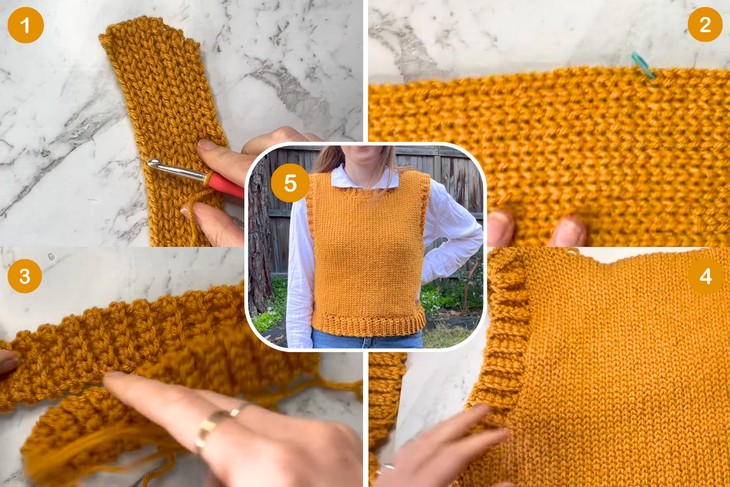
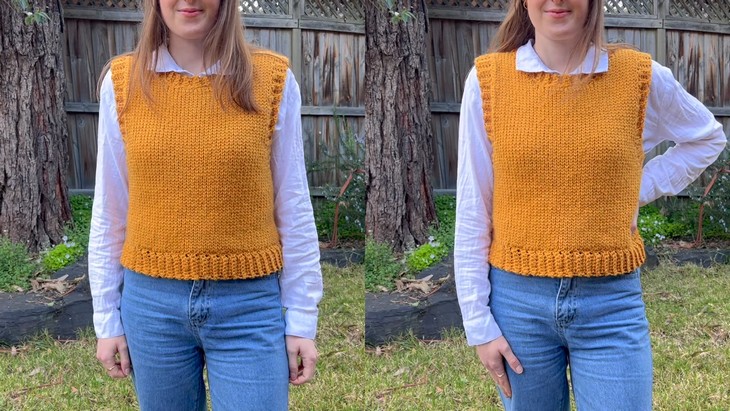
Maybe you are a crocheter but wish for the everyday comfort of knitted sweaters. So, we brought a stitch-by-stitch tutorial on how to crochet a beautiful knit-look sweater vest for autumn that is easily adjustable for different sizes, for beginners. The sweater has three different ribbed trims for the waist, neck, and armholes. It is designed keeping the moderate weather of fall in mind. It simply requires crocheting two panels—a front and a back—using a back loop slip stitch for a lovely edging, too.
The tutorial will also demonstrate how to use increases and decreases to shape the vest for the underarms, shoulders, and neckline. So, if you have made up your mind to crochet this Knit-look sweater vest for beginners, continue reading this post.
About the Designer: The designer behind this crochet sweater vest is @CrochetByHui – her tutorials are mostly for super beautiful crochet wearables, like sweater vests, skirts, cardigans, and tops. Her videos are praised for being size-adjustable and beginner-friendly, and she provides detailed timestamps to help follow along with the different sections of the projects.
Note: In respect for the creator’s pattern rights, there will be no provision of the written pattern. You can watch the tutorial with CC instructions at the end of this post.
Crochet Sweater Vest Tutorial
Skill Level: Beginner – Intermediate. The main panels of the vest, including the front and back, are created using the slip stitch, specifically the back loop slip stitch. To shape the vest, the video demonstrates how to increase by performing two back loop slip stitches into the same stitch and how to decrease by working a slip stitch over two stitches. For the ribbed trim sections, the video switches to using single crochet stitches, which are worked into the back loop only to create the ribbed texture. The tutorial will also show how to join the panels and trim together using a darning needle.
Tutorial Timing: Approximately 57 minutes (perfect for learning the basics of crocheting and designing a sweater, and the ribbing technique for comfortable wear. You will also learn how to modify the size by making a gauge swatch and taking the right measurements. So, the tutorial is worth watching.)

Personalization Tips: The tutor mentions that you can adjust the length of the vest by changing the number of stitches in the initial chain. You can also change the thickness of the neck trim to give the vest a different look. The pattern can be made with a different weight of yarn and a different hook size, and you can wear either side of the reversible fabric as the “good side.”
Pattern Type: An on-screen written pattern is available if you find CC instructions easy to follow along with.
Materials Needed
Gather the following crochet supplies for crocheting this sweater vest:
- Yarn: A medium or worsted-weight yarn.
- Hook: A 6 mm hook.
- Accessories: Stitch markers and a darning needle.

Techniques Used
To understand the instructions and the pattern for the sweater for fall, follow the following crochet pattern stitch guides:
- Slip Knot: Create a loop and a knot to secure the yarn to the hook.
- Chaining: Make a series of loops to form the foundation of your project.
- Back Loop Slip Stitch (blss): Insert your hook into the back loop of the stitch, yarn over, and pull through both loops on the hook.
- Increase: Make two stitches into the same stitch to add a stitch.
- Decrease: Use one slip stitch to join two stitches together, reducing the total stitch count.
- Single Crochet (sc): Insert the hook into a stitch, yarn over, pull through, yarn over again, and pull through the two loops on the hook.
- Back Loop Single Crochet (blsc): Insert the hook into the back loop of the stitch, yarn over, pull through, yarn over again, and pull through the two loops on the hook.