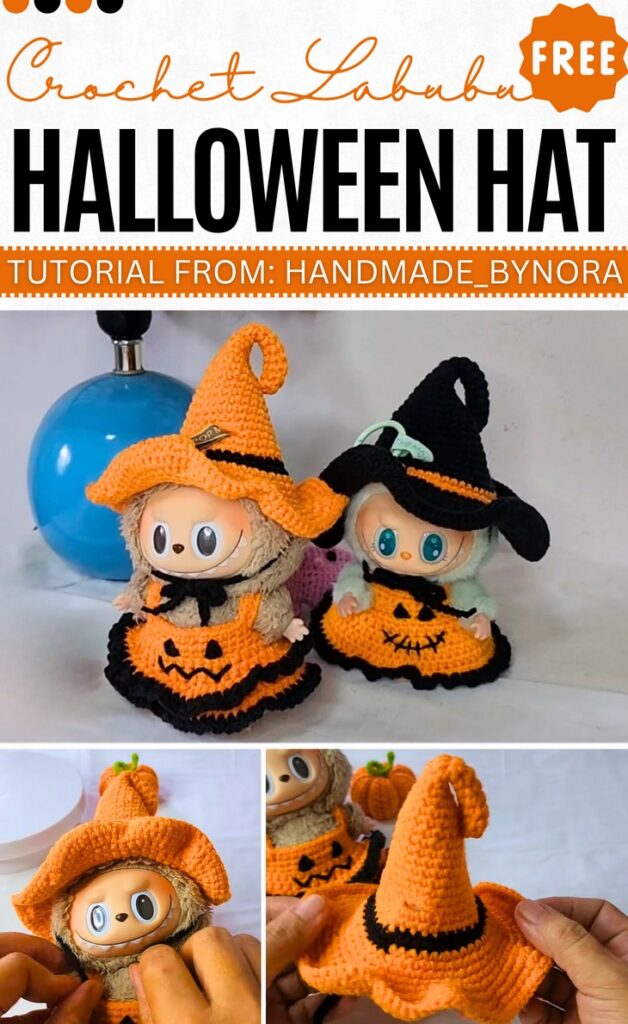
How to Crochet Labubu Witch Hat with Ruffle for Halloween
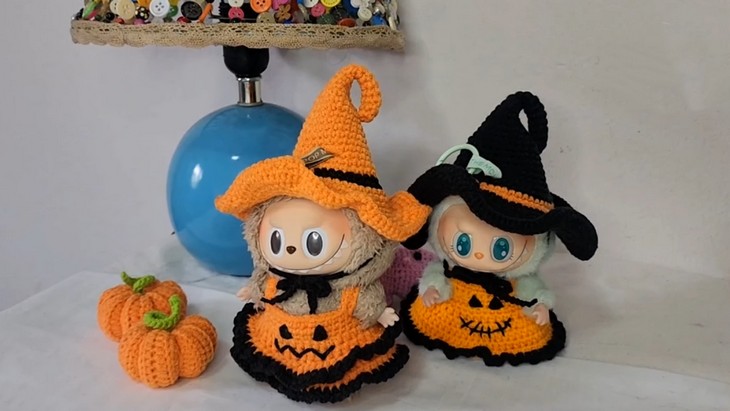
A Labubu hat will never be so detailed and accurate! Check out this tutorial to learn how to crochet a large witch Labubu hat that is finished with a giant ruffle brim and curled tip, with two swapping color combos available. Crocheting one for a 17cm or 24 cm doll will take no more than an hour with zero sewing needed. You can couple this crochet witch and wizard hat for Labubu with the Jack-o-Lantern pumpkin dress for girls, whose tutorial is also available.
So, if you have made up your mind to crochet these witch hats, whether for Labubu or amigurumi, continue reading this post till the end! There you will find the complete tutorial!
About the Designer: The designer behind this Halloween witch hat project is @JaneHandmade – she introduces her library as centered around creating, designing, and imagining through upcycling, refashioning, and rethinking. In other words, hobbies like crocheting, quilting, and DIY projects. But I found her so obsessed with the Labubu doll accessories and clothing, just like My Handmade, and she has most of her recent and even old tutorials for crocheting all things related to Labubu. Her admirable patterns include the Halloween set, the alien set, and even the Christmas set for Labubu.
Note: In respect of the creator’s pattern rights, there will be no provision of the written pattern. You can watch the tutorial at the end of this post.
Crochet Halloween Labubu Hat Tutorial
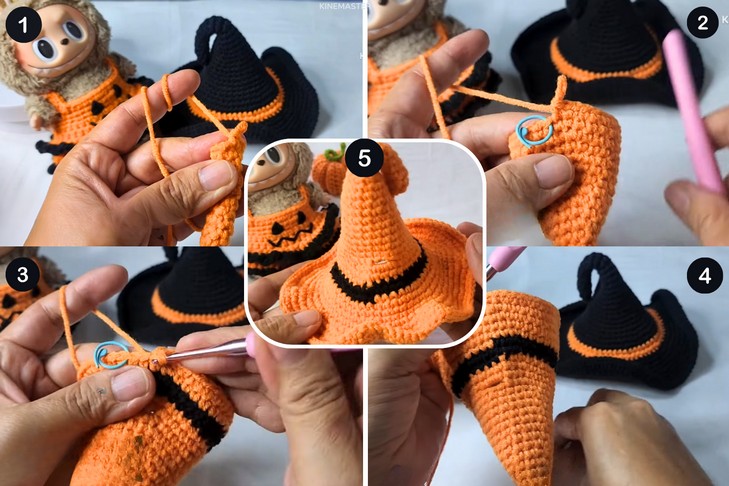
Skill Level: Beginner – Intermediate. This witch hat pattern is worked without sewing from the tip to the bottom and up to the brim with the color changes in the midsection. You will be working in the round with a closed end using the single crochet, slip stitch, chain, increase, and more. For the ruffle, you will be using the specific pattern.
Tutorial Timing: Approximately 22 minutes only. (This witch hat is so detailed, but the tutorial is super quick, so worth watching! You will also learn the ruffle brim, which can also be used for the bucket hat, and how to use the curly tip.)

Personalization Tips: As mentioned, choose from two color combos: black for the hat and orange for the stripe and the reverse of it, too. You can also add the Jack-o-Lantern pumpkin embroidery, and also avoid the curl very easily.
Pattern Type: A detailed on-screen written pattern is available if you find written instructions easy to follow along with.

Materials Needed
Gather the following suggested tools and materials for crocheting this pumpkin witch hat:
- 4 ply Milk Cotton yarn
- Crochet Hook No.5
- Scissors
- Yarn Needle
Techniques Used
Here’s a one-line guide for crocheting each stitch and technique in the witch hat pattern:
- Single Crochet (sc): Insert the hook into the stitch, yarn over, pull up a loop, yarn over again, and pull through both loops on the hook.
- Slip Stitch (sl st): Insert the hook into the stitch, yarn over, and pull through both the stitch and the loop on the hook.
- Chain (ch): Yarn over and pull the yarn through the loop on the hook to create a chain.
- Increase (inc): Work two single crochet stitches into the same stitch or space to create an increase.
- Ruffle Pattern: Follow the specified stitch sequence (e.g., alternating stitches) to form the ruffle effect as instructed in the pattern.
- Color Change: Complete the last stitch of the old color, yarn over with the new color, and continue crocheting.