How to Crochet Large Bat Plushie for Halloween
Need a huggable, plush, and giant crocheted companion for Halloween? With a stitch-by-stitch tutorial from Lala, learn how to crochet this kawaii, large bat plushie that is perfect for beginners. The bat amigurumi has larger-than-life eyes that look just oh-so cute, a Chibi body, and detailed wings with simple embroidery. Even with the large size, you can complete crocheting this plush bat in just 60 minutes thanks to the super bulky yarn. It will be irresistible to all ages and has room for customization.
So, if you have made up your mind to crochet this bat for Halloween, continue reading this post till the end. There you will find the complete tutorial!
About the designer: the designer behind this witch amigurumi project is @Lalacrochet – she basically runs a crochet shop but generously provides tutorials for premium wearables, accessories, and few frequently, tried amigurumi, too. Her notable tutorials are on a butterfly mermaid top, an Aperol Spritz bag charm, and a beehive lace summer top. From plushies, I recommend her crochet strawberry bear, Xmas amigurumi, and low-sew cat. The creator also shares relatable humor about the crocheting process and offers patterns for sale on an external shop. Her humorous but creative pattern was a cake hat and a poop emoji amigurumi! Everything is worth trying!
Note: In respect of the creator’s pattern rights, there will be no provision of the written pattern. You can watch the tutorial with on-screen instructions at the end of this post.

Crochet Bat Plushie Crochet Tutorial
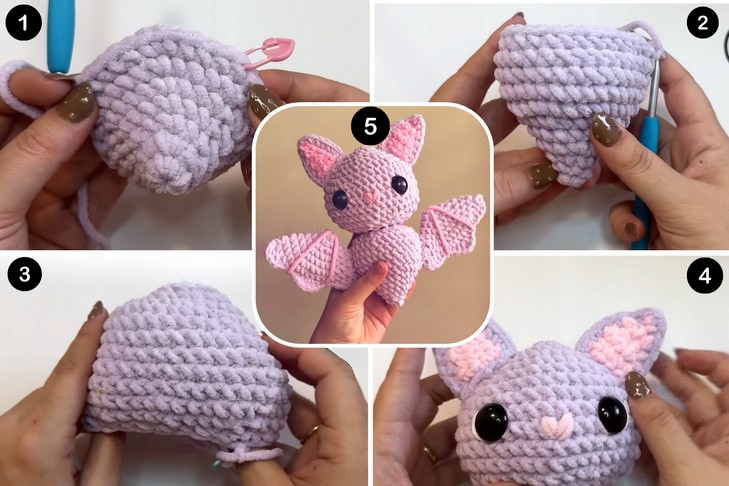
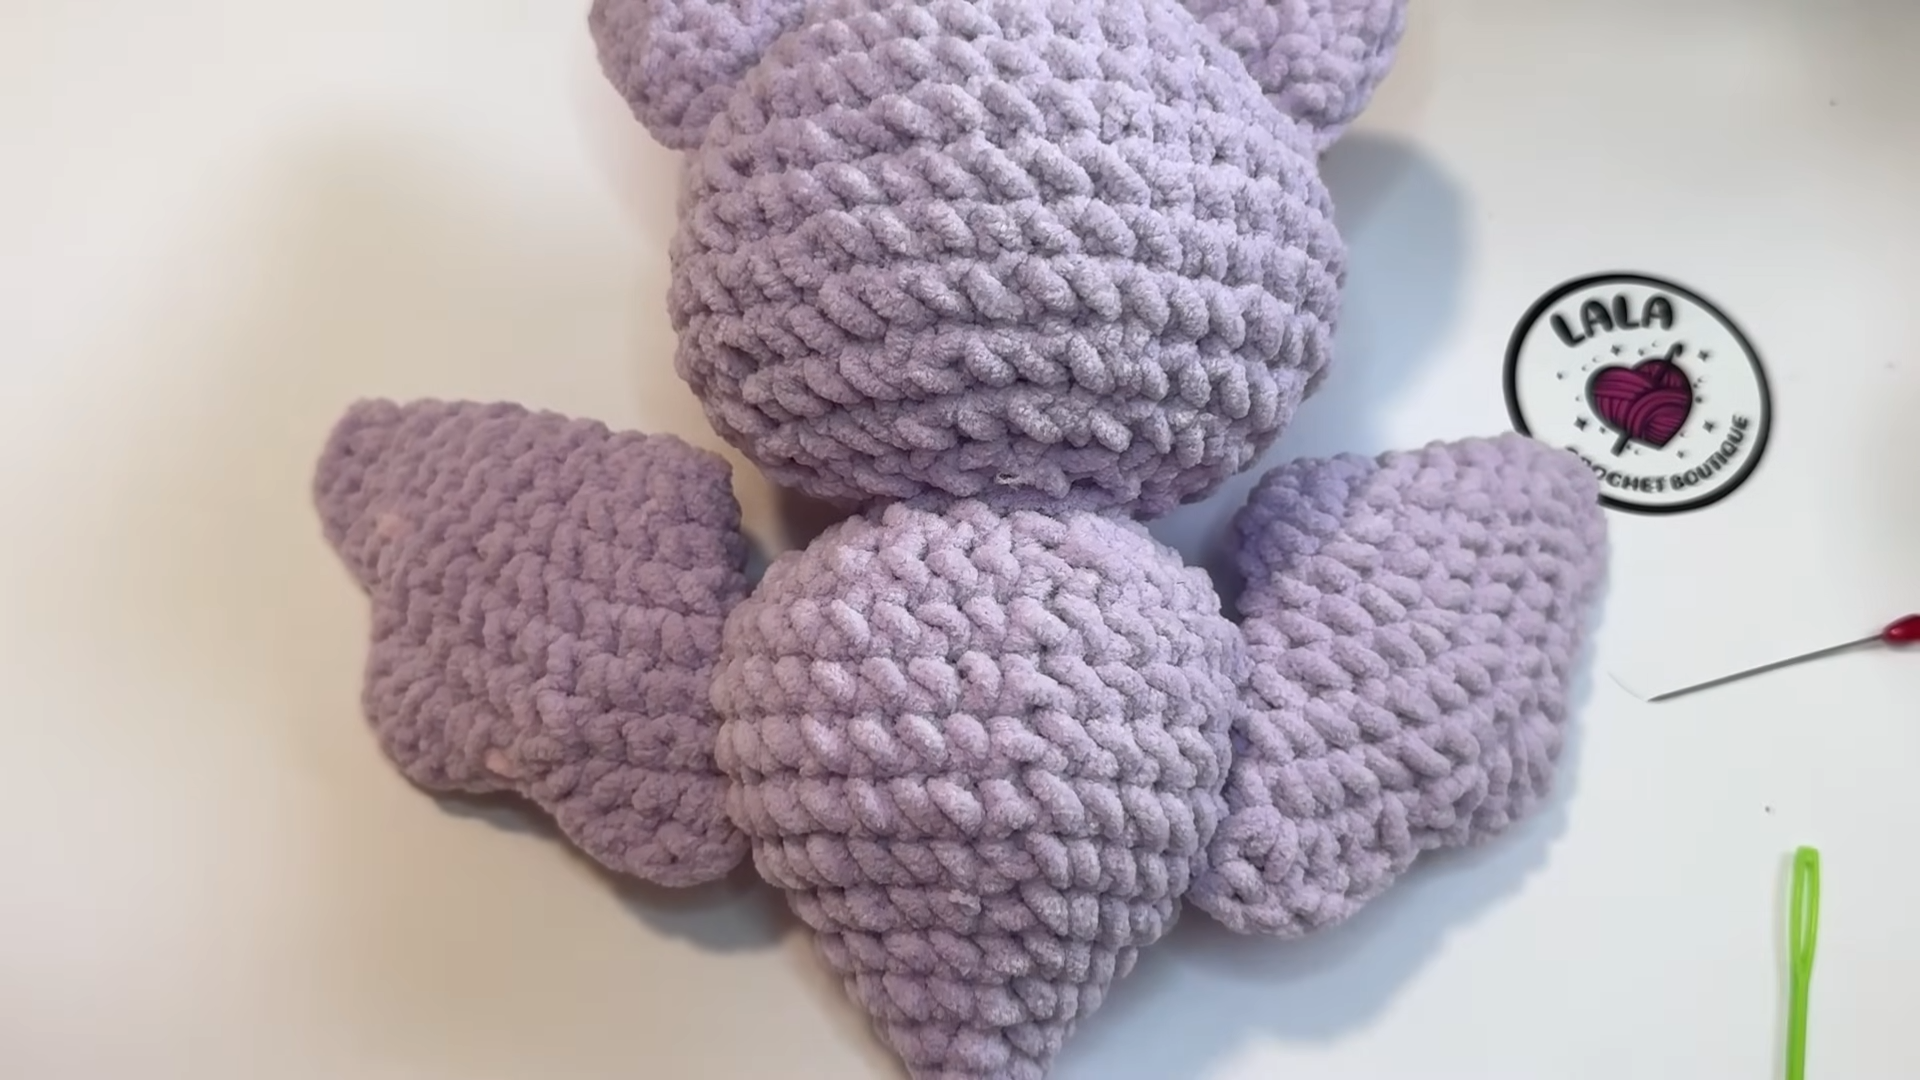
Skill Level: Beginner – Intermediate. This bat pattern is worked in several pieces like the Thin-Yarn Bat amigurumi. First, the double-layer wings, which start in a round using the single crochet, chain, slip stitch and increase to make a cone shape. Then folding, working around the using a pattern of double crochet, chain skipping, and half-double crochet for proper edging. You will also use basic embroidery using a darning needle. Then, a cone for the body of a bat plushie that also involves a decrease in shape. Ears are worked in flat and together using two colors. The last step is sewing!
Tutorial Timing: 41 minutes only (worth the time as you will learn two very clever ways of crocheting the ears and the wings of the bat plushie you may not have seen before. You will also see how chain skipping and stitches of different heights produce better results in shaping a fabric.)

Personalization Tips: You can always use the shades of black for crocheting this plush bat, or try the purple and even green. For the nose, you can also use the plastic nose for a better look, or use the felt. Like usual, the tutor omitted the smile, but you can add it. Also, add the witch hat accessory, bow, or crochet a cape. For a smaller version, use the DK or even thinner yarn.
Pattern Type: A detailed on-screen written pattern is available if you find written instructions easy to follow along with.
Tools & Materials
Gather the following suggested tools and materials for crocheting this Halloween bat plushie, mentioned in the tutorial:
- Yarn: Size 6 / Super Bulky / Jumbo chenille yarn in 2 colors (The creator used purple and pink).
- Crochet Hook: 4.5mm (U.S. size G/7).
- Scissors
- Darning needle (for weaving in ends)
- Stitch markers
- 18mm-20mm safety eyes
- Optional: Some white thread (likely for embroidering details).
Techniques Needed
Here’s a one-line guide for crocheting each stitch and technique in the bat pattern:
- MR (Magic Ring): Create a loop with yarn, insert the hook into the center, and work stitches into the loop, then pull tight to close.
- ch (Chain): Yarn over and pull through the loop on your hook to form a chain stitch.
- sc (Single Crochet): Insert the hook into the stitch, yarn over, pull up a loop, yarn over again, and pull through both loops on your hook.
- inc (Increase): Work two single crochet stitches into the same stitch to expand the piece.
- dec (Decrease): Insert the hook into the next two stitches, yarn over, pull through both loops, yarn over, and pull through the remaining two loops.
- slst (Slip Stitch): Insert the hook into the stitch, yarn over, and pull through both the stitch and the loop on your hook for a seamless join.
- FO (Fasten Off): Cut the yarn, pull the tail through the final loop, and tighten to secure your work.