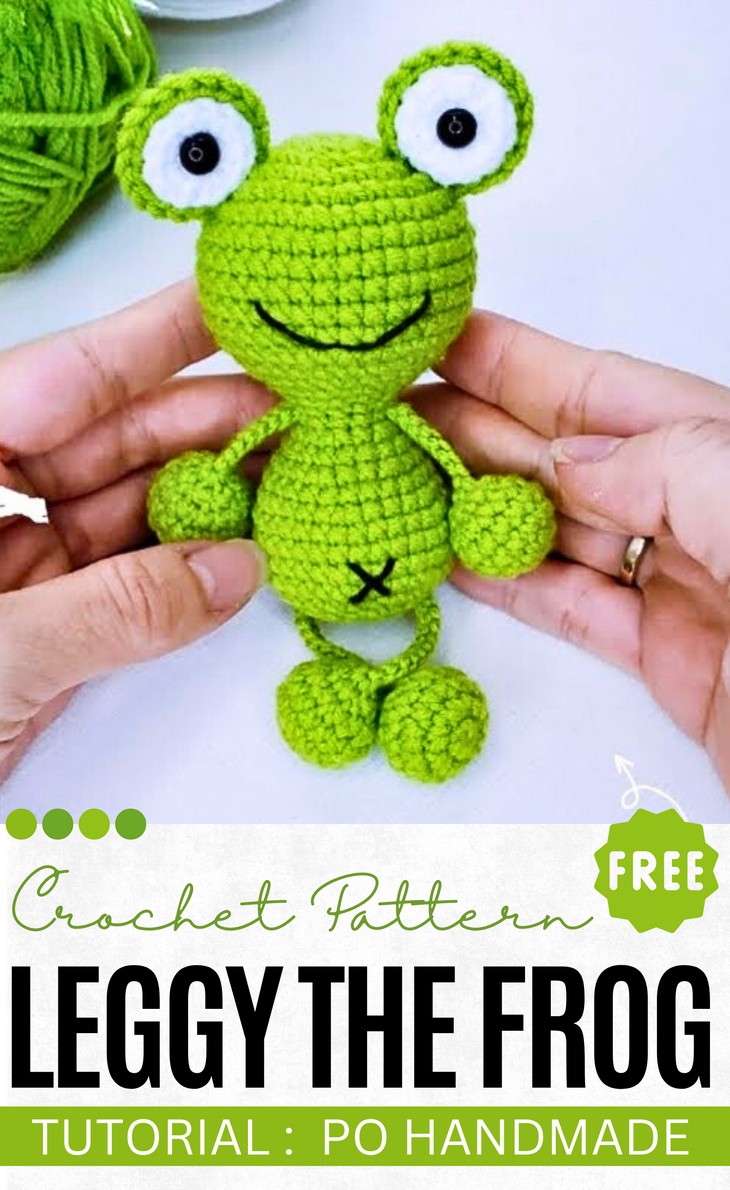
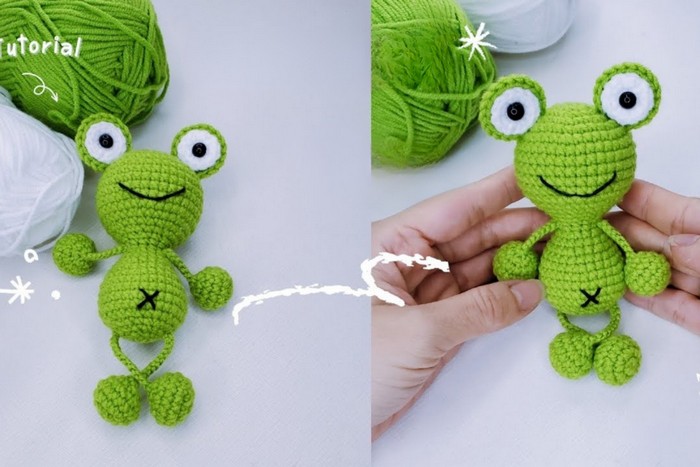
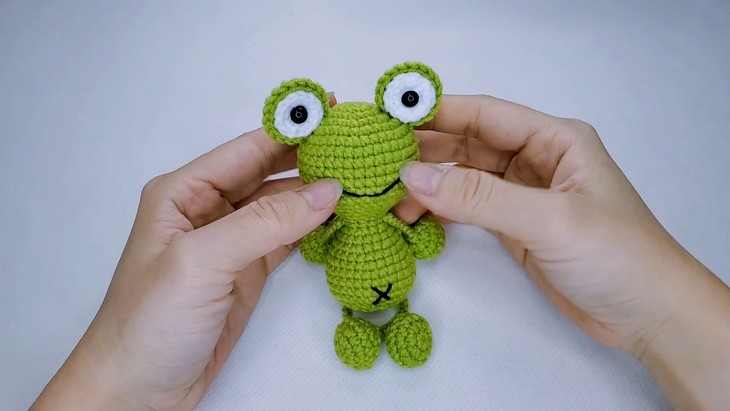
How to Crochet Leggy Frog Amigurumi (Tutorial for Beginners)
Learn how to crochet Leggy the Frog amigurumi with googly eyes, following a step-by-step tutorial presented by Po Handmade. This little frog features thin chain-stitch legs with tiny spheres, making it perfect for hanging from a car interior or as a bag hanger.
It uses the basic crochet stitches and is designed for even beginners. The complete guide to crocheting this frog amigurumi will be available at the end of this post!
Note: All the rights including pattern and media rights of this Leggy Frog Amigurumi Pattern and creator @Po Handmade are fully protected. Not having the ownership, we just provide link to the video tutorial and certain details about it to tackle this project easily!
Skill Level: Beginner
Tutorial Timing: 50 Minutes
Personalization Tips: Insert little magnets into your crochet mini frog amigurumi spheres to create a lovely curtain holder!
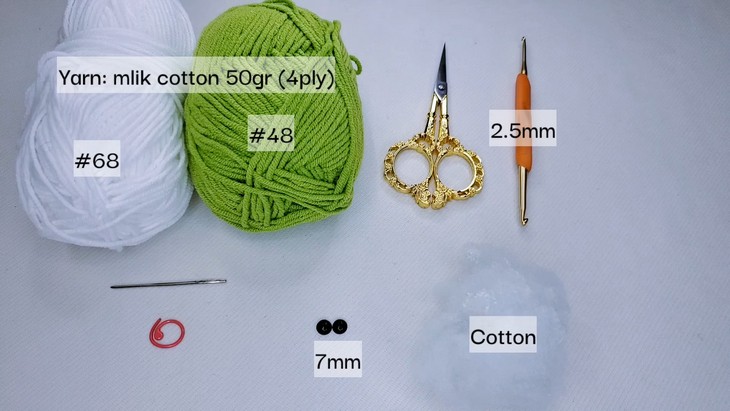
Supplies Used
The following are the materials and tools you’ll require to complete this crochet frog project:
- Milk Cotton Yarn #68 and #48
- 2.5 mm crochet hook
- 7mm Safety beads
Stitches Used
Here’s a quick guide for each of the stitches used to crochet the mini Leggy frog amigurumi:
1. Single Crochet (SC)
-
How to do it:
- Insert your hook into the next stitch.
- Yarn over (wrap yarn around the hook).
- Pull the yarn through the stitch (you’ll now have 2 loops on the hook).
- Yarn over again and pull through both loops.
2. Increase (INC or 2 SC in 1 stitch)
-
How to do it:
- Insert your hook into the next stitch.
- Yarn over and pull up a loop.
- Yarn over and pull through both loops (this completes 1 SC).
- Insert the hook into the same stitch again.
- Repeat the steps above (make another SC in the same stitch).
3. Decrease (DEC or SC2TOG)
-
How to do it:
- Insert your hook into the first stitch.
- Yarn over and pull up a loop (you’ll have 2 loops on the hook).
- Insert your hook into the next stitch.
- Yarn over and pull up another loop (you’ll now have 3 loops on the hook).
- Yarn over and pull through all 3 loops on the hook.
4. Chain Stitch (CH)
-
How to do it:
- Start with a slip knot on your hook.
- Yarn over (wrap yarn around the hook).
- Pull the yarn through the loop on your hook.
- Repeat as needed for the number of chains required.
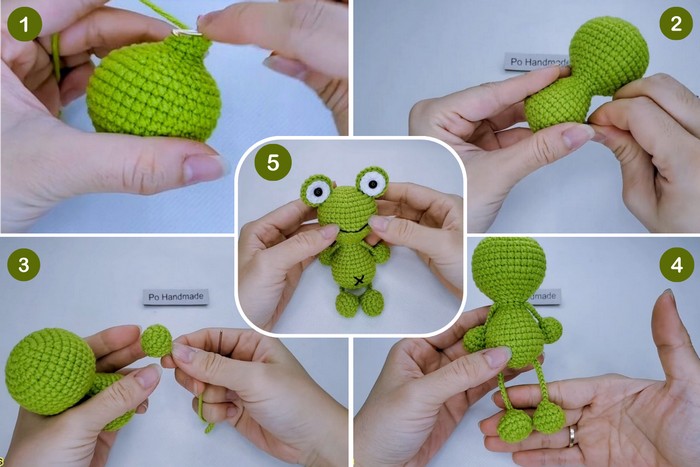
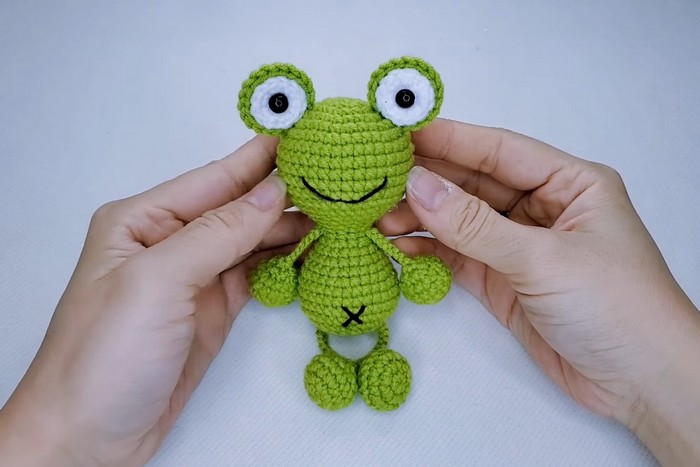
How’s it done?
- Start with a magic circle and crochet six single stitches to form the base for the frog.
- Gradually increase stitches in each row to shape the body, ensuring smooth transitions and symmetry.
- Use green yarn to crochet arms and legs, following the process of increasing and decreasing stitches.
- Create white and green circles for the frog’s eyes, attaching them securely to the body.
- Stitch the mouth and facial details, maintaining balance and alignment for a pleasant expression.
- Assemble all parts carefully, adding final touches like stuffing and securing threads for a neat finish.