
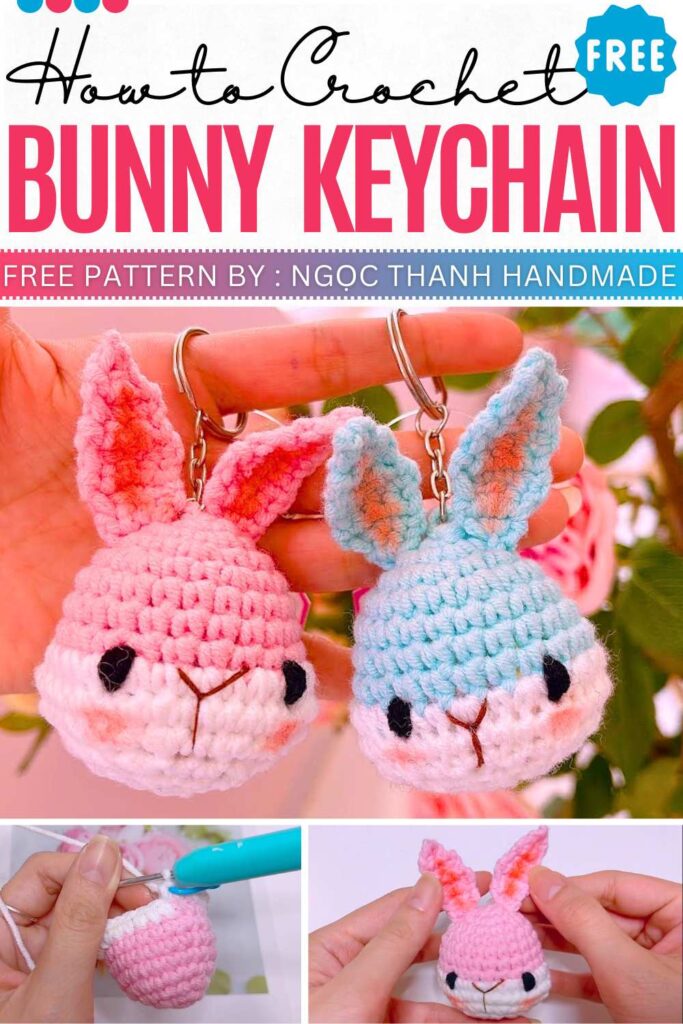
Free Crochet Mini Bunny Amigurumi Keychain Pattern
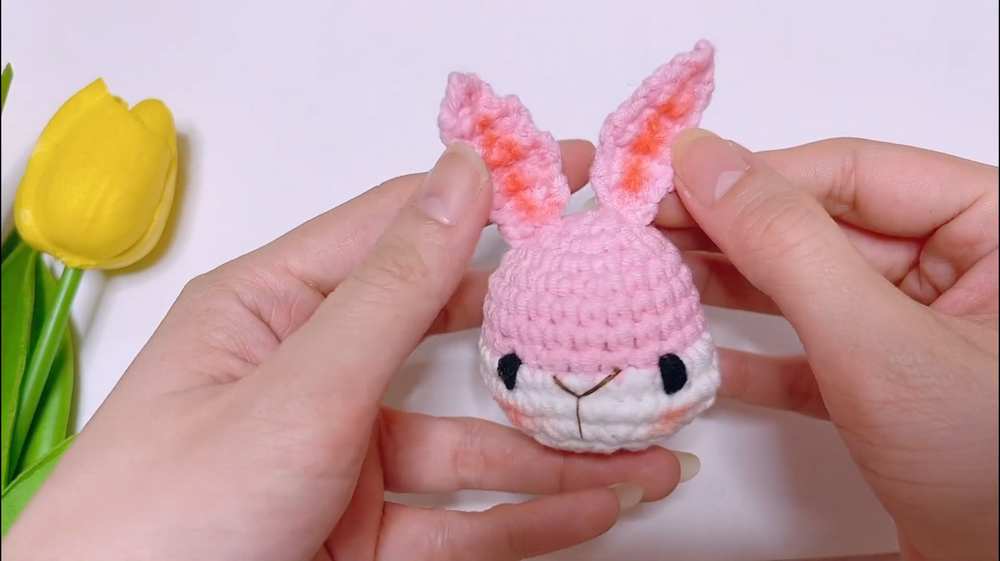
Spring is around the corner. So, learn how to crochet this cute bunny face amigurumi keychain in either pink or blue with a lovely white muzzle, kawaii eyes, and nose. I have a free bunny written pattern to share with you today that can be followed in less than 30 minutes. There are also blushes on the cheeks and the ears that make it one of the most elegant amigurumi bunnies.
The shape of the face is not simply round. It is very well-detailed and shaped, similar to a kawaii amigurumi bunny. You will simply love this crochet pattern. Let’s get started, as I will share both the US and UK patterns.
The designer behind this bunny amigurumi is @NITKA_KZ – she has quite a good grasp on kawaii amigurumi designing with added cuteness and surprises. More tutorials:
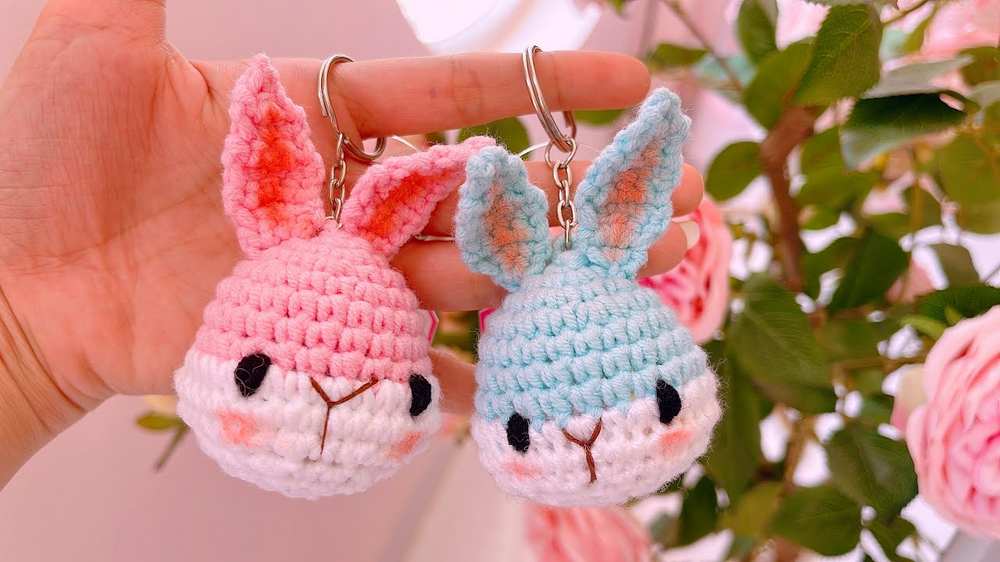
This crochet tutorial demonstrates how to make a mini rabbit keychain. The design features a two-tone head (pink/blue/orange top with a white bottom) and long ears.
Materials Needed
- Yarn: Milk Cotton yarn in your choice of main color (Pink, Blue, or Orange) and White. Small amounts of Black (eyes) and Brown (nose) thread are also needed.
- Hook: 2.5 mm.
- Other: Fiberfill stuffing, tapestry needle, keychain ring, and optional blush/eyeshadow for the cheeks.
Pattern Abbreviations
- MR: Magic Ring
- sc (US) / dc (UK): Single Crochet (US) / Double Crochet (UK)
- inc: Increase (2 stitches in 1)
- dec: Decrease (2 stitches into 1)
- w-inc: 3 single crochets in the same stitch (Triple Increase)
- M-dec: Triple decrease (3 stitches into 1)
- sl st: Slip Stitch
- ch: Chain
Pattern Instructions (US Terminology)
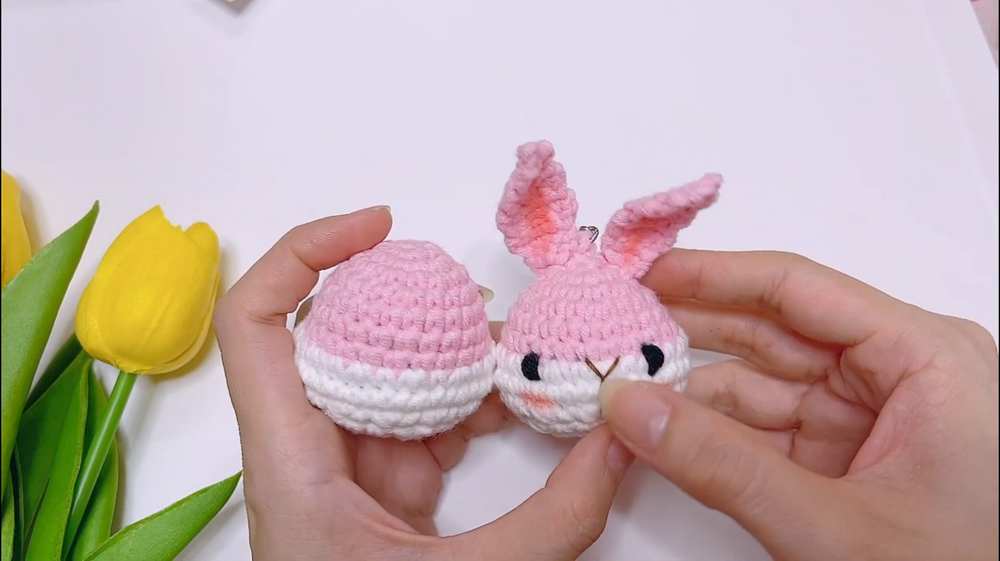
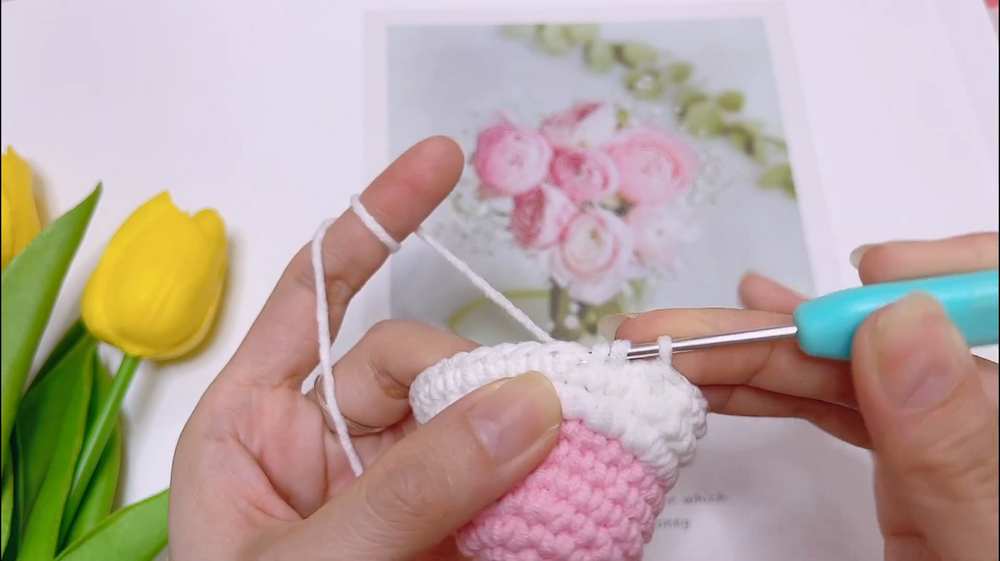
Rabbit Head
- R1: 6 sc in MR. (6)
- R2: 6 inc. (12)
- R3: (1 sc, 1 inc) x 6. (18)
- R4: (2 sc, 1 inc) x 6. (24)
- R5–7: 24 sc around (3 rounds). (24)
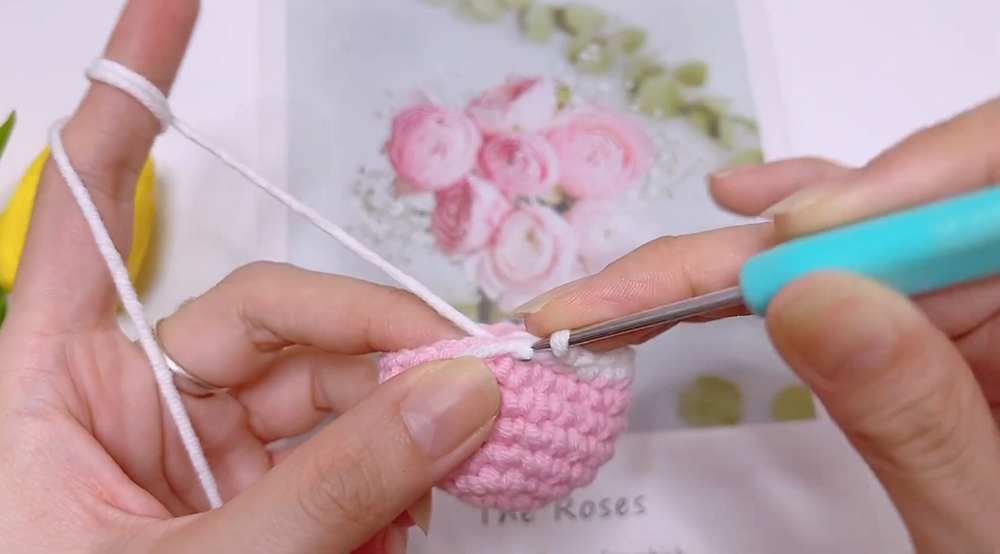
- R8: Switch to White yarn. 5 sc, 2 w-inc, (1 sc, 1 inc) x 5, 2 w-inc, 5 sc. (37)
- R9: 37 sc around. (37)
- R10: 5 sc, 2 M-dec, (1 sc, 1 dec) x 5, 2 M-dec, 5 sc.
- R11: (2 sc, 1 dec) x 6. (18)
- R12: (1 sc, 1 dec) x 6. (12)
- R13: 6 dec to close. (6). Fill with fiberfill before closing completely. Ensure the cheek areas are stuffed well to define the shape.
Ears (Make 2)
The ears are worked directly onto the head or separately and sewn on.
- R1: Attach yarn to the top of the head. Work 2 sc into the head surface. Ch 1, turn.
- R2: 1 sc, 1 inc. (3) Ch 1, turn.
- R3: 1 sc, 1 inc, 1 sc. (4) Ch 1, turn.
- R4–5: 4 sc. (4) Ch 1, turn.
- R6: 1 sc, 1 dec, 1 sc. (3) Ch 1, turn.

- R7: 3 sc. (3) Ch 1, turn.
- R8: 1 sc, 1 dec. (2) Ch 1, turn.
- R9: 1 dec. Fasten off and weave in ends.
Pattern Instructions (UK Terminology)
Rabbit Head
- R1: 6 dc in MR. (6)
- R2: 6 inc. (12)
- R3: (1 dc, 1 inc) x 6. (18)
- R4: (2 dc, 1 inc) x 6. (24)
- R5–7: 24 dc around (3 rounds). (24)
- R8: Switch to White yarn. 5 dc, 2 w-inc, (1 dc, 1 inc) x 5, 2 w-inc, 5 dc. (37)
- R9: 37 dc around. (37)
- R10: 5 dc, 2 M-dec, (1 dc, 1 dec) x 5, 2 M-dec, 5 dc.
- R11: (2 dc, 1 dec) x 6. (18)
- R12: (1 dc, 1 dec) x 6. (12)
- R13: 6 Dec to close. (6). Fill with stuffing before closing completely.
Ears (Make 2)
- R1: Attach yarn to the top of the head. Work 2 dc into the head surface. Ch 1, turn.
- R2: 1 dc, 1 inc. (3) Ch 1, turn.
- R3: 1 dc, 1 inc, 1 dc. (4) Ch 1, turn.
- R4–5: 4 dc. (4) Ch 1, turn.
- R6: 1 dc, 1 dec, 1 dc. (3) Ch 1, turn.
- R7: 3 dc. (3) Ch 1, turn.
- R8: 1 dc, 1 dec. (2) Ch 1, turn.
- R9: 1 dec. Fasten off and weave in ends.
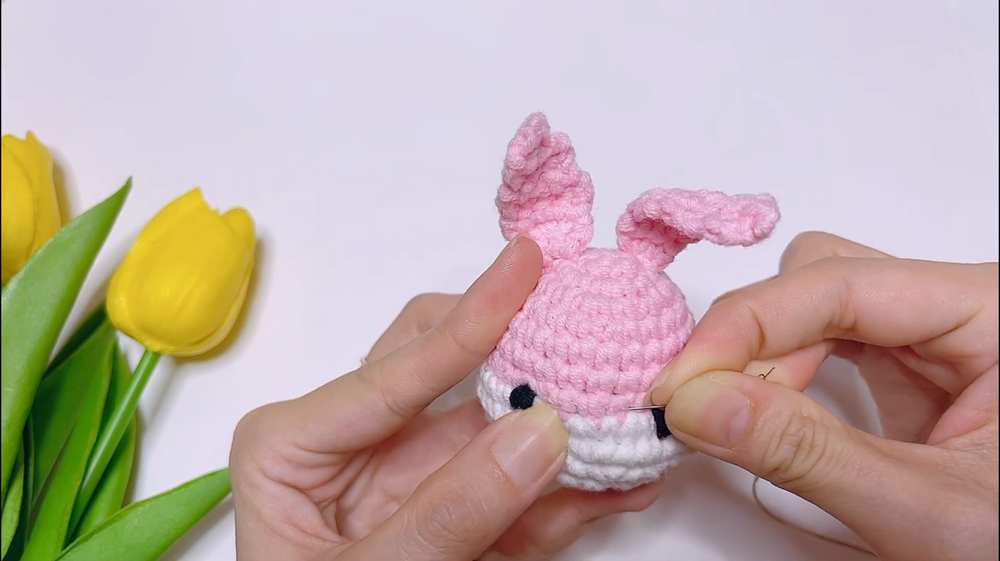
Assmebly
- Eyes: Using black thread, embroider two horizontal lines or small “V” shapes between the white and colored sections of the head. Space them about 5 stitches apart.
- Nose & Mouth: Use brown thread to embroider a small “Y” shape in the center of the white section to create the nose and mouth.
- Cheeks: Apply a small amount of pink or orange blush/eyeshadow to the prominent cheek areas and the inner part of the ears for a cute look.
- Keychain: Attach the keychain ring to the top of the head between the ears.
Video Tutorial