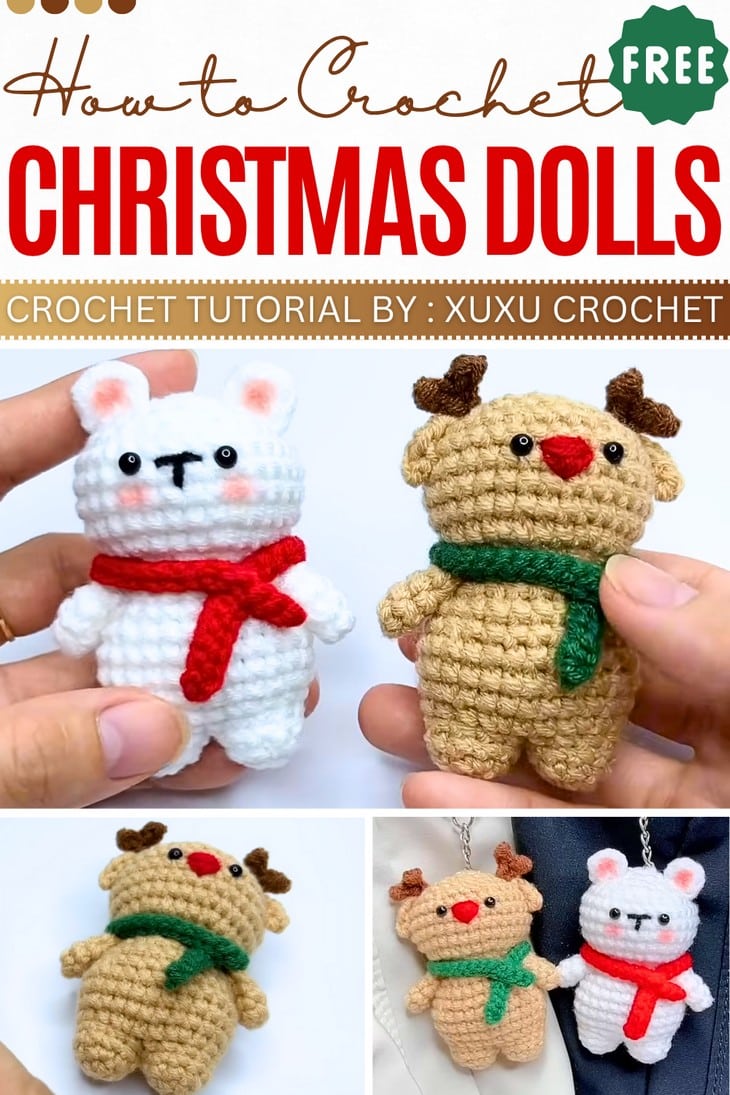
How to Crochet Mini Christmas Dolls (Reindeer and Polar Bear)
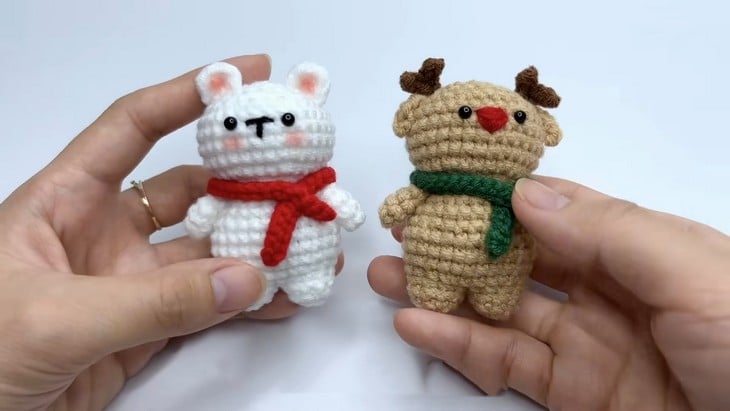
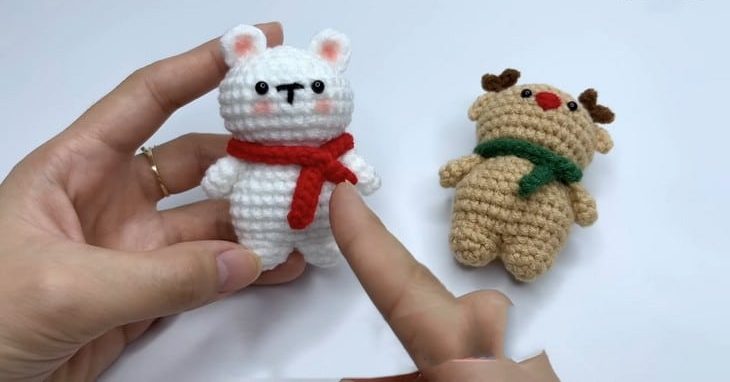
In this post, I have brought another couple of Christmas gift ideas with a tutorial for beginners. You are gonna crochet a set of mini Christmas dolls that includes a reindeer and a polar bear amigurumi, both super easy, even for absolute amigurumi enthusiasts. Both these amigurumi need the same base pattern and, with a little customization, can be turned into a reindeer or bear. They are much more similar to previous Christmas dolls, but a lot easier and quicker.
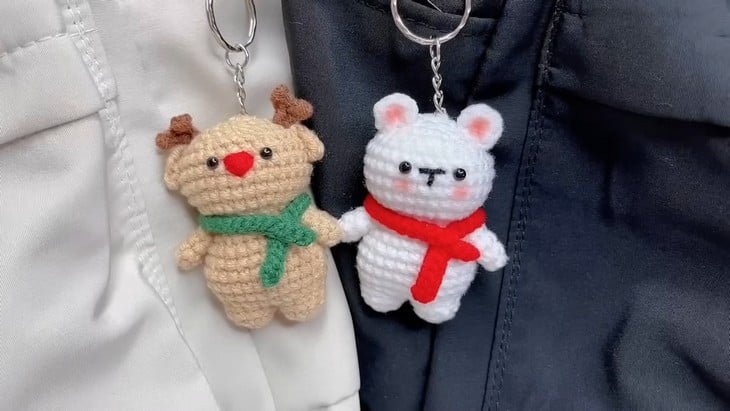
You will love how the scarf will be wrapped around these mini dolls, the kawaii finish, and the blush finish. You can gift these dolls to a little one around, as the pattern is simply no-sew. They are also the best ornaments.
So, if you are ready to crochet this Christmas set, continue reading this post till the end. There you will find the complete tutorial. It will certainly be the best gift ever!
Crochet Reindeer & Bear Christmas Dolls
About the Designer: The designer behind this Christmas animal doll is @xuxucrochet – her animal and flower bag charms, ornaments, and pouches are always oh-so-cute. She also crochets the accessories and wearables, all with beautiful touches.
She has a whole series of quick crochet Christmas projects, including Christmas wreaths, capybara, other Christmas trees, and much more, of which the animal tree is my favorite!
Note: In respect of the creator’s rights, there will be no provision of the written pattern. You can watch the tutorial with on-screen written instructions at the end of this post.
All Supply Suggestions
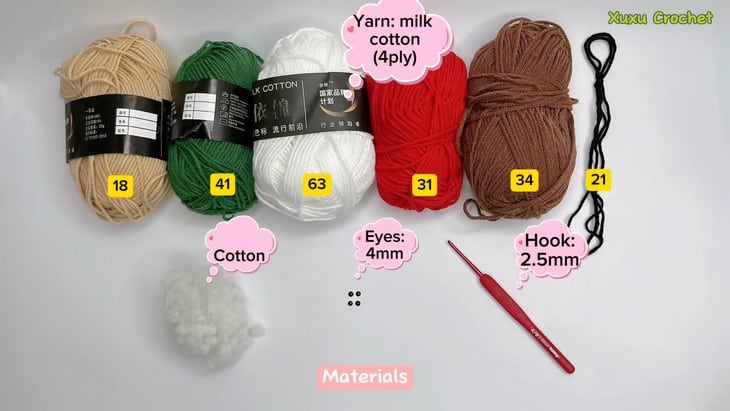
To follow through with the tutorial, gather the following suggested tools and materials for crocheting this mini doll set:
- Milk Cotton yarn 50g: In many colors, including light brown (reindeer body/arms), dark brown (reindeer antlers), white (bear body/ears), black (bear nose), red and blue/green (scarves/reindeer nose).
- 2.5 mm Crochet Hook
- (4 mm Safety Eyes): A pair for each character.
Other materials:
- Stuffing/Fiberfill
- (Tapestry/Yarn Needle): For assembly and embroidery.
- (Stitch Marker)
- (Hot Glue/Glue Gun)
- (Blush/Pink Makeup): Used to add color to the bear’s cheeks.
- (Keychain Hardware): To attach to the finished amigurumi.
Crochet Christmas Reindeer & Bear Tutorial
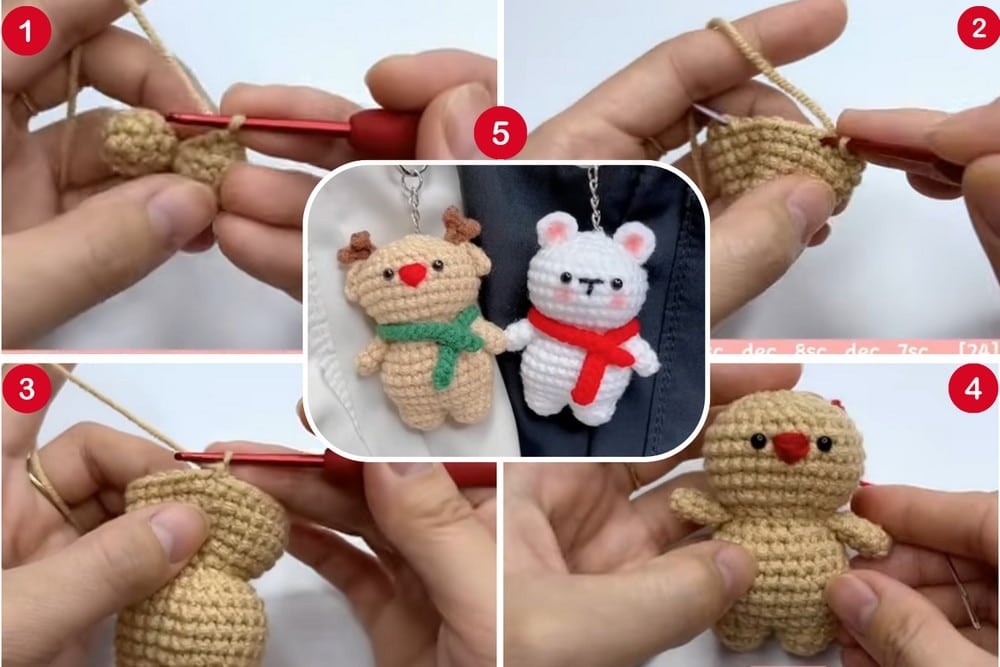
Quick Summary & Skill Level: You will work the base doll pattern in rounds from the legs up to the head as separate half spheres. You will follow the same approach as in the crochet Labubu. First, separately crochet the legs, join them using a slip stitch, and continue working around. Color changes, BLO, slip stitch, and single crochet are used.
The whole body, from legs to head, is completely no-sew. Crochet the arms separately and sew them in the end. The tutor will teach you both the amigurumi in one tutorial with reindeer antlers using chain stitch and single crochet.
Tutorial Timing: 44 Minutes
Tips before getting started: You can also use the brown yarn to crochet a grizzly Christmas amigurumi. The tutorial uses red yarn for the reindeer’s nose, but this can be changed to a black embroidered nose.
You can also crochet a small mouth for your dolls by embroidery. For the bear, blush is used to give a soft, rosy cheek look; this step can be skipped, or users could embroider a small mouth instead.
Techniques Needed
Here’s a list of quick guides to each crochet stitch for these crochet buddies:
- Chain Stitch – Yarn over and pull through the loop on your hook to create a simple chain used for foundations or accessories.
- Slip Stitch – Insert the hook, yarn over, and pull through both loops to join pieces or finish edges smoothly.
- Half Double Crochet (HDC) – Yarn over, insert the hook into the stitch, yarn over again, pull through, and yarn over once more to pull through all loops.