
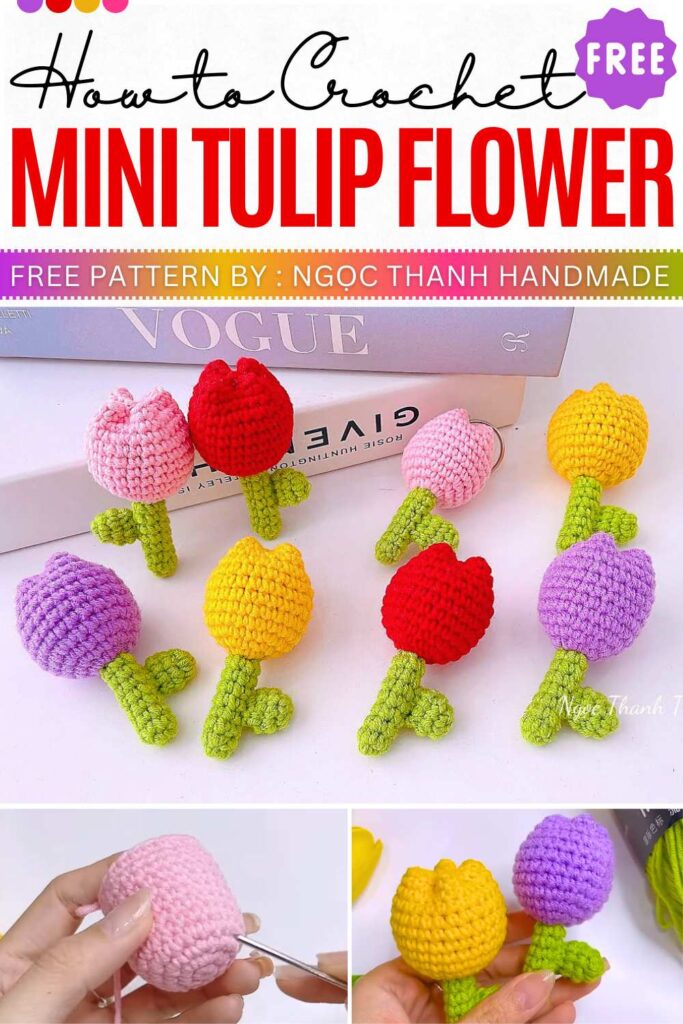
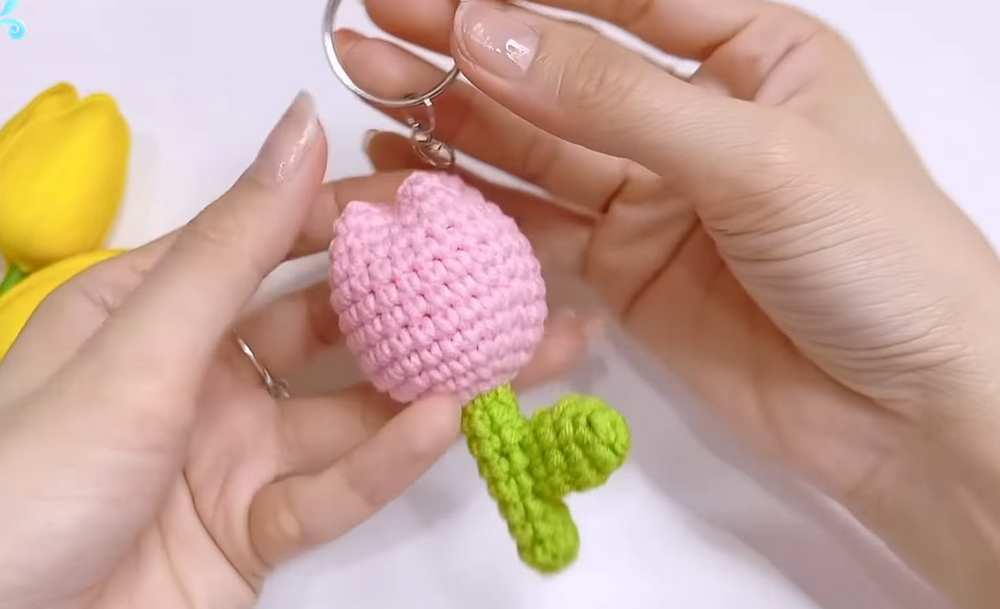
Free Crochet Mini Tulip Flower Keychain Pattern
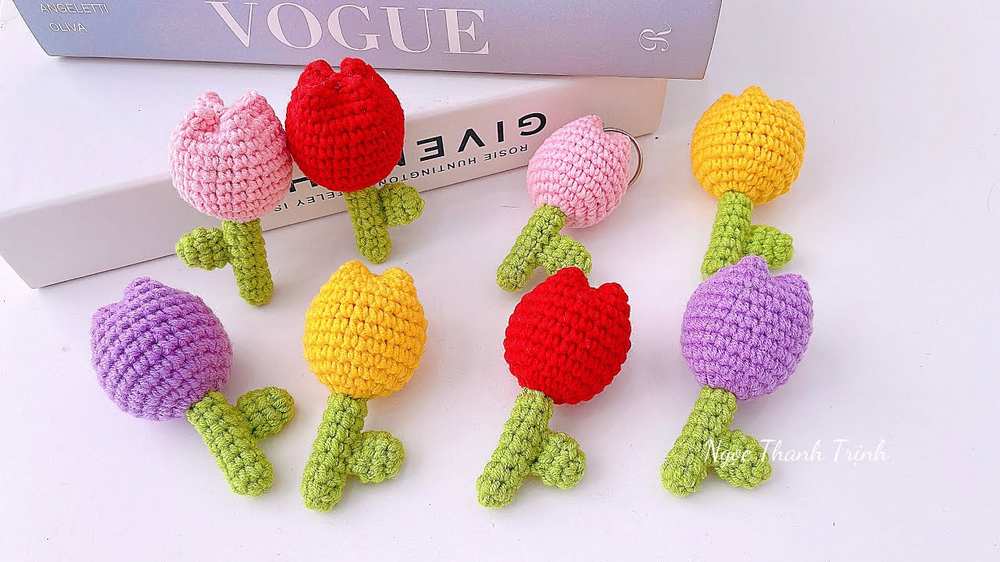
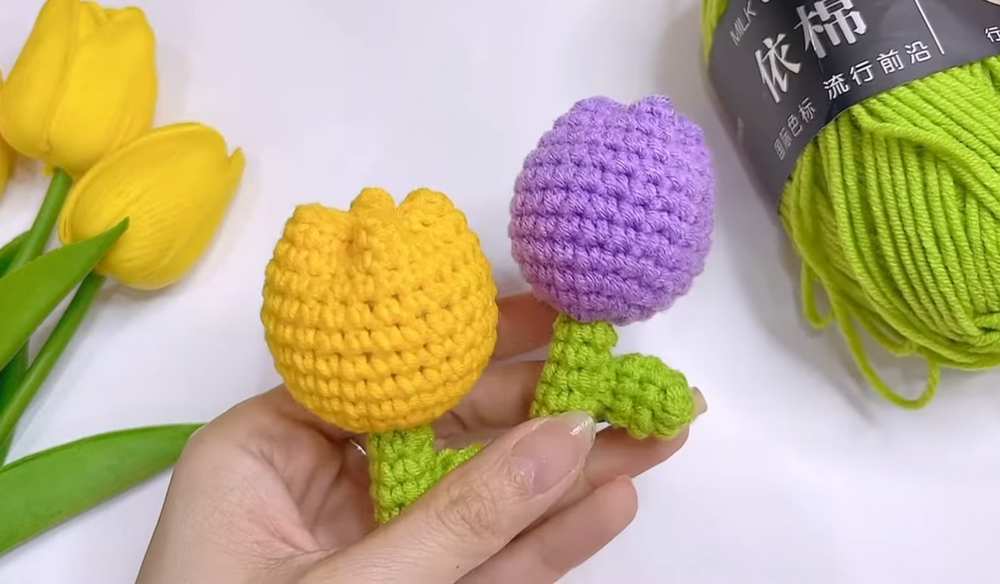
In this tutorial, I will share a written pattern for the easiest method of crocheting a stuffed tulip in any color. This is a classical pattern and makes a cute little tulip that needs little sewing. Perfect when you don’t want to crochet and attach separate petals. The stem is also stuffed. You can choose from red, purple, yellow, and pink tulips. You will be crocheting three parts: the tulip head, the stem, and a small leaf.
We shall basically crochet an open cylinder and cross-stitch the top part after stuffing. You can crochet it very quickly for the spring decorations and bag charms. I will share both the US and UK patterns here.
Crochet Mini Tulip
The designer behind this tulip amigurumi is @NITKA_KZ – she has quite a good grasp on kawaii amigurumi designing with added cuteness and surprises. More tutorials:
Materials
- Yarn: Milk Cotton (50g or 125g) in Pink (or preferred flower color) and Green
- Hook: 2.5 mm (use 3.0 mm for a larger size)
- Stuffing: Fiberfill / Polyester stuffing
- Tools: Tapestry needle, scissors
- Optional: Keychain ring
Abbreviations (US Terms)
- MR: Magic Ring
- ch: Chain
- sc: Single Crochet
- inc: Increase (2 sc in 1 st)
- dec: Decrease (sc 2 together)
- sl st: Slip Stitch
- st(s): Stitch(es)
- * ( )n: Repeat sequence in brackets n times
Pattern
Flower Body (Pink)
- R1: MR, 6 sc (6)
- R2: 6 inc (12)
- R3: (1 sc, 1 inc) * 6 (18)
- R4: (2 sc, 1 inc) * 6 (24)
- R5 – R12: 24 sc (24)
- Sl st to join. Fasten off, leave a long tail for sewing.
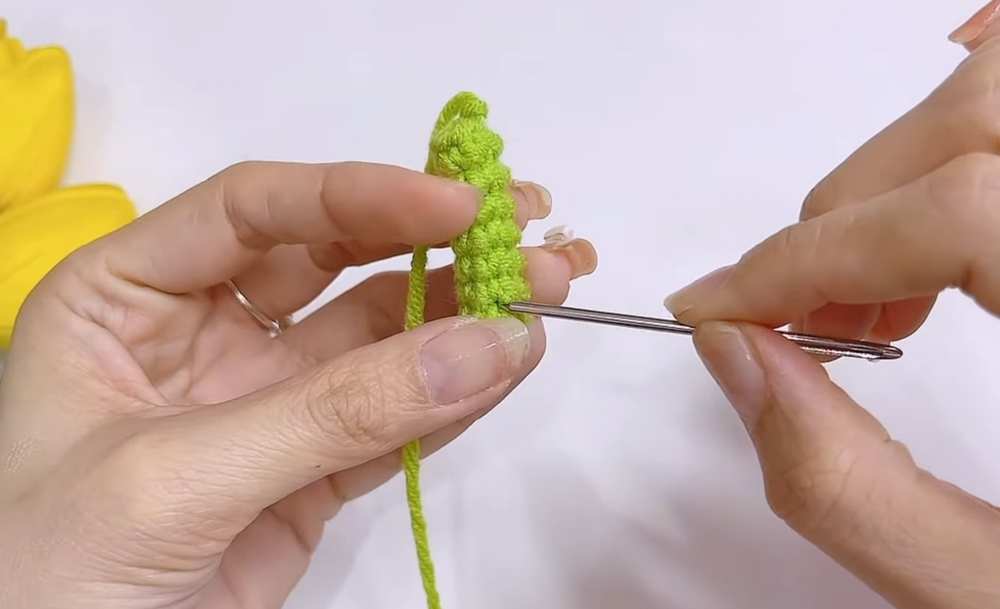
Stem (Green)
- R1: MR, 6 sc (6)
- R2 – R8: 6 sc (6)
- Fasten off, leave a tail for sewing.
Leaf (Green)
- R1: MR, 4 sc (4)
- R2: (1 sc, 1 inc) * 2 (6)
- R3: (2 sc, 1 inc) * 2 (8)
- R4: (2 sc, 1 dec) * 2 (6)
- Fasten off, leave a tail for sewing.
Assembly Instructions
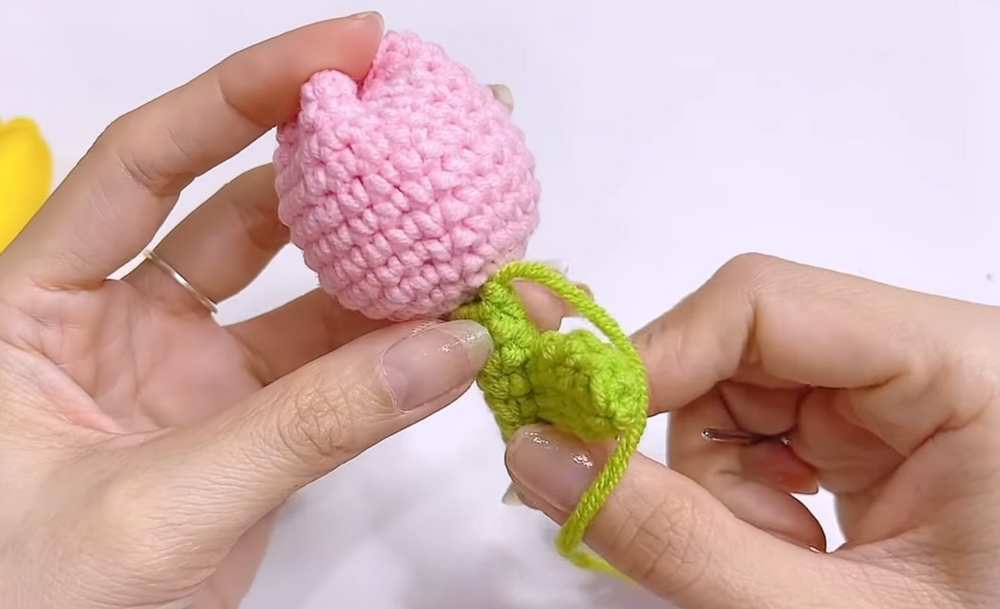
- Leaf to Stem: Sew the leaf onto the side of the stem, positioned approximately at R3 or R4 of the stem. Secure tightly and hide the yarn tail inside.
- Stem Preparation: Lightly stuff the green stem with a small amount of fiberfill.
- Stem to Flower: Align the top of the stem with the center bottom (MR) of the flower body. Sew the stem to the base of the flower. Ensure it is centered and secure.
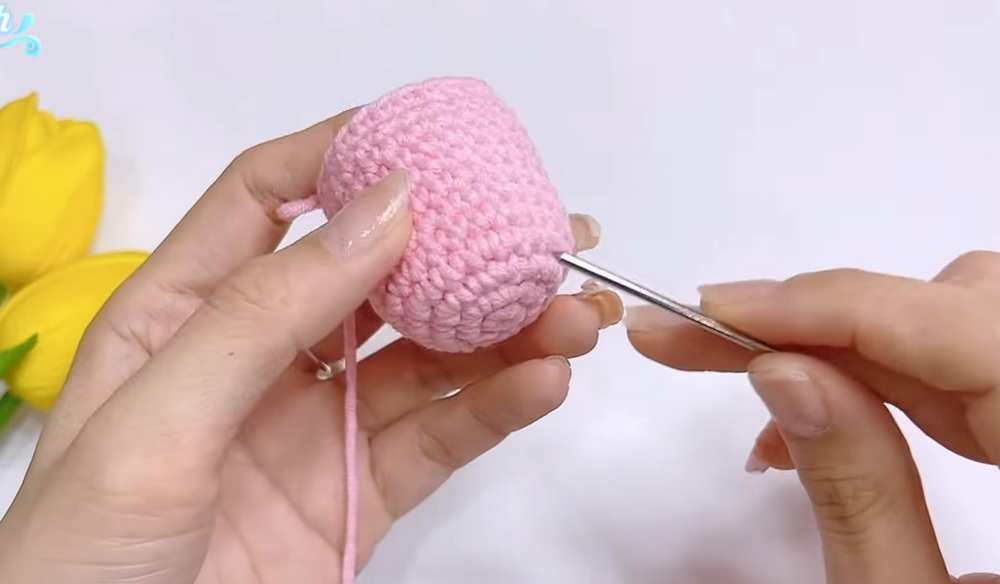
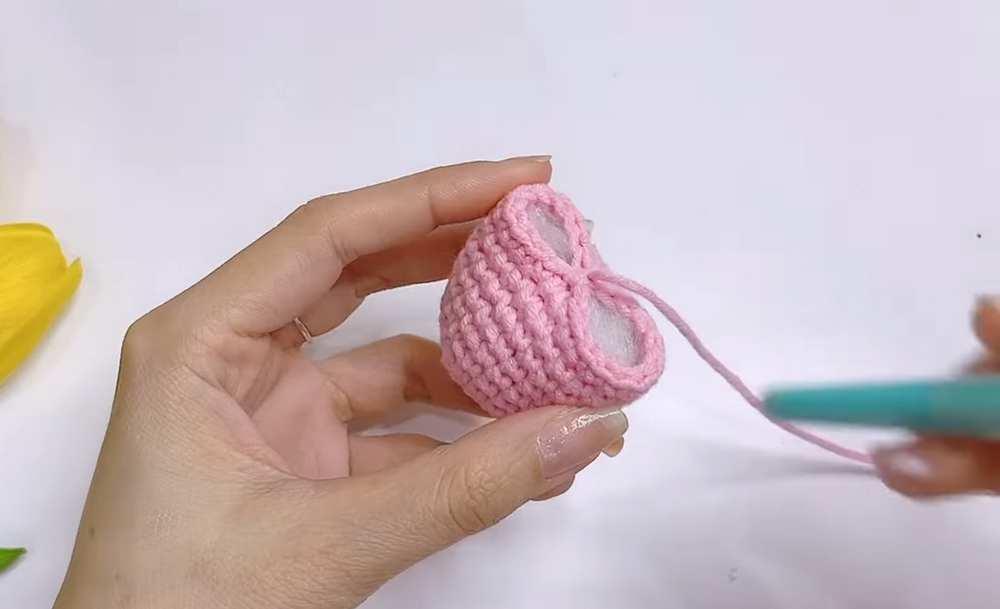
- Stuffing Flower: Fill the flower body firmly with fiberfill.
-
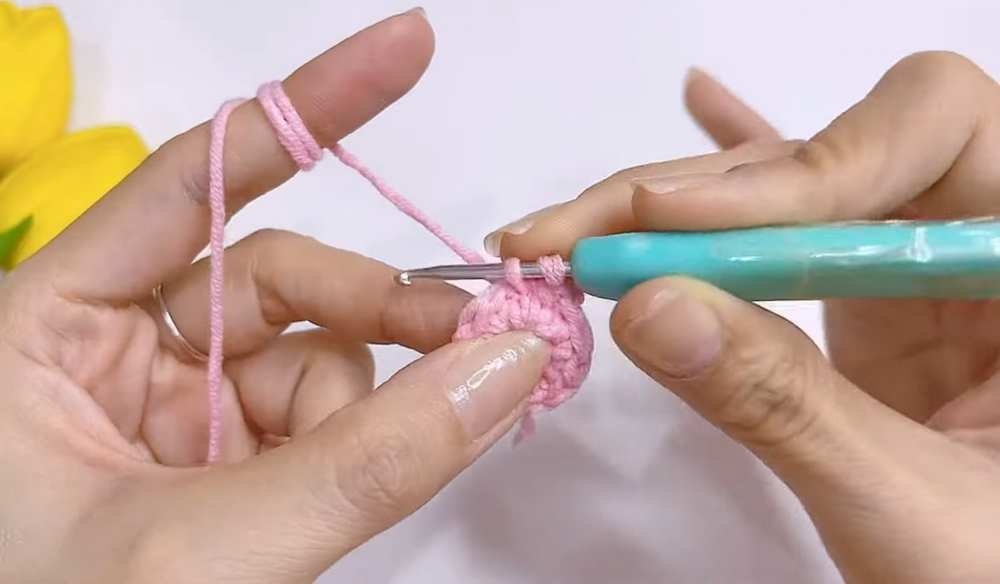
Closing the Top (Tulip Shape):
- Thread the long tail from the flower body.
- Flatten the top opening and sew the two middle stitches of the opposite sides together.
- Pull the remaining two sides toward the center point (forming a “+” shape).
- Sew through the center of all four “petals” to lock them in place.
- This creates the characteristic four-pointed pinched top of the tulip.
Video Tutorial
Abbreviations (UK Terms)
- MR: Magic Ring
- ch: Chain
- dc: Double Crochet
- inc: Increase (2 dc in 1 st)
- dec: Decrease (dc2tog)
- ss: Slip Stitch
- st(s): Stitch(es)
- * ( )n: Repeat sequence in brackets n times
Pattern (UK Terms)
Flower Body (Pink)
- R1: MR, 6 dc (6)
- R2: 6 inc (12)
- R3: (1 dc, 1 inc) * 6 (18)
- R4: (2 dc, 1 inc) * 6 (24)
- R5 – R12: 24 dc (24)
- ss to join. Fasten off, leave a long tail for sewing.
Stem (Green)
- R1: MR, 6 dc (6)
- R2 – R8: 6 dc (6)
- Fasten off, leave a tail for sewing.
Leaf (Green)
- R1: MR, 4 dc (4)
- R2: (1 dc, 1 inc) * 2 (6)
- R3: (2 dc, 1 inc) * 2 (8)
- R4: (2 dc, 1 dec) * 2 (6)
- Fasten off, leave a tail for sewing.
Assembly Instructions
- Leaf to Stem: Sew the leaf onto the side of the stem, positioned approximately at R3 or R4 of the stem. Secure tightly and hide the yarn tail inside.
- Stem Preparation: Lightly stuff the green stem with a small amount of fiberfill.
- Stem to Flower: Align the top of the stem with the center bottom (MR) of the flower body. Sew the stem to the base of the flower. Ensure it is centered and secure.