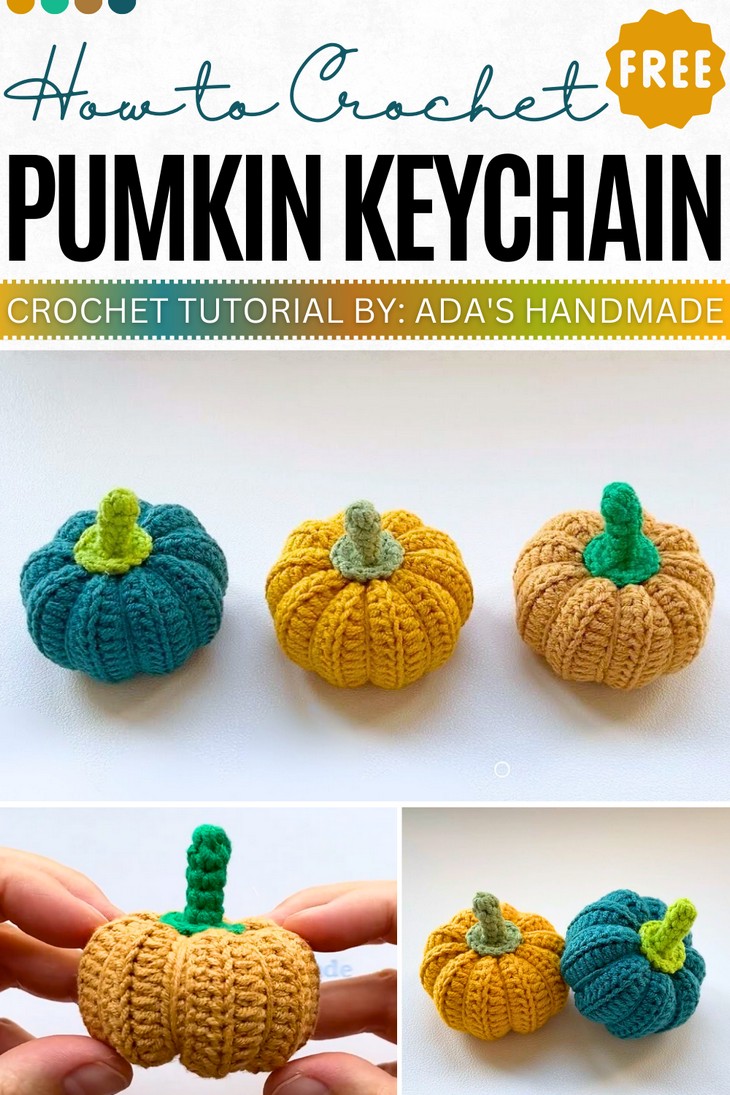
How to Crochet Most Detailed Pumpkin Keychain (Low-Sew Method)
Here is another tutorial for how to crochet a mini pumpkin amigurumi from a rectangle, but with the shape-as-you-go method that results in a super accurate shape. It, therefore, requires little sewing (just for the middle) and has the same cute ribs and slice effect. Luckily, the pumpkin pattern does not need to work in the round. The result will be a super professional pumpkin design that will certainly make your amigurumi look seamless. You can crochet the set of three each in a different color and sell at craft fairs, or complete your centerpiece for Thanksgiving.
So, if you are interested in crocheting this 20-minute pumpkin amigurumi by yourself, continue reading this post till the end. There you will find the complete tutorial.
About the Designer: The designer behind this most detailed pumpkin project is @adashandmade – she always focuses on tutorials for oh-so-cute, professionally designed, small and quick crochet items, including pouches and holders like drawstring bags, large capacity waffle bags, and small card holders. It also features instructions for a wide range of accessories, such as bows, flower hair clips, keychains, and other small crafts. Additionally, you can find tutorials for figures and objects like pineapples, apples, and strawberries, which are used as keychains or decorations. Many crochet appliques and amigurumi are also available.
Note: In respect of the creator’s pattern rights, there will be no provision of the written pattern. You can watch the tutorial at the end of this post.

Crochet Pumpkin Keychain Tutorial
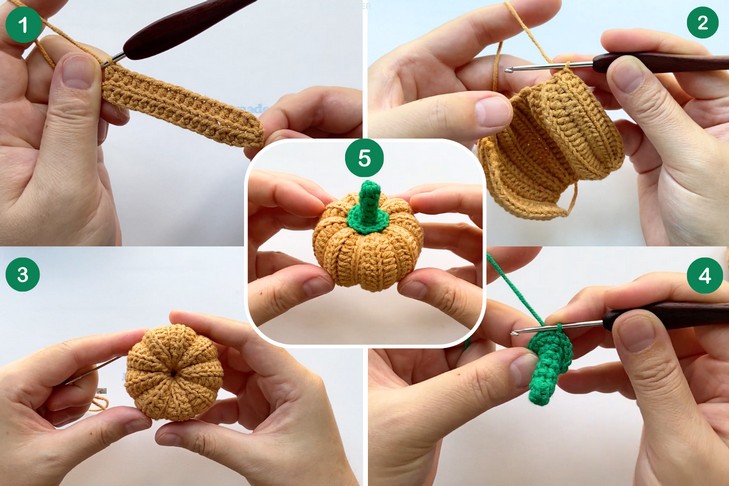
Skill Level: Beginner – Intermediate. To crochet the pumpkin, you’ll start with the slip knot and initial chain stitches. Slip stitches (slst) for the edges, while half double crochets (hdc) form the body with texture. The stitch pattern uses back-loop-only crochet for a ribbed effect that adds elasticity. For the stem. You will use the magic ring, followed by single crochet (sc) and increasing stitches. These techniques are combined in an easy-to-follow pattern!
Tutorial Timing: Approximately 15 minutes only. (Most of the mini pumpkin patterns use the rectangle pattern, but this one is much cleverer thanks to the low-sew method used. You will also learn the ribbed pattern that is used in sweaters, cuffs, and cozies.)

Personalization Tips: You can also crochet this pumpkin amigurumi in non-traditional colors like the tutor used, i.e., blue, yellow, and brown, and even green. For the stems, she uses three shades of green. You can also use the brown and even the light green. Adding a mix of small and large pumpkins to your centerpiece or display is the end goal of this tutorial. You can also use the plush yarn!
Pattern Type: The on-screen written pattern is available if you find written instructions easy to follow along with.
Materials and Tools
Gather the following suggested tools and materials for crocheting this lovely fall pumpkin amigurumi:
- Use the DK yarn or 3ply yarn
- 2.5 mm crochet hook
- Polyester fiberfill
- Sewing needle

Techniques Used
To understand the instructions and the pattern for the pumpkin, learn the following stitches and techniques:
- Slip Knot: Create a secure base loop to start your project.
- Chain Stitch: Create a row of loops to act as your foundation.
- Slip Stitch (slst): Insert the hook, pull through, and join seamlessly for edges or shaping.
- Half Double Crochet (hdc): Yarn over, pull through three loops to make a textured stitch.
- Back-Loop-Only Crochet: Insert the hook into the back loop to create a ribbed texture.
- Magic Ring: Form a tight, adjustable loop as the foundation for circular projects.
- Single Crochet (sc): Insert hook, yarn over, and pull through two loops to create sturdy stitches.
- Increase (inc): Add two stitches into the same space to expand the work.