
How to Crochet Mushroom House Bag for Fall (TURN INTO AMIGURUMI!)
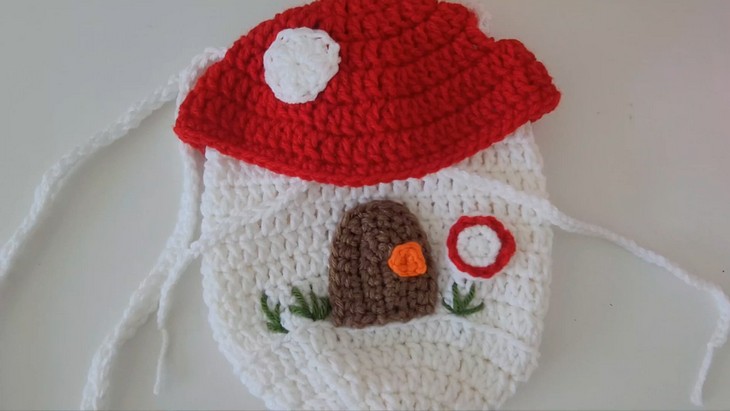
The fairy tale Mushroom house pattern will never be more useful and customizable than with today’s stitch-by-stitch tutorial. Learn how to crochet a large mushroom house bag for kids that can function as a crossbody purse or a handbag, depending on the strap length you choose to crochet. It features the drawstring closure, a door, windows, embroidery grass, a flower, and the same toadstool mushroom cap.
With a mix of colors, including red, brown, green, and white, this mushroom project will surely stand out.
So, if you have made up your mind to crochet this mushroom pattern for beginners, continue reading this post.

About the Designer: The designer of this mushroom bag project is @GSCrochet – her crochet library focuses on crocheting small projects such as stars, flowers, hearts, and even amigurumi like pandas and cats. Her videos are often labeled as “Absolute Beginners” and “Step-by-Step,” which means her library includes gems for novices. You will also find tutorials for appliques and bag charms.
Note: In respect for the creator’s pattern rights, there will be no provision of the written pattern. You can watch the tutorial with on-screen written instructions at the end of this post.
Mashroom Bag Tutorial
Skill Level: Intermediate. The project is a sure test of crochet skills. It uses a mix of basic and intermediate crochet techniques to create the mushroom purse. Key stitches include the magic ring for tightly closed circular bases, double crochet (DC) for the main bag, mushroom top, and spots, and single crochet (SC) to craft the details like the door and drawstring.
Slip stitches (SL ST) are used for seamless joins and decoration, while increases expand sections like the mushroom top. Lastly, the back loop-only stitch adds texture and depth, particularly to the bag’s base. These techniques combine to create a well-shaped and textured mushroom design.
Tutorial Timing: Approximately 1 hour (This mushroom bag project uses a large number of crochet techniques, and so is worth the time. You will learn how to work with small parts, crochet spaces for darwstrin,g, and improve your embroidery and amigurumi designing.)
Personalization Tips: Customize the strap length for a crossbody, shoulder, or handheld bag, depending on your needs. Add a lining to the bag using fabric to enhance durability and prevent smaller items from slipping out. Swap brown with beige for a soft look or the red mushroom top with purple for a whimsical look.
Pattern Type: The on-screen written pattern is available if you find written instructions easy to follow along with.

Materials Needed
Gather the following suggested tools and materials for crocheting this lovely fall mushroom bag for beginners:
- Yarn: Six colors—pink (top), brown (bag), white (spots), green (grass), dark brown (door), orange (doorknob); category 4 recommended.
- Crochet Hook: 5.5mm or a size suitable for the yarn used.
- Darning Needle
- Scissors
- Optional: Fabric yarn and a larger hook for sturdy bags.

How is it done?
The mushroom purse is created in several steps. The main bag and mushroom top are crocheted using rounds of double crochet with increases for shaping. A textured border is added to the base using back loop stitches. The details, including the door, window, grass, and spots, are crocheted separately with single and double crochets and then sewn onto the bag.
A simple chain is used to craft the drawstring, while the strap is made to your preferred length. The end result is a delightful mushroom-shaped bag that is both fun and practical to use.

Stitches and Techniques Guide
To understand the instructions and the pattern for the fall mushroom , follow the following crochet pattern stitch guides:
Magic Ring: Wrap yarn into a loop, crochet into it, then pull the tail to tighten.
Slip Knot: Make a loop, pull yarn through to form an adjustable starting knot.
Double Crochet (Dc): Yarn over, insert hook, pull up loop, yarn over, pull through 2 twice.
Single Crochet (Sc): Insert hook, yarn over, pull up loop, yarn over, pull through both loops.
Slip Stitch (Sl St): Insert hook, yarn over, pull through stitch and loop on hook in one motion.
Increase (Inc): Work two stitches into the same stitch or space to widen the fabric.
Chain Stitch (Ch): Yarn over, pull through loop on hook to form the base chain.
Back Loop Crochet (BLO): Insert hook into the back loop only, then complete stitch normally.