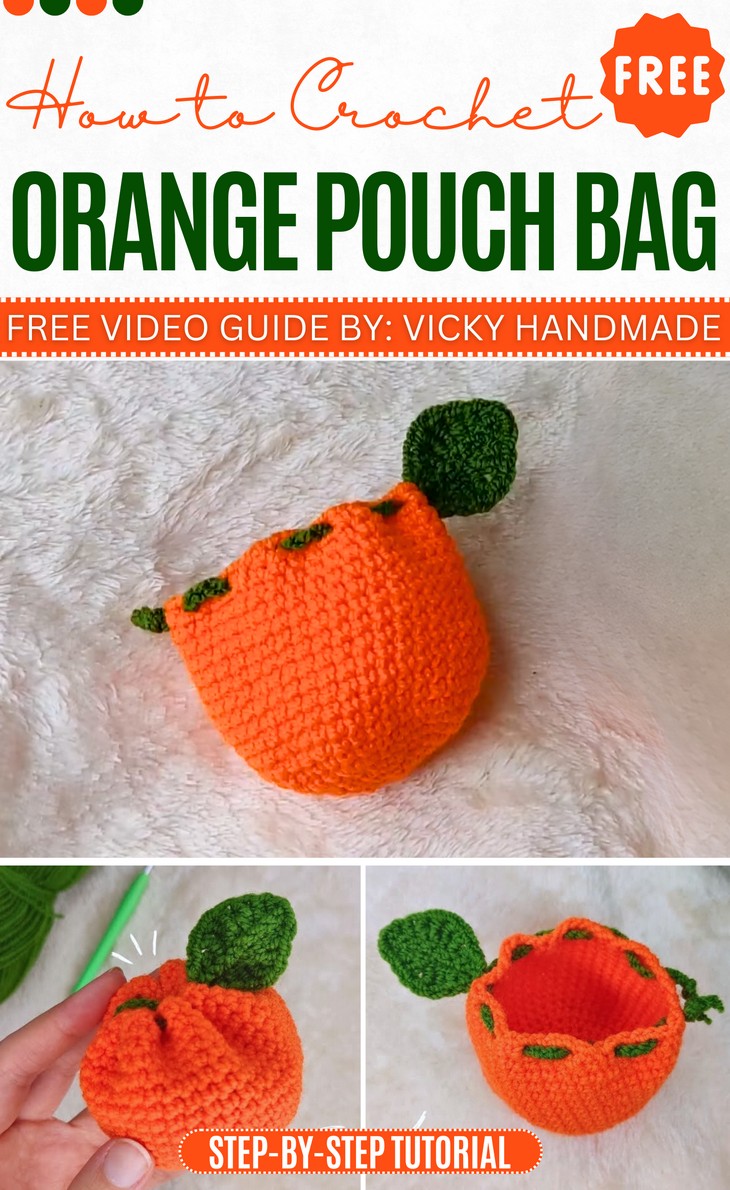
How to Crochet Orange Drawstring Pouch for Fall
Orange, yellow, and brown, if you choose your next fall projects by color, here is a project! Learn how to crochet this little orange pouch with a crocheted leaf and drawstrings for hiding your autumn and Halloween treats. Luckily, there is no need for sewing fi you follow the stitch-by-stitch by Yarn Symphony. This crochet pouch is designed such that whenever you close the drawstrings, it gets the perfect shape of an orange amigurumi. It finished off with a leaf handle on just one side, which is very fun to draw.
So, if you have made up your mind to crochet this lovely drawstring bag, continue reading this post till the end. You will love the finished pouch!
About the Designer: The designer behind this crochet fall orange pouch is @YarnSymphony – she always crochets all things oh-so cute and quick to complete. Some of her lovely projects are a crochet star, a cat bracelet, a bunny pouch, and various bag charms and hair accessories. This shows her creative thinking in crochet designing. Her animal amigurumi are also worth crocheting!
Note: In respect for the creator’s pattern rights, there will be no provision of the written pattern. You can watch the tutorial with on-screen written instructions at the end of this post.
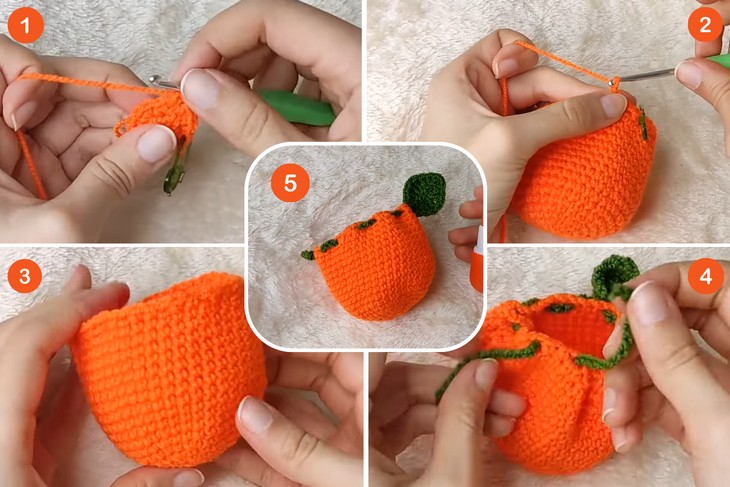
Crochet Orange Drawstring Pouch Tutorial
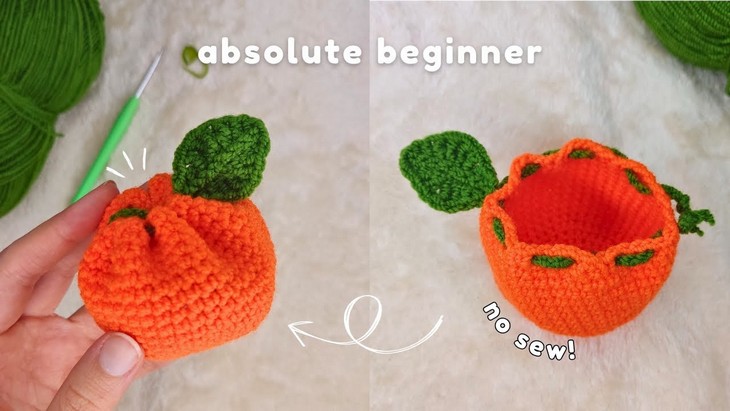
Skill Level: Beginner. Key stitches include the slip knot, chain stitch, single crochet, half double crochet, double crochet, and triple crochet. Additionally, the video demonstrates how to increase stitches by placing two single crochets into a single stitch and how to properly hide the yarn tail using a needle to finish the project neatly.
Tutorial Timing: Approximately 20 minutes only (it is perfect for making an amigurumi without using the magic ring, which involves beginning with the slip knot and flat rows or oval, and then joining the ends or working around the bottom.)
Personalization Tips: You can change the colors to create different fruits, like a red for an apple and a green strawberry, or a yellow and green lemon. For a touch of sparkle, consider adding small beads to the drawstring or embroidering a cute face onto the pouch. For instance, a slightly fuzzy yarn can make a peach-like effect.
Pattern Type: An on-screen written pattern is available if you find written instructions easy to follow along with.
Supplies Needed
Here are the materials used in the crochet orange drawstring pouch tutorial:
- 3mm hook
- Milk Cotton Yarn 5ply yarn
- Stitch marker
- Needle
- Orange and Green

Techniques and Guides
Here is the list of what you need for crocheting this fall pouch:
- Slip Knot: Create a loop with your yarn, pull the tail through, and tighten on your hook to get started.
- Chain Stitch (CH): Yarn over, pull through the loop on the hook to form a foundation chain.
- Single Crochet (SC): Insert the hook into the stitch, yarn over, pull through, yarn over again, and pull through both loops.
- Half Double Crochet (HDC): Yarn over, insert the hook into the stitch, yarn over, pull through, yarn over, and pull through all three loops.
- Double Crochet (DC): Yarn over, insert the hook into the stitch, yarn over, pull through, yarn over, pull through two loops, yarn over, and pull through the final two loops.
- Triple Crochet (TR): Yarn over twice, insert the hook into the stitch, yarn over, pull through, yarn over, pull through two loops at a time until one loop remains.
- Increase with Single Crochet: Place two single crochet stitches into the same stitch to expand the project.
- Hide Yarn Tail: Thread the needle with the yarn tail and weave it back and forth through stitches to secure and finish neatly.