How to Crochet Pumpkin Hat with Stem & Leaf for Absolute Beginners
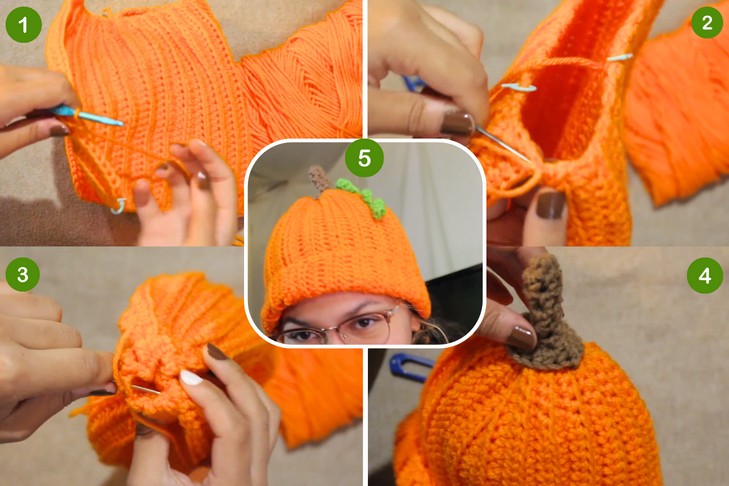
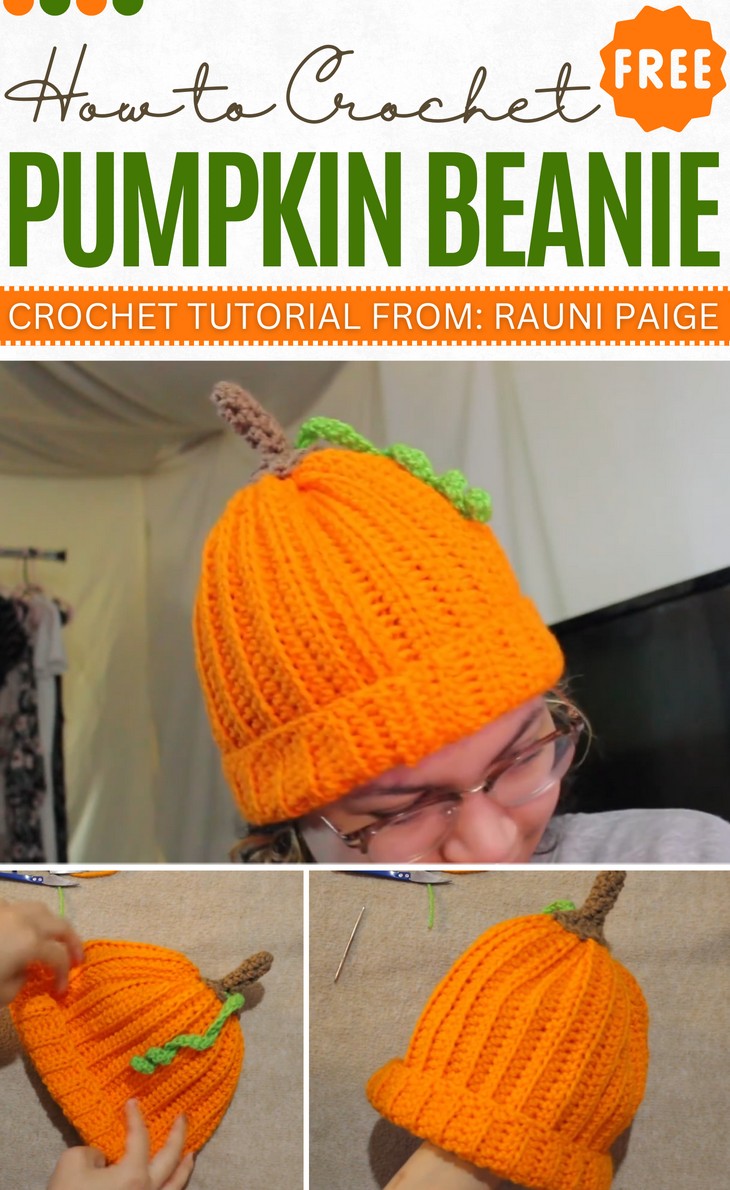
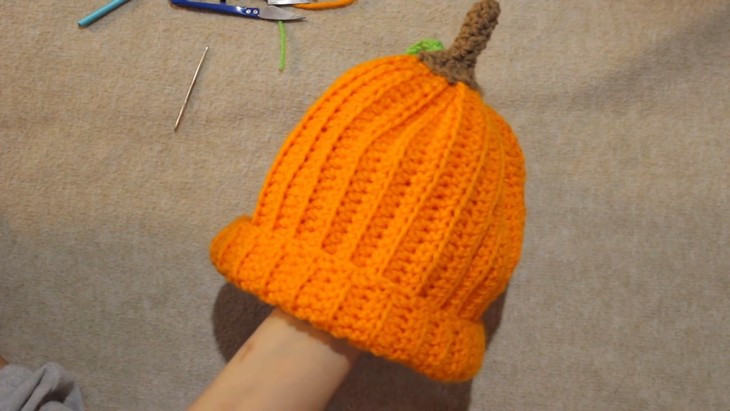
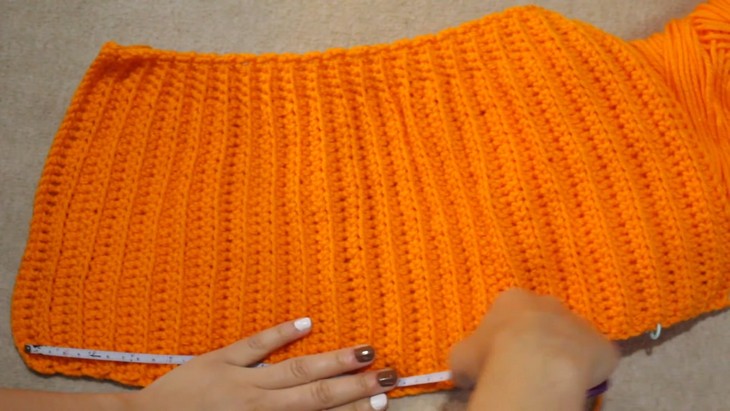
This fall, learn how to crochet a ribbed and perfectly shaped pumpkin beanie with a stitch-by-stitch tutorial for beginners in any size. This beanie also features a long little pumpkin stem and a tiny pumpkin leaf, plus a cuff for warmth. It will start with the foundationless chain and uses half-double crochets (HDC) and back loop stitches to create a ribbed rectangular base. So, the pumpkin beanie pattern is quite easy. The rectangle is sewn into a beanie, and pumpkin details are added, including a magic circle stem and curly greenery.
So, if you have made up your mind to try this pumpkin hat pattern by yourself, continue reading this post till the end! It is worth crocheting for all ages.
About the Designer: The designer behind this fall and Halloween pumpkin project is @RauniPaigeO – she creates content centered around various hobbies, including crochet tutorials, DIY projects, Vlogs, gaming videos and her favorite crochet ideas. She also occasionally discusses topics like autism and mental health. Some of her videos include: beginner crochet basics, easy how to crochet a bucket hat, crochet summer mesh tote bag tutorial and more.
Note: In respect of the creator’s pattern rights, there will be no provision of the written pattern. You can watch the tutorial with on-screen instructions at the end of this post.

Crochet Pumpkin Hat Tutorial
Skill Level: Beginner – Intermediate. It starts with a foundationless chain, which combines chaining and stitching for a smooth base. The main body is created using half-double crochet (HDC) stitches, offering a balance of height and density. To achieve a ribbed texture, stitches are worked into the back loops only, adding visual depth and elasticity. For the circular stem, the magic circle technique is used to create a tight, adjustable center. Single crochet (SC) stitches are used.
Tutorial Timing: 20 minutes only (perfect for learning how to crochet a hat from a straight rectangle by working in the back and forth rows, and creation of a cuff around the bottom. So, the tutorial is worth the time!)
Personalization Tips: You can also choose the darker orange or rustic brown and yellow pumpkin beanie. Adjust the hat size by altering the number of foundation stitches or rows based on head measurements. You can also add the Jack-o-Lantern pumpkin felt face for the Halloween beanie!
Pattern Type: An on-screen written pattern is available if you find written instructions easy to follow along with.
Materials Needed
Gather the following suggested tools and materials for crocheting this fall pumpkin bucket hat:
- Medium-weight yarn (e.g., Red Heart or Craft Smart yarn) in orange, brown, and green
- 5.5mm crochet hook
- Measuring tape
- Scissors
- Yarn needle
- Stitch markers
Techniques with One-Line Guides
Learn the following crochet techniques for crocheting this fall project:
- Slip Knot: Wrap yarn around your finger, pull a loop through, and tighten on the hook.
- Foundationless Chain: Chain two, insert into first chain, yarn over, pull through one loop, then pull through remaining loops.
- Half-Double Crochet (HDC): Yarn over, insert into stitch, pull up a loop, yarn over, pull through all loops on hook.
-
Single Crochet (SC): Insert hook, pull loop, yarn over, pull through both loops.
Crocheting Into Back Loops Only: Insert hook into the back loop of “V” at the top of previous stitches, then perform desired crochet stitch. - Magic Circle: Wrap yarn around fingers, pull loop through central circle, and secure with single/multiple stitches.
How is it done?
To crochet the pumpkin hat, start with a foundationless chain and create a ribbed rectangle using HDC and SC stitches in back loops only. Sew the rectangle’s sides together, cinch the top to close the hat, and add decorative elements: a magic circle stem and curly greenery made from single crochets. Personalize with choice of colors, size adjustments, or added features.
Assemble and finish the hat by sewing the decorations securely. This festive and beginner-friendly project is both fun and functional!