
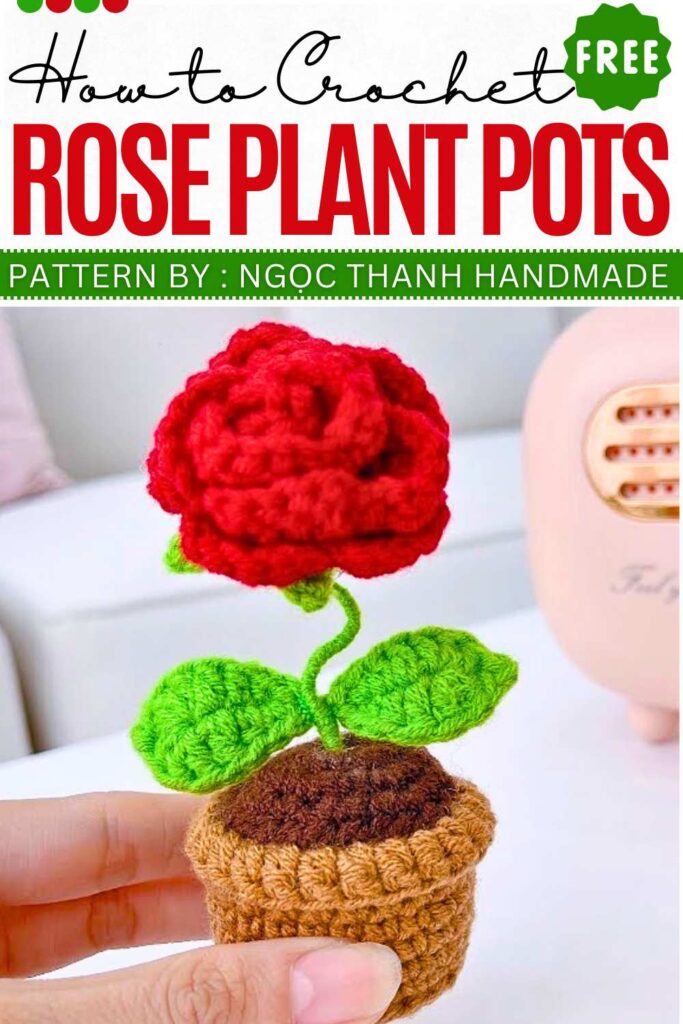
Free Crochet Rose Plant Pot Pattern for Spring
Learn how to crochet a beautiful potted rose plant with a free and complete written pattern. This rose pot has a beautiful curly stem that can also be posed in other ways, thanks to the use of craft wire. We shall crochet the rose by working in flat rows and then wrapping it into a rose flower.
This method is very clever and lets you crochet a rose of any bulk. There is also a soil part in the pot, a sepal, and a pair of leaves. Everything is easy to crochet and can be done by even beginners. Let’s get started.
The designer behind this flower tutorial is @NITKA_KZ – she has quite a good grasp on kawaii amigurumi designing with added cuteness and surprises.
Shared already:
Materials
Yarn (Milk Cotton 50g): Light Brown (pot), Dark Brown (soil), Green (leaves/stem), Red
Crochet hook (2.5 mm)
Floral wire
Hot glue
Fiberfill stuffing
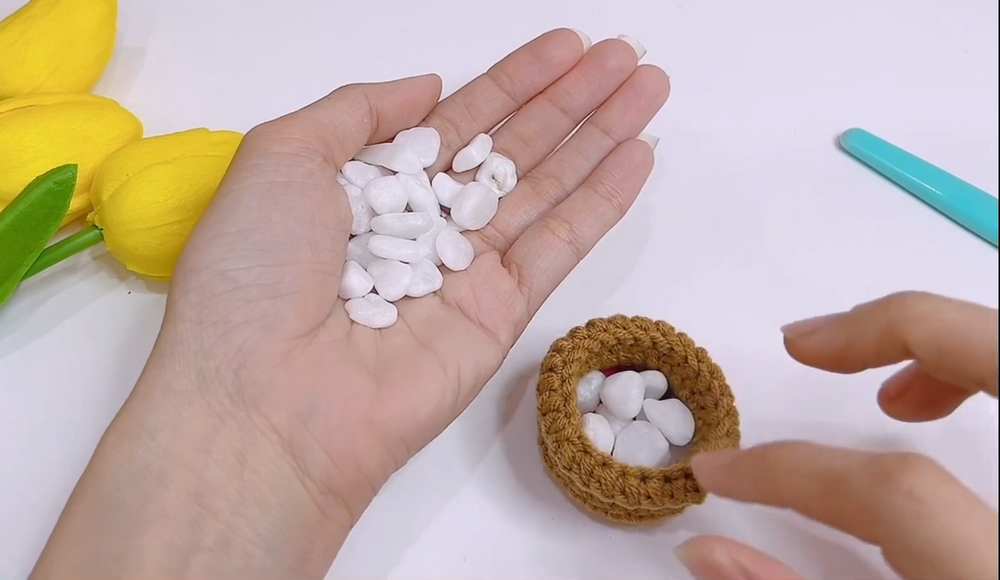
Small pebbles or heavy cardboard
Yarn needle, scissors
Abbreviations (US Terms)
MR: Magic Ring
ch: Chain
sc: Single Crochet
hdc: Half Double Crochet
dc: Double Crochet
inc (V): Increase (2 sc in the same st)
inc-dc: Double Crochet Increase (2 dc in the same st)
sl st: Slip Stitch
BLO: Back Loop Only
FLO: Front Loop Only
st(s): Stitch(es)
[ … ] x N: Repeat instructions in brackets N times
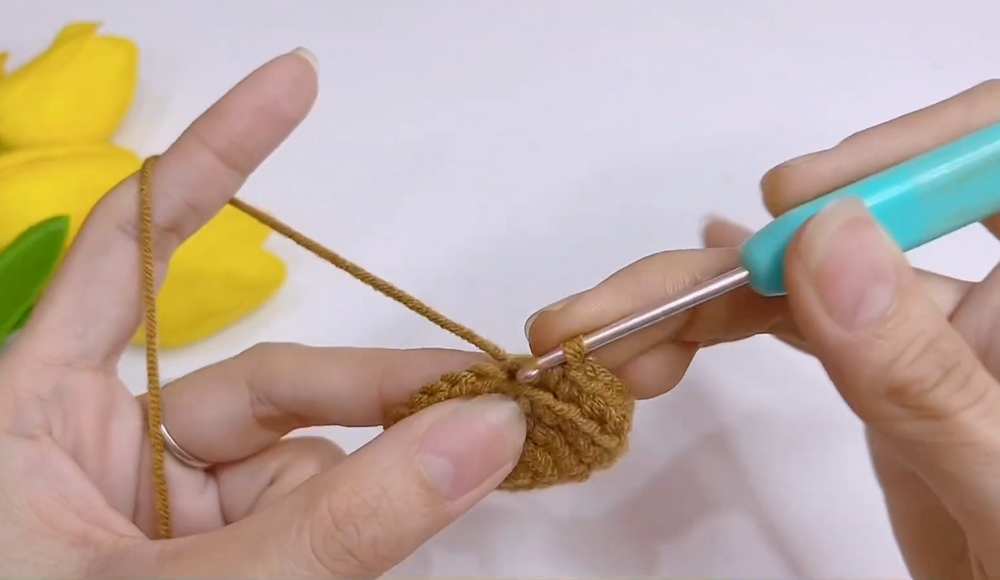
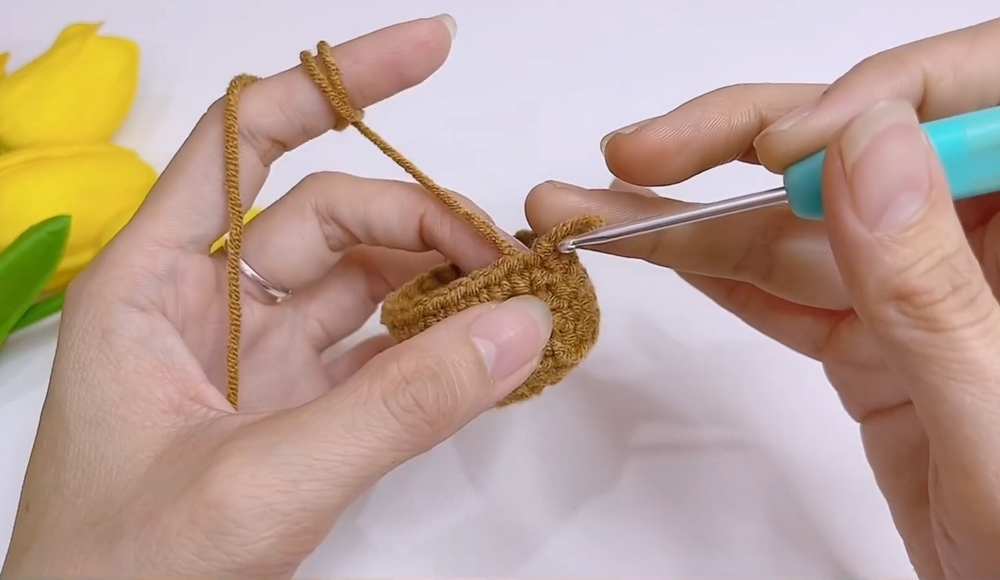
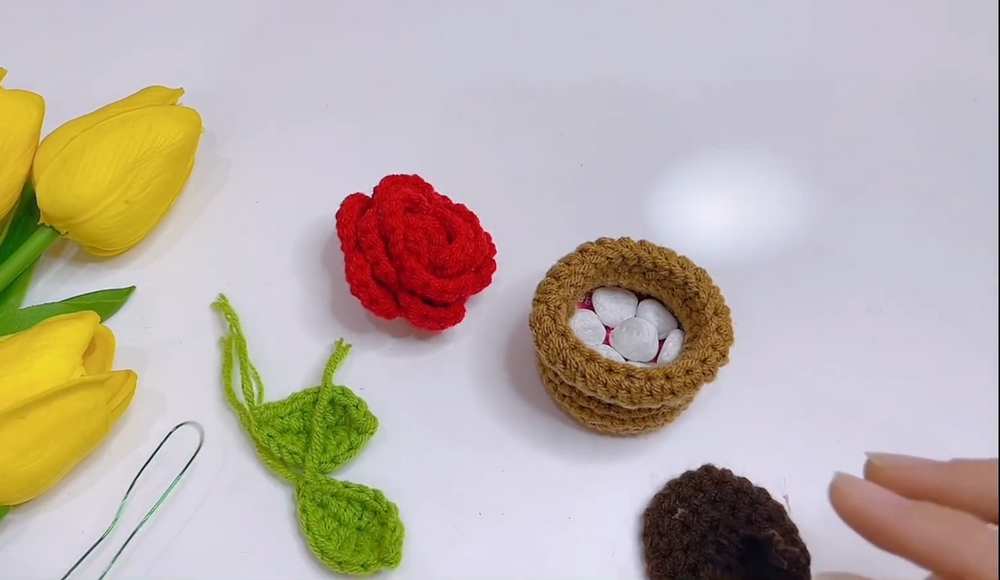
1. Pot (Light Brown)
Work in joined rounds. Join with a sl st to the first st and ch 1 at the end of each round.
Rnd 1: 6 sc in MR. Join. (6)
Rnd 2: 6 inc. Join. (12)
Rnd 3: [1 sc, inc] x 6. Join. (18)
Rnd 4: [2 sc, inc] x 6. Join. (24)
Rnd 5: BLO sc in each st around. Join. (24)
Rnd 6-8: sc in each st around. Join. (24)
Rnd 9: ch 2, dc in each st around. Join. (24)
Rnd 10: ch 2, flip the work so the inside is facing you. FLO dc in each st around. Join. (24)
Fasten off and weave in the ends. Fold Rnd 10 down to form the rim of the pot.
Base Edge (Optional for stability): Rejoin yarn to the exposed front loops from Rnd 5. Sl st in each st around. Fasten off.
2. Soil (Dark Brown)
Work in joined rounds. Join with a sl st to the first st and ch 1 at the end of each round.
Rnd 1: 6 sc in MR. Join. (6)
- Rnd 2: 6 inc. Join. (12)
- Rnd 3: [1 sc, inc] x 6. Join. (18)
Rnd 4: [2 sc, inc] x 6. Join. (24)
Fasten off, leaving a long tail for sewing.
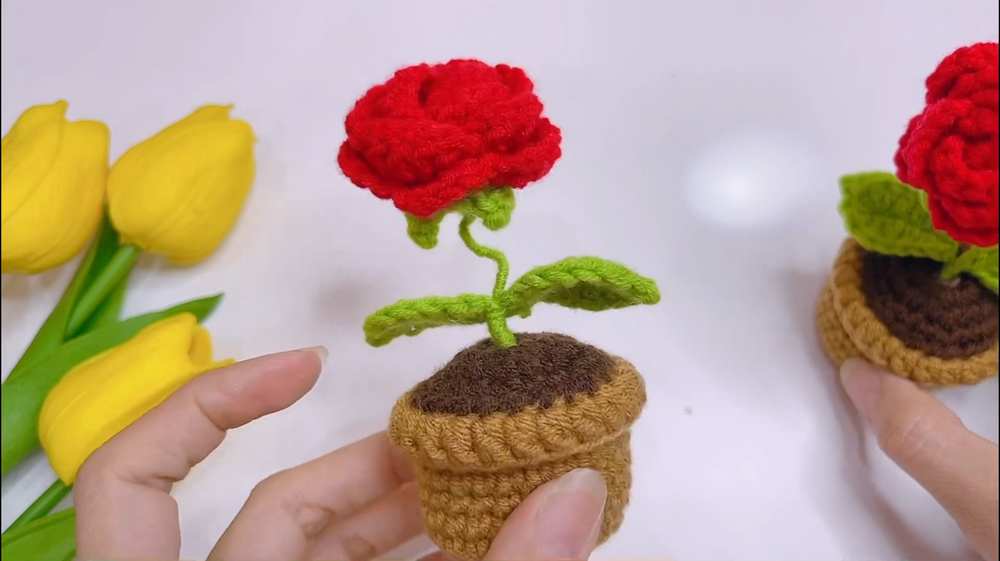
3. Rose Flower (Red or desired color)
Row 1: ch 26.
Row 2: Skip 3 ch (counts as 1 dc), dc in the 4th ch from hook. ch 1, skip 1 ch, 3 dc in the next ch. Repeat from * to the end of the chain.
Row 3: ch 2, turn. In the first 3-dc group: dc in first st, inc-dc in second st, dc in third st. ch 2, sl st into the ch-1 space. In each 3-dc group across: ch 2, dc in first st, inc-dc in second st, dc in third st, ch 2, sl st into the ch-1 space.
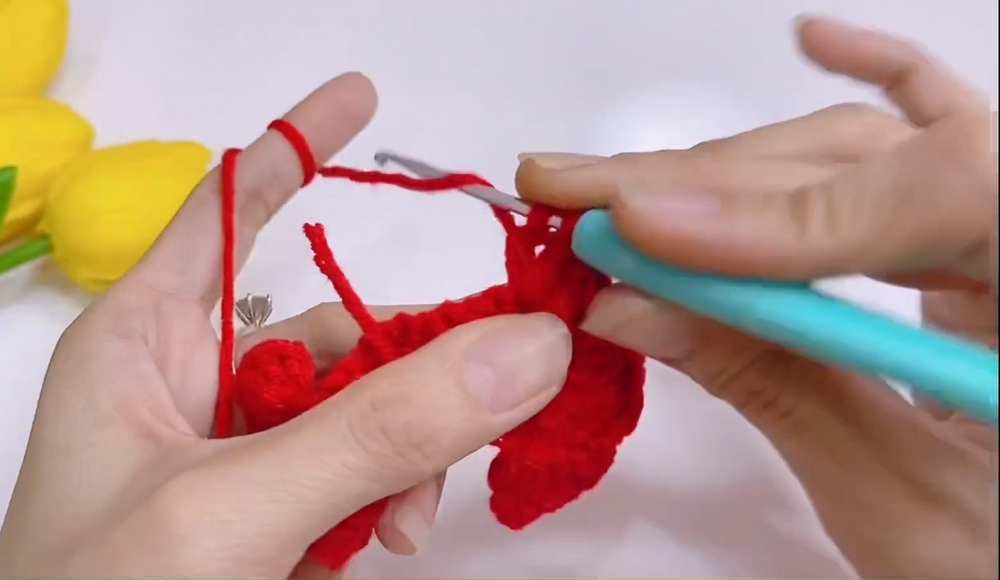
Fasten off, leaving a long tail.
Assembly: Roll the strip tightly from one end to the other to form the rose shape. Use the long tail and a yarn needle to sew the bottom layers together securely.
4. Receptacle/Calyx (Green)
Work in joined rounds. Join with a sl st to the first st and ch 1 at the end of each round.
Rnd 1: 5 sc in MR. Join. (5)
Rnd 2: 5 inc. Join. (10)
Rnd 3 (Sepals): ch 4. sl st in 2nd ch from hook, sc in next ch, hdc in last ch. Skip 1 st on the base, sl st in the next st. Repeat from * 4 more times to create 5 sepals total.
Fasten off and weave in the end.
5. Leaves (Green) – Make 2
Row 1: ch 6.
Row 2: sl st in 2nd ch from hook, sc in next ch, hdc in next ch, dc in next ch, 3 dc in the last ch. Working down the opposite side of the chain: ch 1, sl st in the same st, 3 dc in next ch, dc in next ch, hdc in next ch, sc in next ch, sl st in last ch.
Fasten off, leaving a tail.
Assemble Everything
Stem: Cut a piece of wire, fold it in half, and twist it. Wrap the green yarn around the top and thread it through the center of the Receptacle. Apply hot glue to the Receptacle to the wire, then glue the Rose Flower inside the Receptacle.
Wrap the Stem: Wrap the green yarn around the wire stem. About halfway down, hold the leaves against the stem and wrap the yarn around their tails to secure them to the stem. Continue wrapping to the bottom and secure the end with glue.
Pot Base: Place a heavy piece of cardboard or small pebbles at the bottom of the pot so it stands upright.
Planting: Poke a hole in the center of the Soil piece and push the bottom of the stem through. Secure the wire on the underside of the soil with hot glue.
Video Tutorial