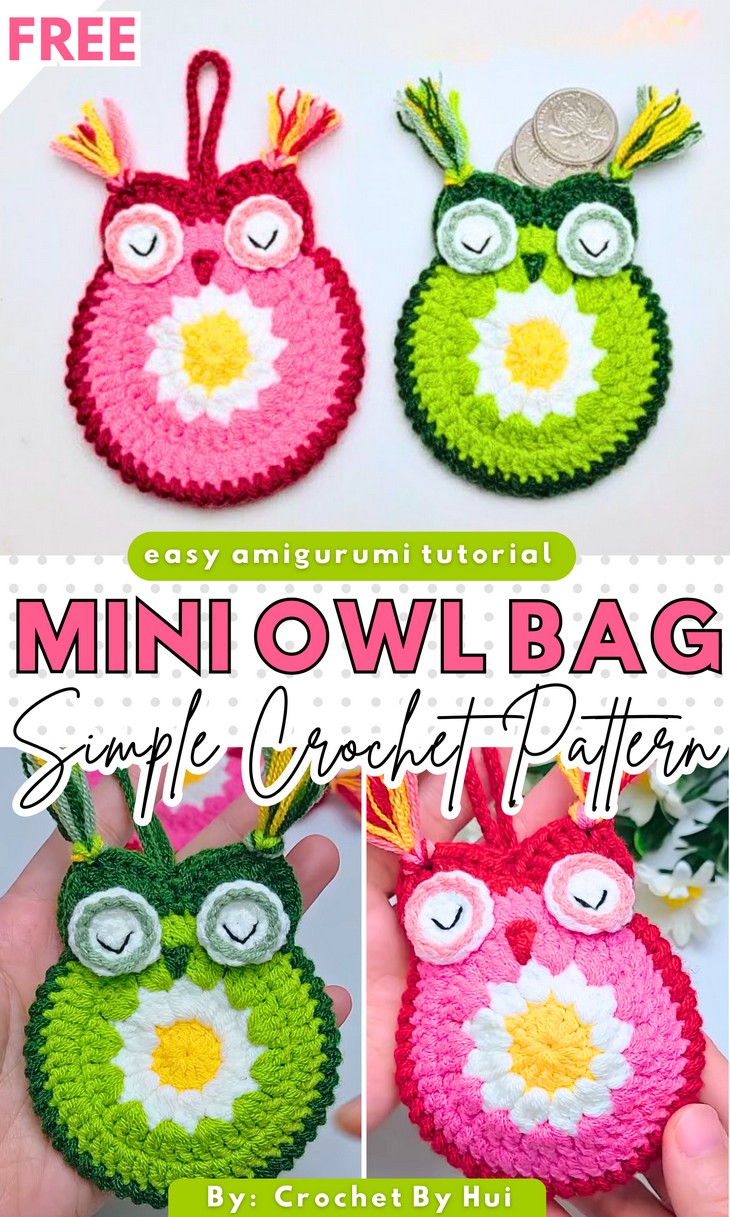
How to Crochet Sleeping Owl Pouch (Colorful, Mini and Easy)
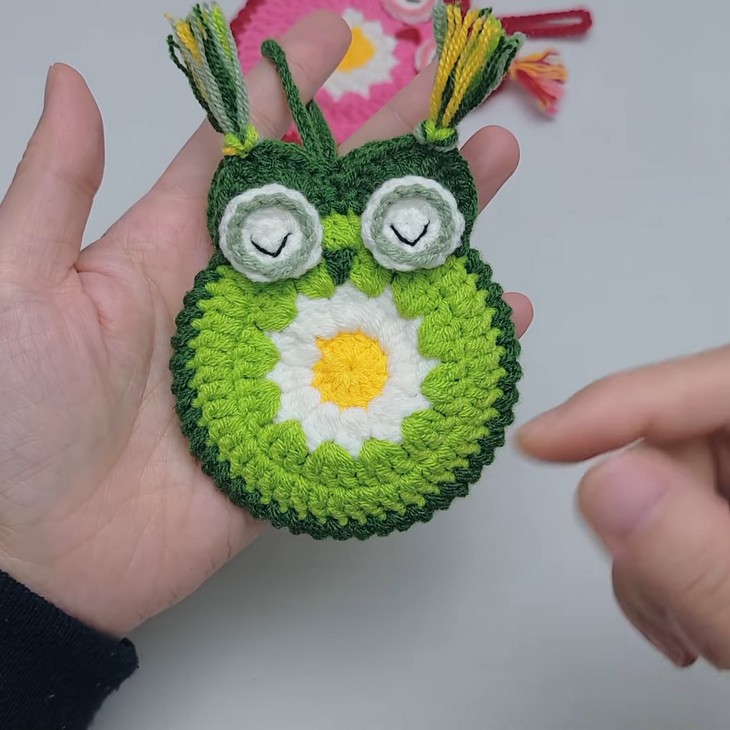
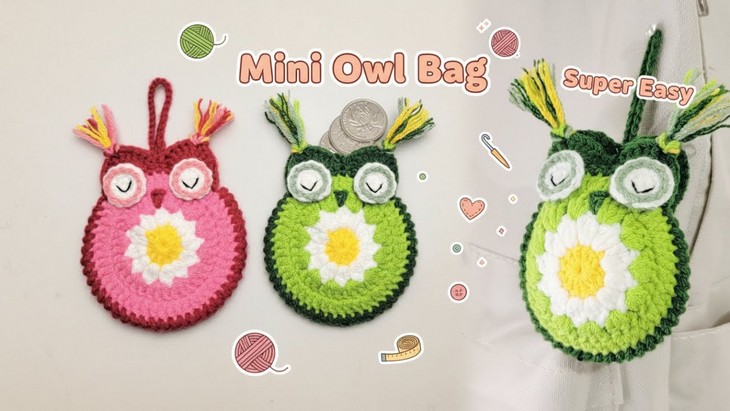
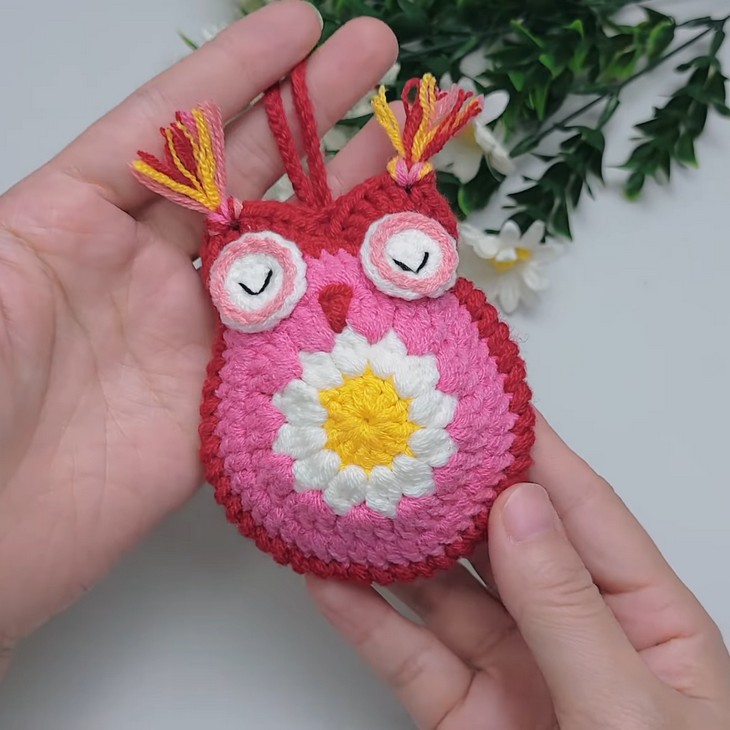
More colorful, vibrant, and adorable, the sleepy owl pouch is gonna get a big moment thanks to Hui Crochet! So, follow this stitch-by-stitch tutorial to crochet a mini owl bag in any of two color schemes for your earphones or coins. It is perfect to hang on a backpack as a bag charm. This crochet owl pouch features an irresistible puff flower pattern in the middle and uses a perfect contrast of four colors. With a beautiful edging, the detailed sleepy eyes, and the mix-colored fringes, this owl pocket pouch will be an irresistible gift idea. Once you crochet one, you won’t help but make a pair. Luckily, the construction is super fast, about 30 minutes.
The project is simple enough for beginners to easily complete. So, if you have decided to crochet this vivid version of owl pouch, continue reading this post till the end. There you will find the complete tutorial. It is worth crocheting!
About the Designer: The designer behind this smiling reindeer doll is @CrochetByHui – Like An_design Crafts, she has excelled at amigurumi designing. From chibi dolls and mermaids to animal keychains like dolphins and mice with a lot of creative and unique variations, her library is a top, though underrated, amigurumi library. What sets this channel apart is the creator’s commitment to making these projects accessible to absolute beginners. She also has a decent number of elegant crochet pouches, like a panda pixel bag, a cat key pouch, a drawstring pouch, and more!
Note: In respect of the creator’s pattern rights, there will be no provision of the written pattern. You can watch the tutorial with on-screen written instructions at the end of this post.
Crochet Mini Owl Bag Tutorial
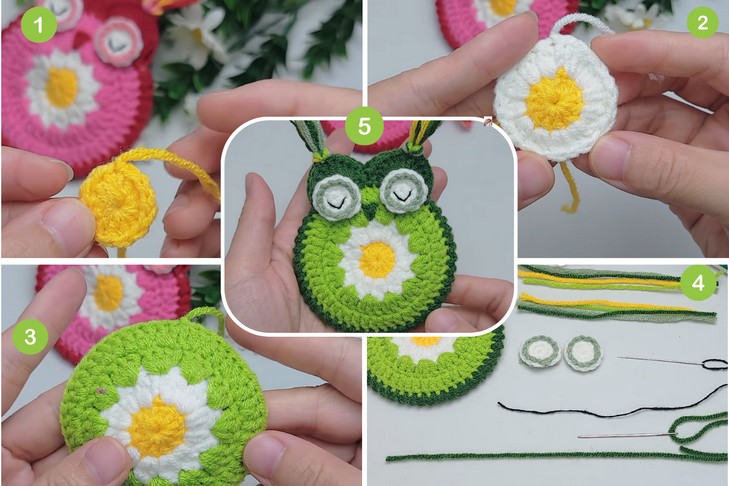
Skill Level: Beginner – Intermediate. You will crochet two pieces of the owl’s body, where one piece includes the long chain for the strap and the other doesn’t. Then both pieces will be joined as you go. The main mini pouch and eyes start with the magic ring. Chain stitch for the foundation, the slip stitch for creating the hanging loop, and the double crochet (long treble/triple) for working in the round. The puff stitch (or a similar cluster of double crochets) is used to create the textured ‘feathers’ in the second round of the main body.
The short treble/triple crochet is used for the body, and the twisted single crochet is used to join the two main body pieces together and to give the edges a clean, textured finish. You will also be using color changes and the surface-joining technique.
Tutorial Timing: About 14 Minutes only (you will learn the popular sunburst flower pattern and the puff stitch that is used in many granny square projects and accessories. Plus, learn how to crochet a shell border, seamless color-changes, joining two pieces together, and making the colorful fringes. It will also enhance your sewing and embroidery. So, the tutorial is worth watching!)
Personalization Tips: The finished owl’s strap is created by making 35 chain stitches and then slip stitching back which you can adjust! For personalization, you can choose from two color-combos: green, parrot, white, and yellow & pink, dark pink, yellow, and white. You can also choose the popular single yellow shade. Vary the length of the 35-chain strap to create a shorter loop for a keychain or a longer loop to wear as a neck pouch. For the googly look, you can also use the safety beads in the crochet eye sockets.
Pattern Type: A detailed on-screen written pattern is available if you find written instructions easy to follow along with. The pattern is written in US terms.
Materials Needed
Gather the following suggested tools and materials for crocheting this mini owl puffy pouch, mentioned in the tutorial:
- Cotton yarn (4 colors for the body, one for the eyes). You can use the milk cotton yarn which is a blend of cotton and milk protein.
- 2.0 mm crochet hook
- Needle for weaving in ends
- Scissors
- Four strands of yarn (11cm long) for the tassels/feet
- Small piece of yarn for the nose/beak
Techniques Used
The following are the crochet techniques that the tutor will use for crocheting this mini animal pouch for beginners:
- Chain Stitch (ch): Yarn over and pull through the loop on the hook to create a foundation or add height.
- Slip Stitch (sl st): Insert hook, yarn over, and pull through the stitch and the loop on the hook to join or finish.
- Short Treble/Triple Crochet (sc): Insert hook, yarn over, and pull up a loop, yarn over, and pull through both loops to create the basic stitch.
- Double Crochet (dc): Yarn over, insert hook, yarn over, and pull up a loop, yarn over and pull through two loops, yarn over and pull through the last two loops.
- Puff Stitch (or similar cluster): Work multiple incomplete double crochets into one stitch and join them at the end to create a texture.
- Increase (inc): Work two stitches into a single stitch to expand the circumference.
- Twisted Single Crochet: Work a single crochet stitch while twisting the hook to create a decorative, rope-like texture on the edges.