
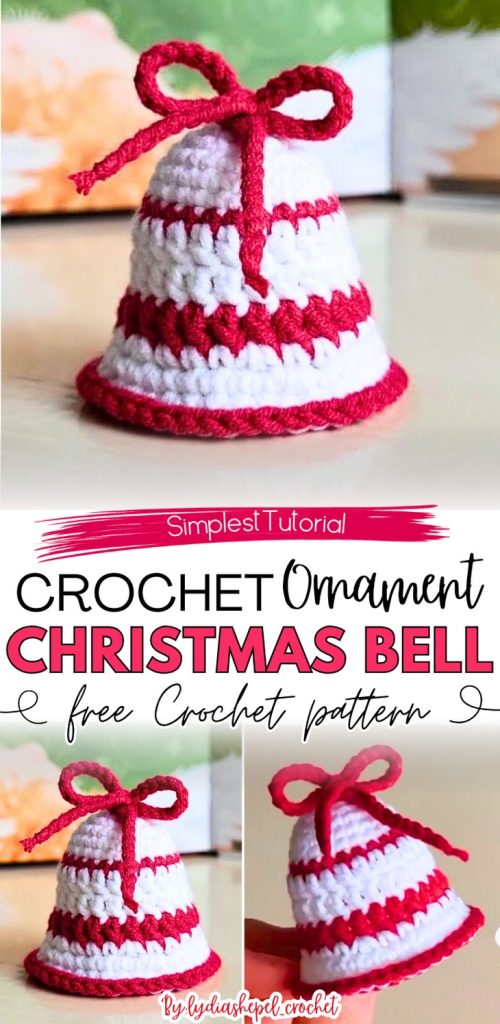
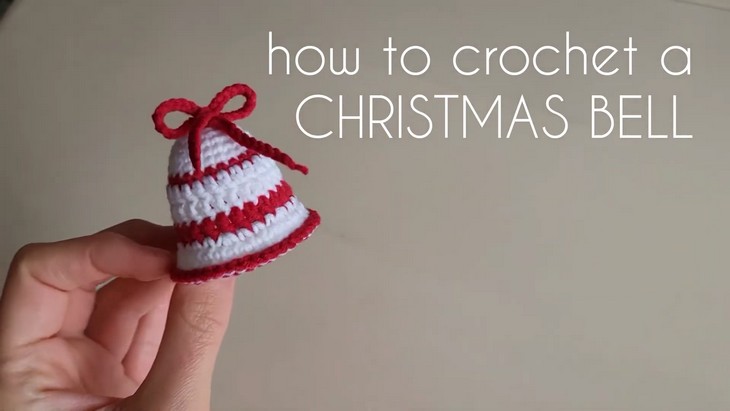
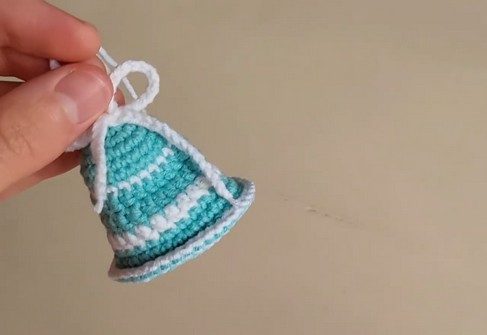
How to Crochet Christmas Bell Ornament with Stripes for Gifting
Today’s crochet bell project is much more accurate, thanks to the thin yarn, and looks super elegant. So, follow this stitch-by-stitch tutorial to crochet a striped bell Christmas ornament for absolute beginners that is finished with a tiny French knot, making it gift-ready. This crochet bell can be crocheted in any of two color versions, red or blue, with white as a compulsory shade. You can customize this bell in many ways and use it as a wreath add-on, Christmas tree ornament with a real bell insert, or even as a bag charm. Learn crocheting this in less than 15 minutes in any size.
So, if you have made up your mind to crochet this bell for Christmas pattern, continue reading this post till the end. There you will find the complete tutorial.
About the designer: the designer behind this Christmas bell project is @lydiashepel – she has specialized in designing accurate amigurumi using thin yarn very well. Her library includes tutorials mostly for crochet animals like pugs, cats, unicorns, snails, and dachshunds, as well as popular characters like a Labubu toy, Santa, snowmen, and more. She has the largest list of crochet dog and Christmas projects, including the candy corn, Christmas tree, and more. With many of its tutorials broken down into multiple parts, her projects are perfect for beginners.
Note: In respect of the creator’s pattern rights, there will be no provision of the written pattern. You can watch the tutorial with on-screen instructions at the end of this post.

Crochet Christmas Bell Tutorial
Skill Level: Beginner – Intermediate. The magic ring is used to start the bell with the stripe-work achieved using color changes. The main stitch is the single crochet, with increased stitches used to shape the bell. But for a stripe of large height, you will also use double crochet. For the last round, to crochet the chain edging, you will also need to work in the BLO and work the slip stitches. Other stitches are the chain stitch for the turning chains and the slip stitch for joining the rounds. A little bit of knotting and sewing is also needed.
Tutorial timing: Just about 12 minutes (perfect for learning the French bow knot and crocheting a base pattern for crocheting a Christmas bell. You can then customize this pattern, like in a crochet bell and bow keychain. Many projects like flower pots and Santa hat uses crochet slip stitch edging in the BLO that gives a cleaner look, you will certainly love. So, the tutorial is worth giving a try!)
Personalization tips: You can also use a combination of Christmas classics, like green and yellow. You can also crochet an actual crochet bow tie by working in flat back-and-forth rows and a bit of knotting. You can also swap white with your main color, like the tutor does for getting more rows of your preferred color, but to me, the main looks much better. For adjusting the size easily, always use the super bulky or bulky velvet yarn.
You can also use it to cover a larger bell, but use a small bell. Add it to crochet wreaths, use it as a car hanger, or simply to the crochet buntings.
Pattern Type: An on-screen written pattern is available if you find written instructions easy to follow along with. The instructions are written using US terms.
Materials Suggested
The tutor specifies this list of materials and tools for the medium-sized Christmas bell project for beginners. Gather all for similar results:
- YartArt JEANS (like the Milk Cotton Yarn, this yarn is very much preferred and mostly comes in sport weight). For this, the recommended hook is 3.5, but the tutor uses an even smaller size.
- 1.6 mm crochet hook
Techniques Used
Here are the quick crochet guides for crocheting each stitch mentioned and used in the tutorial for crocheting this bell Christmas ornament:
Magic ring – Wrap yarn into a ring, insert hook, yarn over, pull through, and start working stitches into the ring.
Single crochet (sc) – Insert hook into stitch, yarn over, pull through, yarn over, pull through both loops.
Increase (inc) – Work 2 stitches into the same stitch.
Double crochet (dc) – Yarn over, insert hook into stitch, yarn over, pull through, yarn over, pull through 2 loops twice.
Back loop only (BLO) – Insert hook under back loop only and work the stitch as usual.
Slip stitch (sl st) – Insert hook into stitch, yarn over, pull through both stitch and loop on hook.
Chain stitch (ch) – Yarn over, pull through loop on hook.
Complete Video Guide
You will love, too!
How to Crochet Christmas Bells Ornament with Bow (Green & Red)