
5 Free Crochet Tee Top Patterns for Summer
Tee sleeves are a must-have for spring and early summer, tops! This is the time, so if you are looking for some free crochet patterns for elegant and breezy tee tops, be sure to go through this whole list. I have included the best top designs, such as the mesh granny stitch top, wheel stitch top, basic mesh top, and many more.
If you show love for any of these tops, I will extend this to include many new tee patterns. For now, I have included the classical variations mainly for summer. Crochet them in any size from small to XL with free guides! So, let’s get started!
01 of 06 Crochet Granny Summer Top
This Granny Summer Top is a lightweight piece that can be made with short, long, or three-quarter sleeves. It has a beautiful, seamless design with ribbed edges at the collar, bottom, and cuffs for a clean and professional finish.
General Making:
Start by crocheting a stretchy collar. Use the “Granny Stitch”—groups of three tall stitches—and crochet in circles, adding extra stitches at four corners to grow the top. Once it fits your chest, join the front and back under your arms and crochet down to the waist. Finally, add sleeves and stretchy borders to the bottom and cuffs!
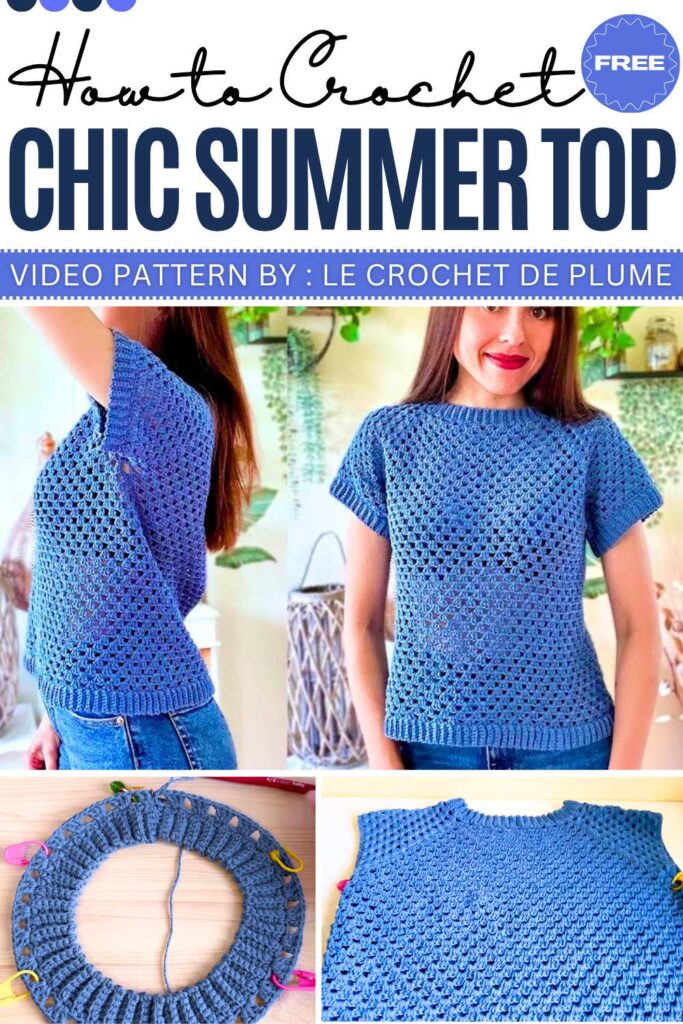
02 of 06 Crochet Wheel Stitch Summer Top
The Wheel Stitch Summer Top uses a stunning pattern that creates small, circular “wheels” (also called the Galaxy stitch). It’s a light and airy design that looks like knitwear but is actually made with simple crochet techniques.
General Making:
This top starts with a single long chain that sets the height from top to bottom. After a base row, you create a neck opening with a second chain and grow the width by adding “wheel” stitches to both sides. Once it’s wide enough, fold the piece in half and sew the sides, leaving gaps for your arms!
03 of 06 Crochet Butterfly Summer Top
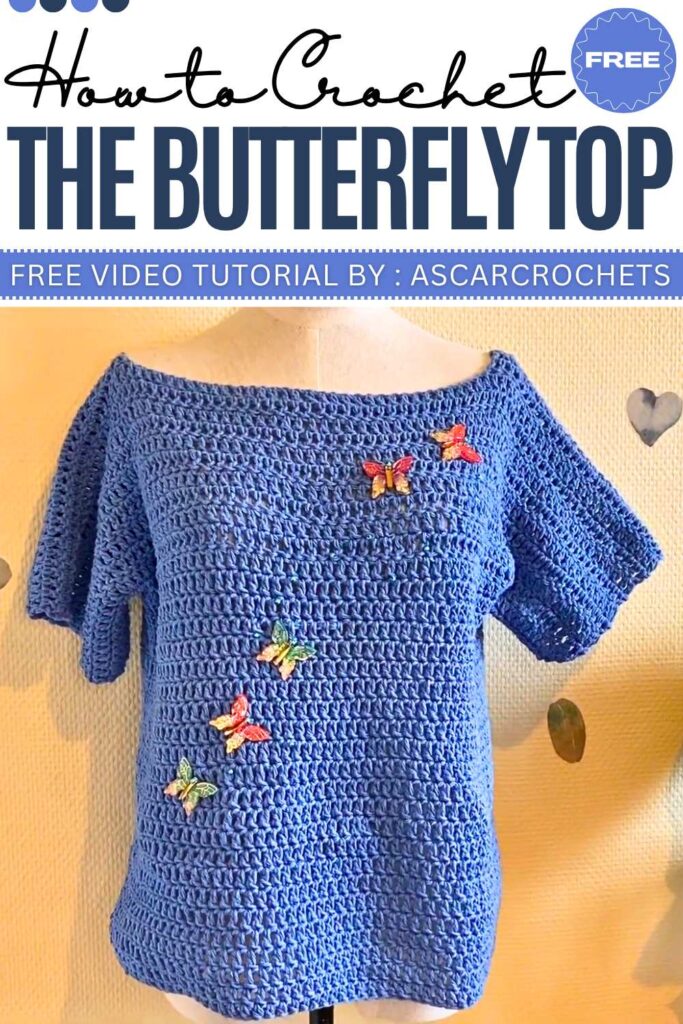
We also have a beginner-friendly project that uses basic crochet stitches to create a breezy, stylish look. You can customize it with butterfly charms or beads to give it a unique, personalized touch! It is a perfect project for beginners because it uses simple shapes and basic stitches to create a trendy, custom fit.
General Making:
Start with a long chain that goes from one elbow to the other. Crochet tall stitches for the shoulders, leaving a gap in the middle for your neck. Join the front and back under your arms and crochet in circles to finish the body. Just sew the small sleeve seams and add your favorite charms!
04 of 05 Crochet Summer Sweater Pattern
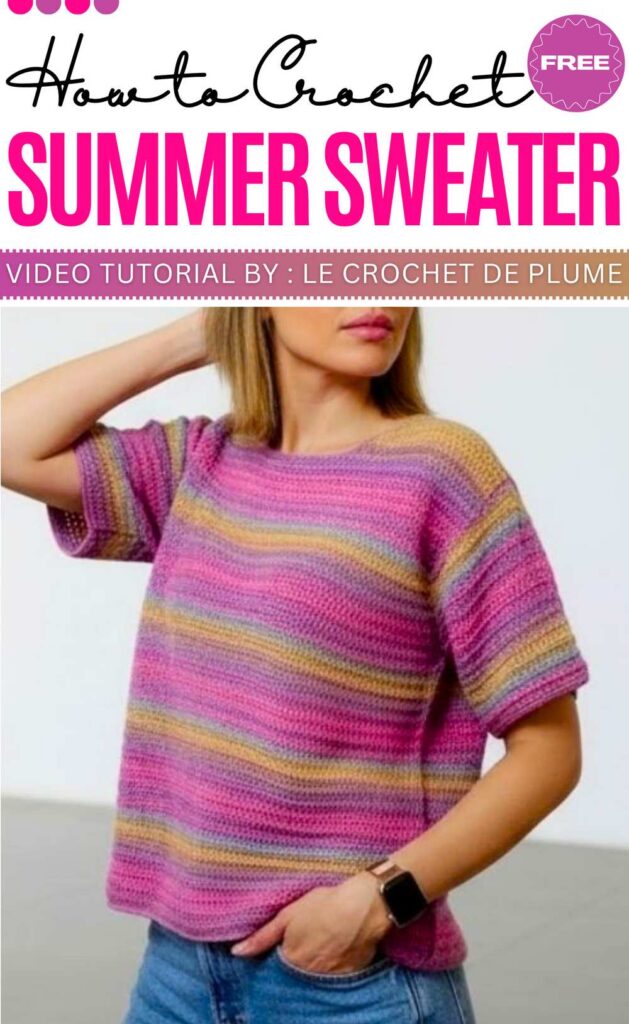
The Angel Top is an easy crochet summer sweater designed to be easily adaptable to any size. It shows a simple pattern with basic double crochet (bride) stitches. And you can personalize this lovely top with decorative charms like butterflies and beads.
General Making:
Start with a long chain that sets the full width of the shoulders and sleeves. Crochet several rows of tall stitches, leaving a gap in the middle for your neck. Once the top section is done, join the front and back pieces under your arms and crochet in circles to finish the body. Finally, sew the small seams under the sleeves and add your favorite decorations!
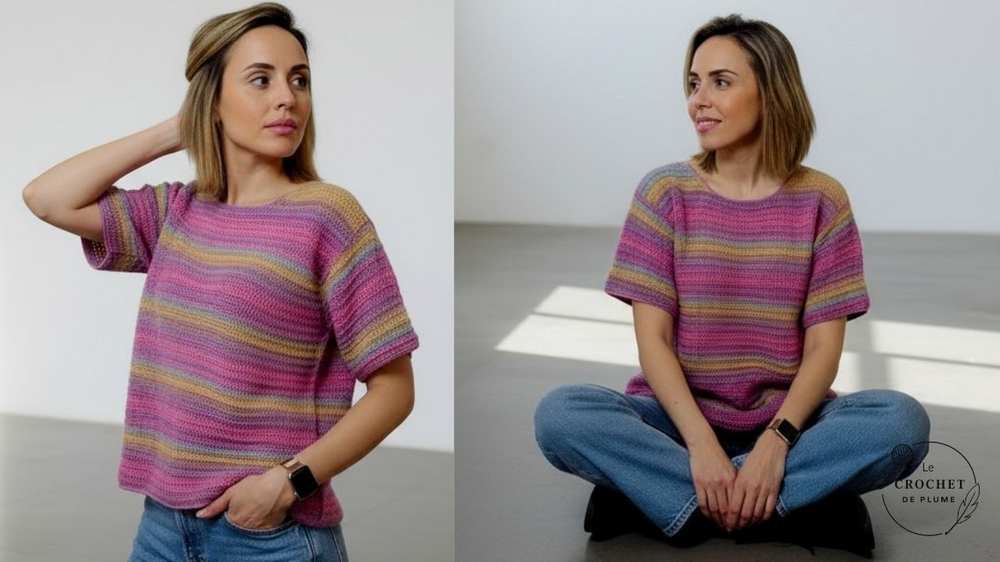
05 of 05 Crochet Striped Tee Top
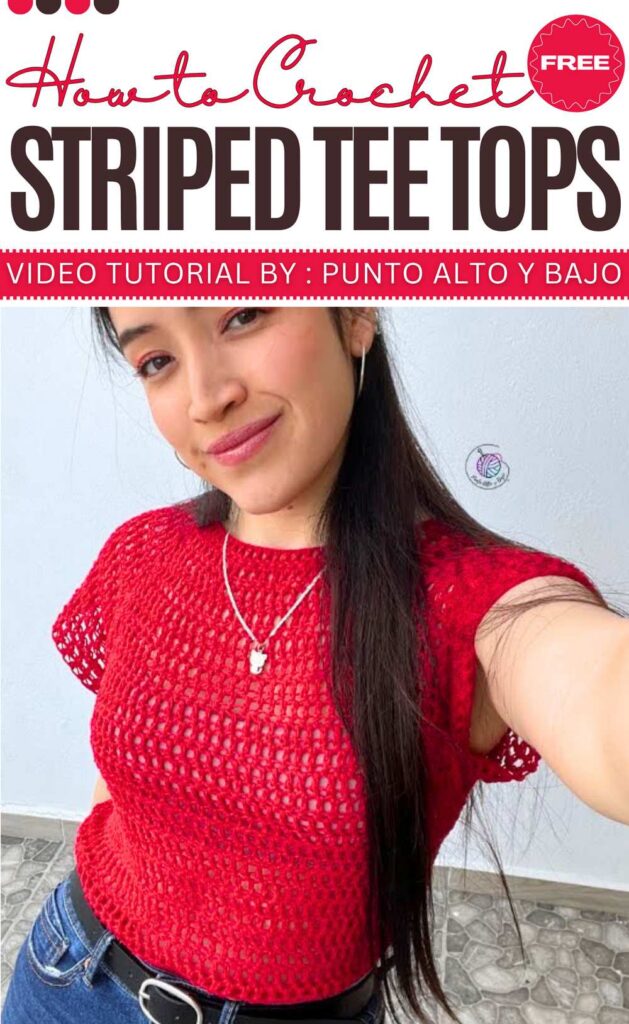
The Striped Tee Top uses a “top-down” method, meaning you start at the neckline and work your way down to the hem. This clever design is made in one solid piece, allowing you to try it on as you go and adjust the length to fit your style perfectly.
General Making:
Start with a chain that fits around your head. Divide the stitches for your front, back, and sleeves, then crochet in circles while adding extra stitches at four corners to grow the shoulders. Once it reaches your underarms, join the front and back and keep crocheting down to the waist. To finish, just add more rows to the sleeves or decorative borders!