
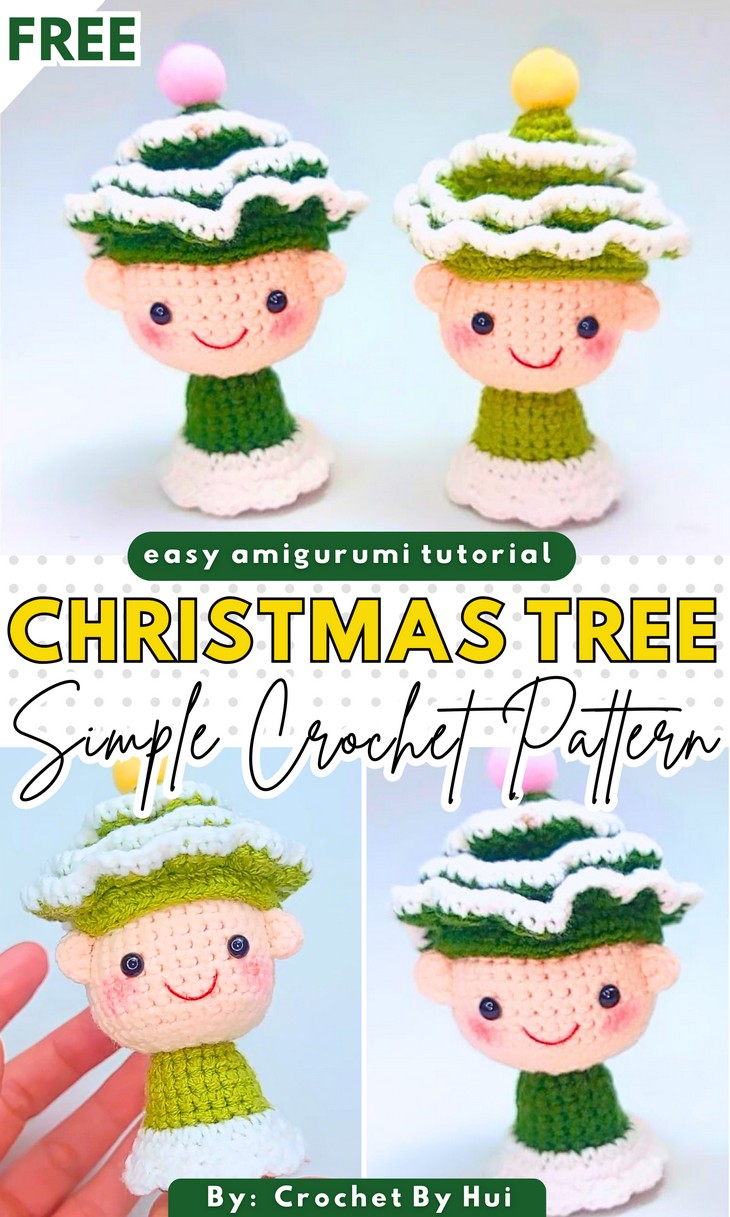
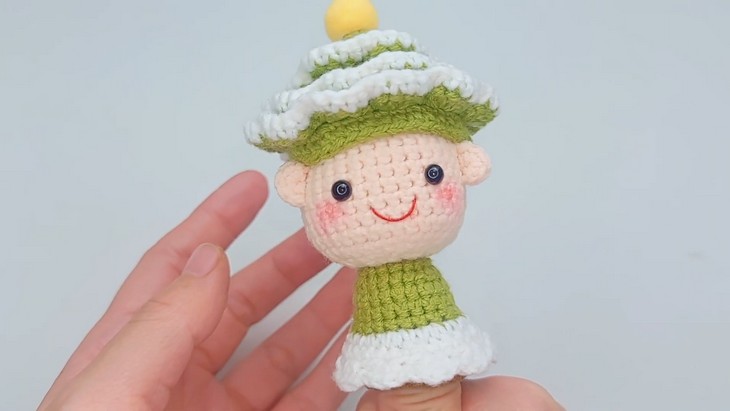
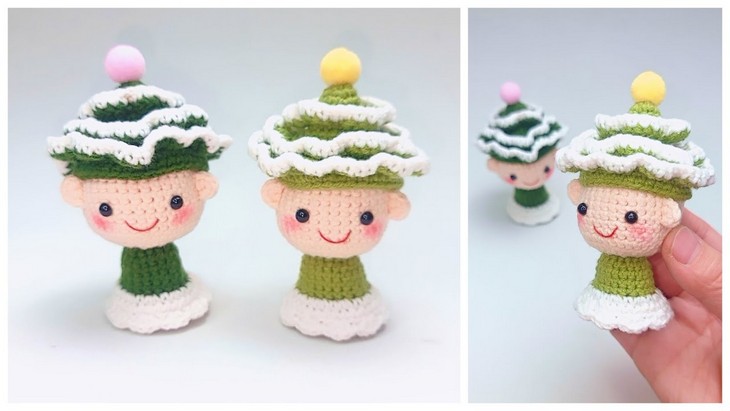
How to Crochet Christmas Tree Amigurumi Doll (Finger Puppet & Ornament)
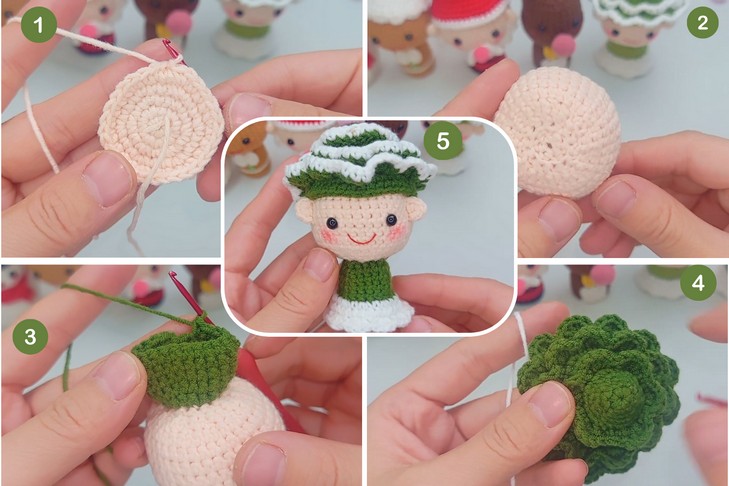
An ornament, a doll, and a puppet all in one, this is a super versatile Christmas project! So, follow this stitch-by-stitch tutorial to crochet a baby Christmas tree amigurumi designed by Hui Crochet that is cute, quick, and unique. Thanks to the unstuffed body and stable position, it will double as a small desk buddy and a fun finger puppet. This Christmas tree amigurumi features a baby head, finger sleeve, skirt, ears, tiered Christmas hat, and a tiny pom-pom as a finishing touch. You will especially love its smile, low-sew pattern, and the snowy white edging for the leaves. You can easily finish this baby Christmas tree doll in less than 45 minutes.
So, if you have decided to crochet these Christmas puppets, continue reading this post till the end. There you will find the complete tutorial. It is worth crocheting!
About the Designer: The designer behind this smiling Christmas tree doll is @CrochetByHui – Like An_design Crafts, she has excelled at amigurumi designing. From chibi dolls and mermaids to animal keychains like dolphins and mice with a lot of creative and unique variations, her library is a top, though underrated, amigurumi library. What sets this channel apart is the creator’s commitment to making these projects accessible to absolute beginners. She has also made a whole playlist of crochet Christmas projects, from hats to puppets of Santa, so check them for sure!
Note: In respect of the creator’s pattern rights, there will be no provision of the written pattern. You can watch the tutorial with on-screen written instructions at the end of this post.
Crochet Little Christmas Tree Tutorial
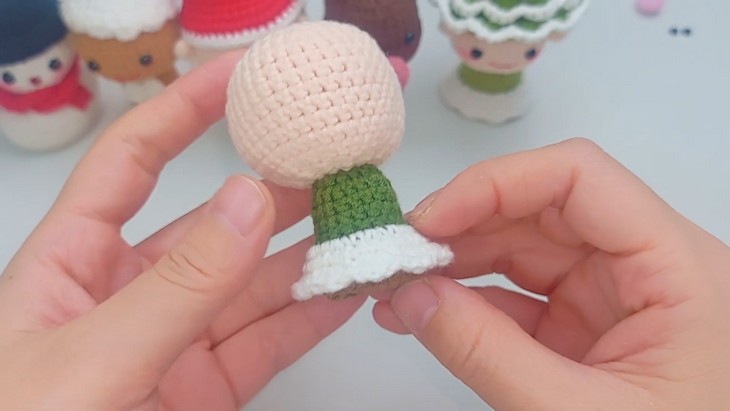
Skill Level: Beginner. The baby puppet pattern is worked from the head to the bottom while the tree pattern is worked separately. The head is simply a sphere, with an increase and decrease of single crochet. The pattern also involves working into the inner loop only (often called back loop only) and outer loop only (front loop only) to create texture, starting the fingerless body, and ridges for attaching other parts like the skirt and leaves.
The slip stitch and chain stitch are used for joining rounds and starting the project. Finally, different pieces are joined together through sewing, and a face is added through embroidery. Color changes, weaving in the ends, and a little sewing are needed.
Tutorial Timing: 28 Minutes (You will learn the shell and ruffle edging by surface-stitching that is used in so many crochet projects, from bucket hats to the tiered Christmas tree, and even Labubu clothes. You will also learn a basic doll head pattern and the color changes. So, the tutorial is worth watching.)
Personalization Tips: To personalize this unique Christmas tree project, the tutor shows two versions – light green with a yellow pom pom and dark green with a pink pom pom. You can also turn it into a Santa Christmas tree by crocheting a small beard, as explained in this tutorial. The tutorial uses a wool ball/pom-pom, but this can be replaced with a crocheted star or bead for a different tree topper.
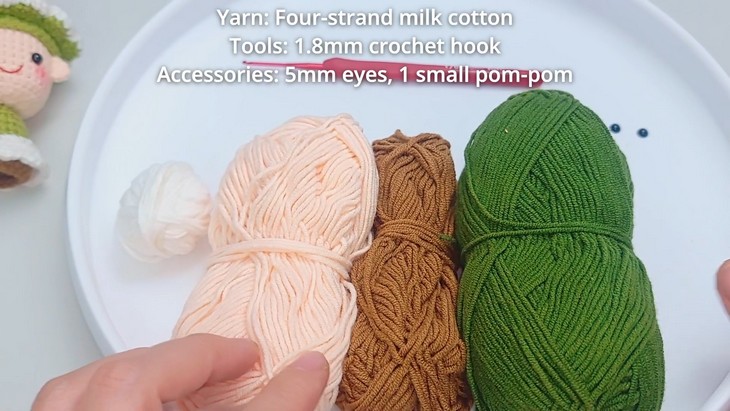
Materials Needed
You will have to gather the following suggested tools and materials for crocheting this mini kawaii Christmas tree ornament, mentioned in the tutorial:
- Four-strand milk cotton yarn (it is a lovely blend of cotton and the milk protein, and it is suggested by so many amigurumi designers)
- 1.8 mm crochet hook
- 5 mm safety eyes
- A small wool ball (pom-pom)
- Stuffing material
- Tapestry/darning needle for assembly and embroidery
- Blush (for cheeks)
Techniques Used
The following are the crochet techniques that the tutor will use for crocheting this Christmas tree for beginners:
Chain Stitch (鎖針): Yarn over and pull through the loop on the hook to form a chain.
Slip Stitch (引拔): Insert hook, yarn over, and pull through both the stitch and the loop on the hook.
Single Crochet / Short Stitch (短針): Insert hook, yarn over, pull up a loop, yarn over, pull through both loops.
Increase (短針加針): Work two single crochet stitches into the same stitch.
Decrease (短針減針): Insert hook into two stitches, yarn over, pull through both, yarn over, pull through two loops.
Outer Half Stitch (挑外半針): Insert hook into the front loop only and work the stitch.
Inner Half Stitch (挑內半針): Insert hook into the back loop only and work the stitch.
Changing Colors (換線): Complete the last yarn-over of a stitch with the new color.
Filling (填充): Stuff the piece evenly with fiberfill or other stuffing material.
Sewing/Embroidery (縫合/綉出): Use a yarn needle to attach pieces or stitch on details.
Complete Video Guide
See also:
How to Crochet Tiered Christmas Tree Keychain with Bow (Mini & Accurate)