How to Crochet Pumpkin Amigurumi from a Rectangle
Not mastered amigurumi yet? You can still learn how to crochet a realistic amigurumi mushroom in no time with this crochet pumpkin duo tutorial presented by Avocado Handmade. This technique is super easy to learn, all using some sewing and working in the back-and-forth rows.
You will also learn how to make the crochet pumpkin ribbons without putting much effort. So, if you are interested in turning a flat piece of crochet fabric into a 3D pumpkin, continue reading till the end for the tutorial.

The designer of this pumpkin project is @AvocadoHandmade – she crochets all things cute but her animal amigurumi are truly next-level. In respect for the creator’s pattern rights, there will be no provision of the written pattern. You can watch the tutorial with on-screen written instructions at the end of this post.
Crochet 3D Mini Pumpkin Amigurumi Duo Tutorial
Skill Level: Beginner – Intermediate. This 3D pumpkin amigurumi needs the flat work by working in the back-and-forth rows; therefore, sewing is a must. The tutorial uses basic crochet stitches (single crochet, chain stitch, half-double crochet, and working in that will be easy even for beginners.)
Tutorial Timing: Approximately 20 minutes. (perfect for learning how to use the flat crochet techniques for crocheting amigurumi. All it needs is a precise hand on the sewing)

Personalization Tips: There are two options to choose from: orange pumpkin amigurumi and brown pumpkin amigurumi. You can also use the bulky yarn for crocheting this pumpkin amigurumi.
Pattern Type: The on-screen written pattern is available if you find written instructions easy to follow along with. Also, the tutorial is slow-paced.
Supplies Used
Gather the following crochet supplies for crocheting this amigurumi pumpkin by yourself:
- Cotton yarn 4ply
- 2.0mm, 2.3mm hook
- Sewing Needle
- Fiberfill Stuffing

Techniques Used
The following are the crochet techniques that the tutor will use for crocheting this amigurumi pumpkin keychain:
- ch (chain): Yarn over, pull through loop on the hook.
- sl st (slip stitch): Insert hook into stitch, yarn over, pull through both loops.
- sc (single crochet): Insert hook, yarn over, pull up a loop, yarn over, pull through both loops.
- hdc (half double crochet): Yarn over, insert hook, yarn over, pull up a loop, yarn over, pull through all three loops.
- blo (back loop only): Work into only the back loop of a stitch.
- Sewing

How is it done?
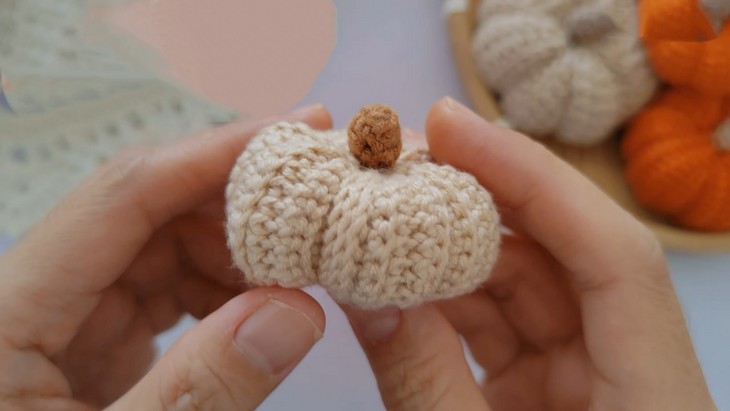
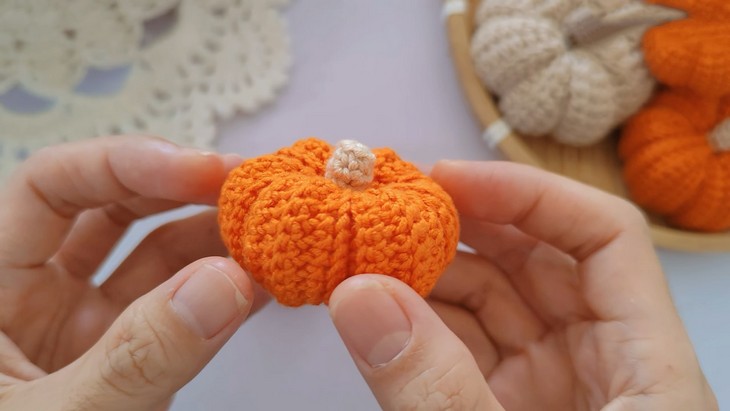
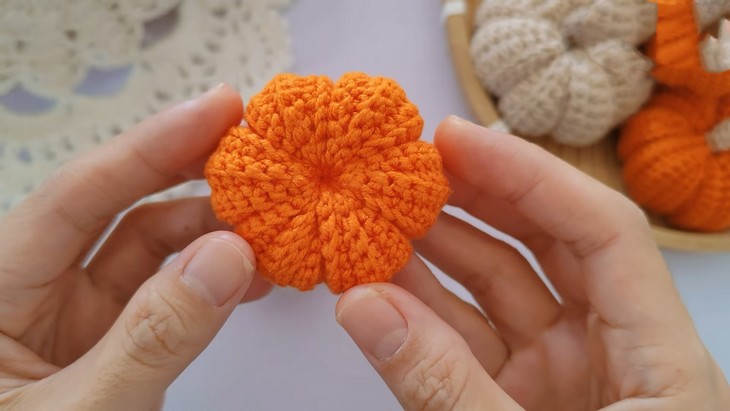
The tutorial begins with a slip knot to start working the flat base. You’ll use half double crochet stitches for quicker progress. Ribbed stitches are added to create the ridged texture. Once the flat piece is done, sew the ends together using slip stitches. Wrap the yarn around the piece and stuff it to form the pumpkin shape. Finally, crochet and attach the stem.
Why Cotton Yarn?
The best yarn for crocheting a pumpkin amigurumi is medium-weight yarn, often labeled as worsted or category 4, as it provides good structure while still being easy to work with. Cotton yarn has a nice stitch defination that is perfect for work with for beginners.