
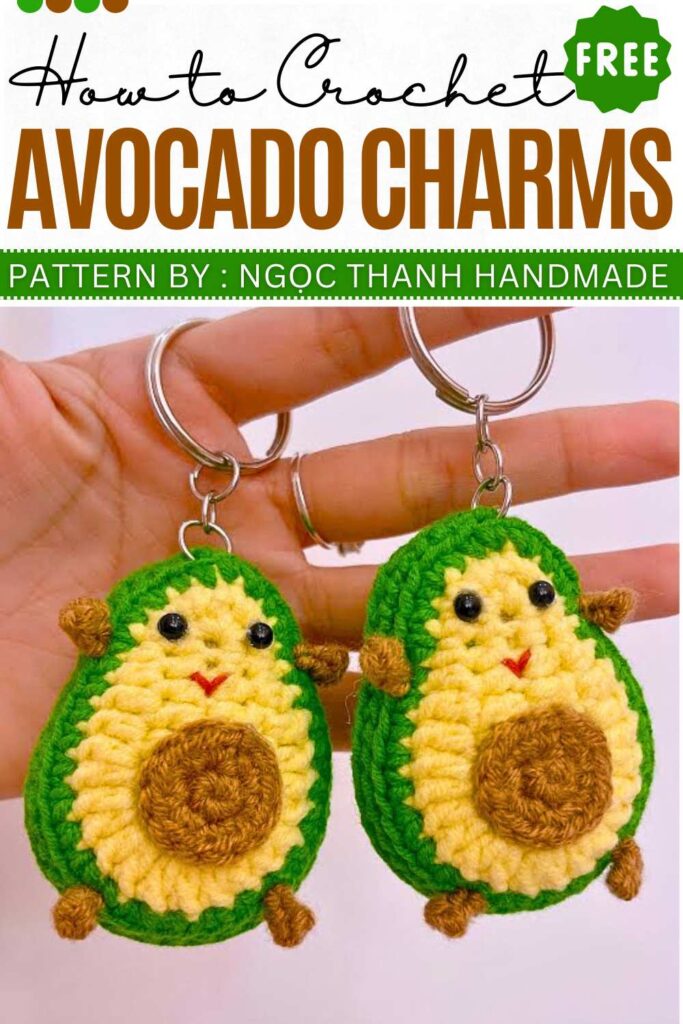
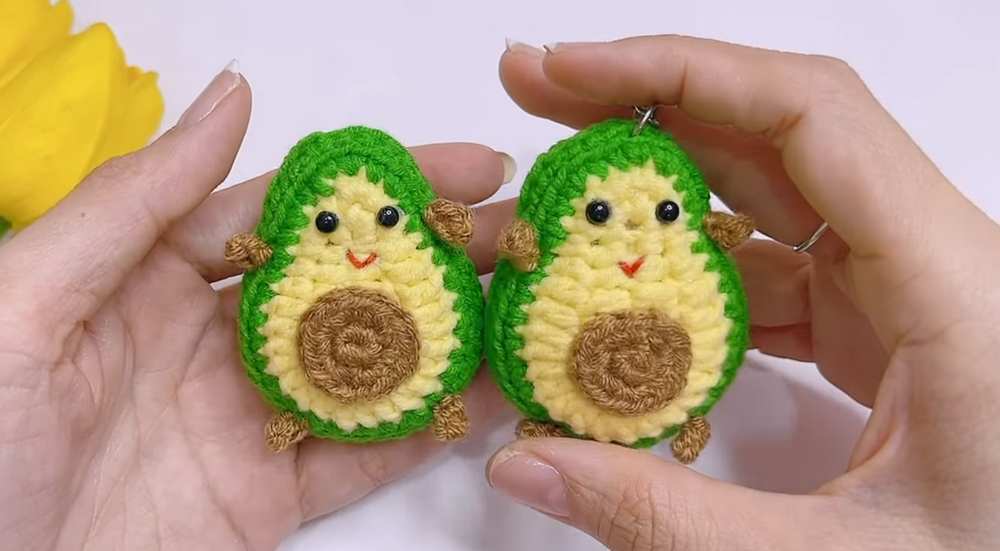
Free Crochet Avocado Amigurumi Keychain Pattern
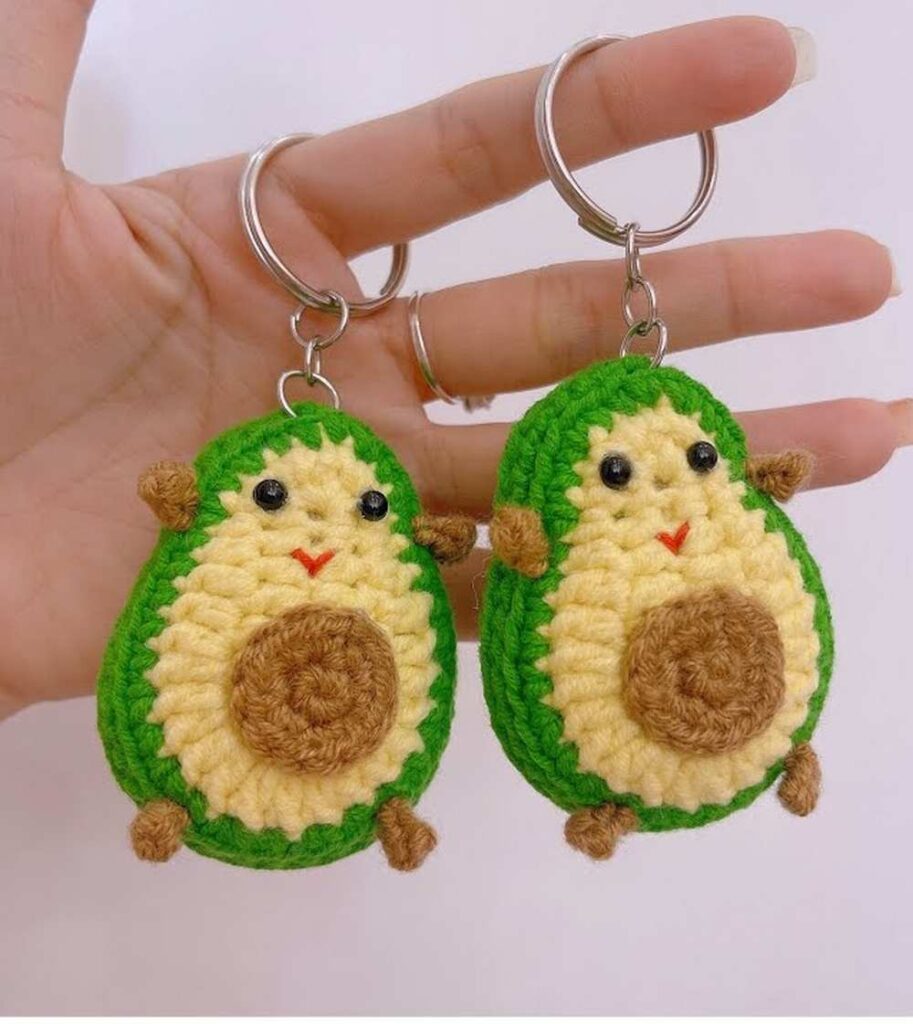
Learn how to crochet a cute avocado buddy keychain with a free step-by-step pattern for absolute beginners. This avocado is from the funny keychain collection that can be gifted to anybody in love with crochet fidget toys. There is a cute face of an avocado, including the seed, belly, legs, and arms.
You can also crochet a bigger and plusher version of this crochet avocado using super bulky chenille yarn. There are mini beads needed that make it cute and attractive. Today, I will share both the UK and US patterns.
The designer behind this avocado keychain is @NITKA_KZ – she has quite a good grasp on kawaii amigurumi designing with added cuteness and surprises.
Crochet Avocado Pattern (US Terminology)
This pattern is for a cute, small amigurumi avocado keychain. It features a light yellow center, a dark green outer skin, and a brown seed, with simple arms and legs.
Materials Needed
- Yarn: Cotton yarn (e.g., Milk Cotton) in Light Yellow, Dark Green, and Brown. A small amount of Red for the mouth.
- Hook: 2.5mm (use 3.0mm for a larger size).
- Eyes: Small safety eyes or black beads (approx. 4mm-6mm).
- Other: Fiberfill stuffing, tapestry needle, scissors, glue (hot glue recommended), and a keychain ring.
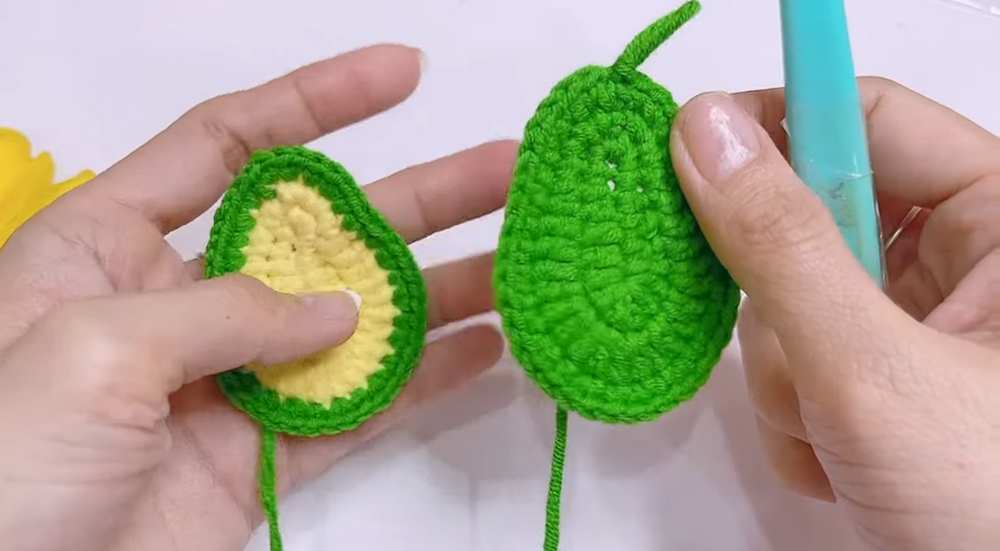
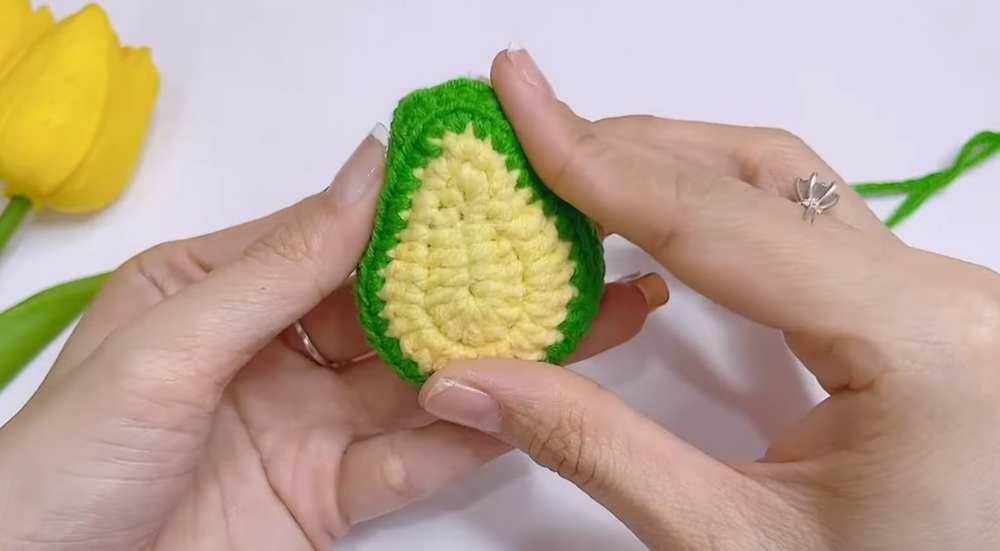
Front Panel (Yellow & Green)
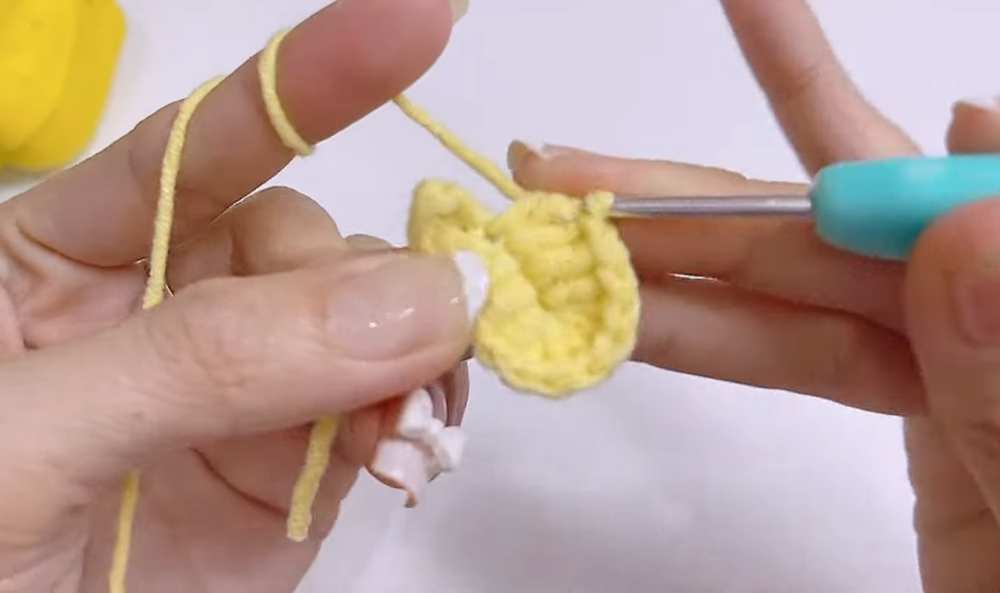
- R1: With Yellow, ch 7. Starting in the 2nd ch from hook: 1 inc, 1 sc, 1 hdc, 2 dc, then 7 dc in the last chain. Working down the other side: 2 dc, 1 hdc, 1 sc, 1 inc. Sl st to join.
- R2: ch 1, 2 inc, 1 sc, 1 hdc, 2 dc, 7 dc-inc (2 dc in each of next 7 sts), 2 dc, 1 hdc, 1 sc, 2 inc. Sl st to join.
- R3: Switch to Green. ch 1, (1 sc, 1 inc) x 2, 4 sc, (1 sc, 1 inc) x 7, 4 sc, (1 inc, 1 sc) x 2. Fasten off, leaving a long tail for sewing.
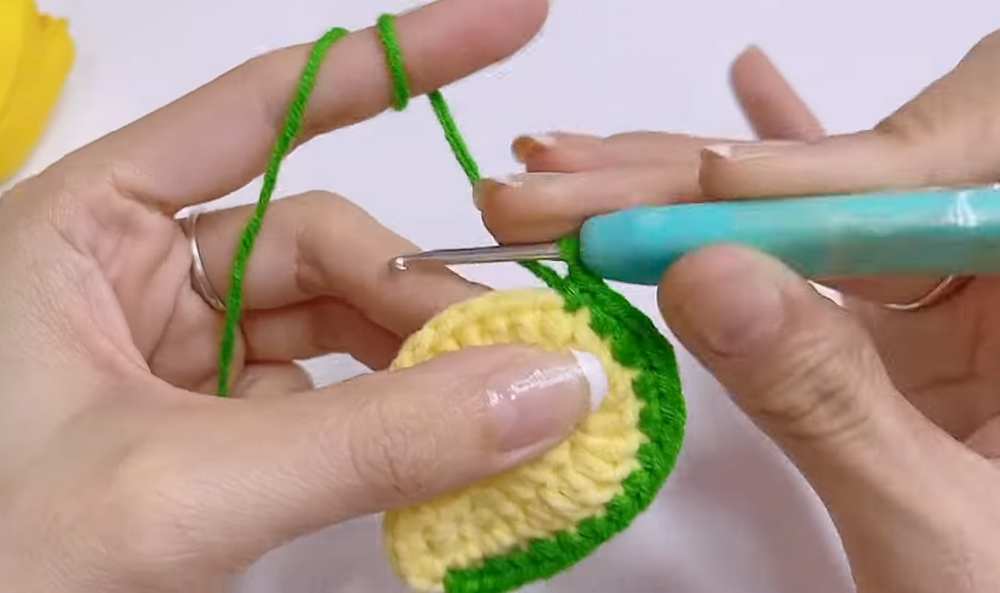
Back Panel (Green)
- R1-R3: Repeat the same steps as the Front Panel, but use Green yarn for all rounds.
- R4: ch 1, 41 sc around the entire piece. (41)
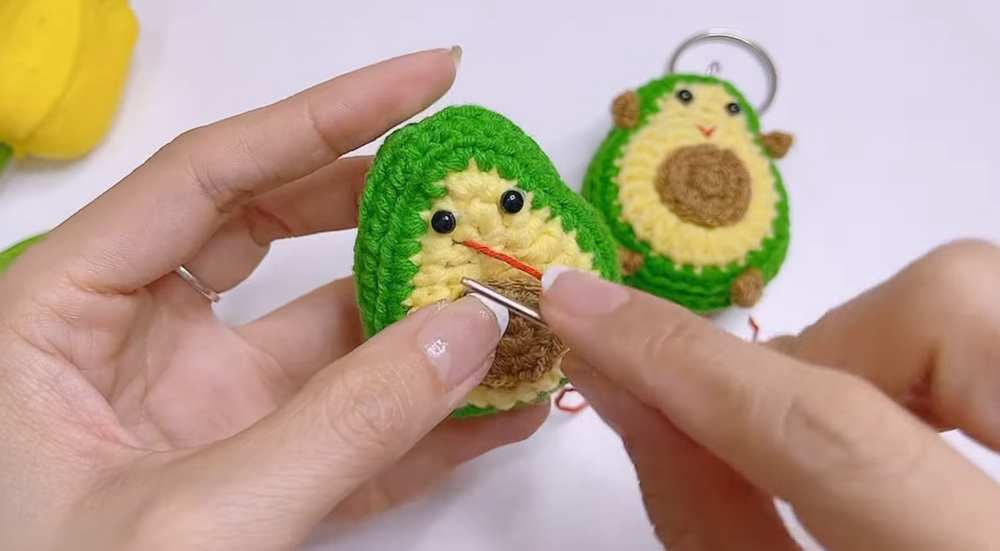
The Seed (Brown)
- R1: 6 sc in MR. (6)
- R2: 6 inc. (12)
- Sl st to join and fasten off.
Arms & Legs (Brown)
- Attach yarn to the body.
- Steps: ch 3, starting in 2nd ch from hook: 1 sc, 1 sl st. Fasten off and pull the thread through to the back to secure. Repeat for two arms and two legs.
Assembly & Finishing
Seed: Glue or sew the Brown seed to the center of the Yellow section on the Front Panel.
Face: Attach safety eyes above the seed. Embroider a small “V” shaped mouth using Red thread.
Joining: Place the Front and Back panels together (wrong sides facing). Sew them together through the inner loops, leaving a small gap.
Stuffing: Lightly stuff with fiberfill through the gap, then sew closed.
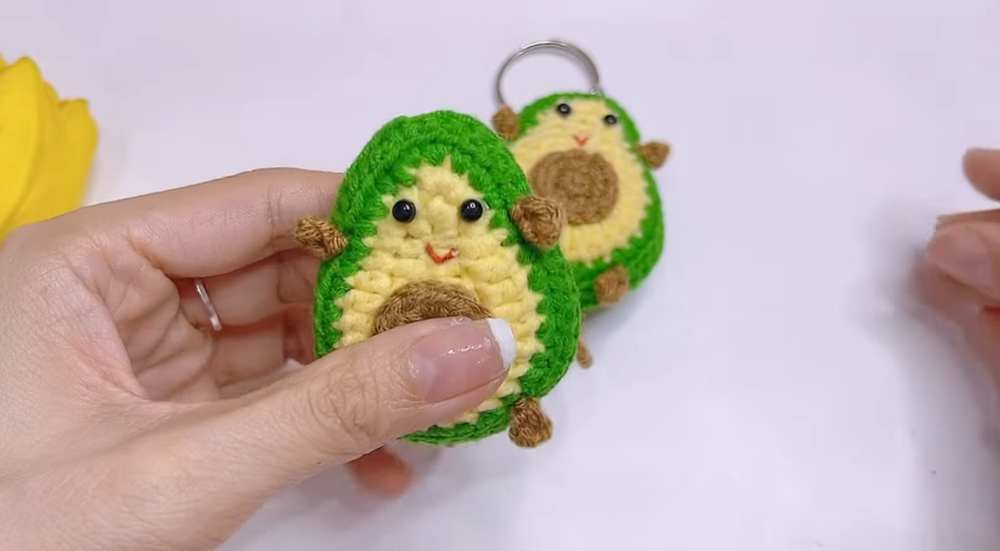
Limbs: Add the arms between the eyes and mouth level on the sides. Add the legs at the bottom corners.
Video Pattern
Pattern (UK Terminology)
Front Panel (Yellow & Green)
R1: With Yellow, ch 7. Starting in 2nd ch from hook: 1 inc, 1 dc, 1 htr, 2 tr, then 7 tr in the last chain. Working down the other side: 2 tr, 1 htr, 1 dc, 1 inc. Sl st to join.
R2: ch 1, 2 inc, 1 dc, 1 htr, 2 tr, 7 tr-inc (2 tr in each of next 7 sts), 2 tr, 1 htr, 1 dc, 2 inc. Sl st to join.
R3: Switch to Green. ch 1, (1 dc, 1 inc) x 2, 4 dc, (1 dc, 1 inc) x 7, 4 dc, (1 inc, 1 dc) x 2. Fasten off.
Back Panel (Green)
R1-R3: Repeat the same steps as the Front Panel using Green yarn throughout.
R4: ch 1, 41 dc around. (41)
The Seed (Brown)
R1: 6 dc in MR. (6)
R2: 6 inc. (12)
Sl st to join and fasten off.
Arms & Legs (Brown)
Attach yarn to the body.
Steps: ch 3, starting in 2nd ch from hook: 1 dc, 1 sl st. Fasten off.