
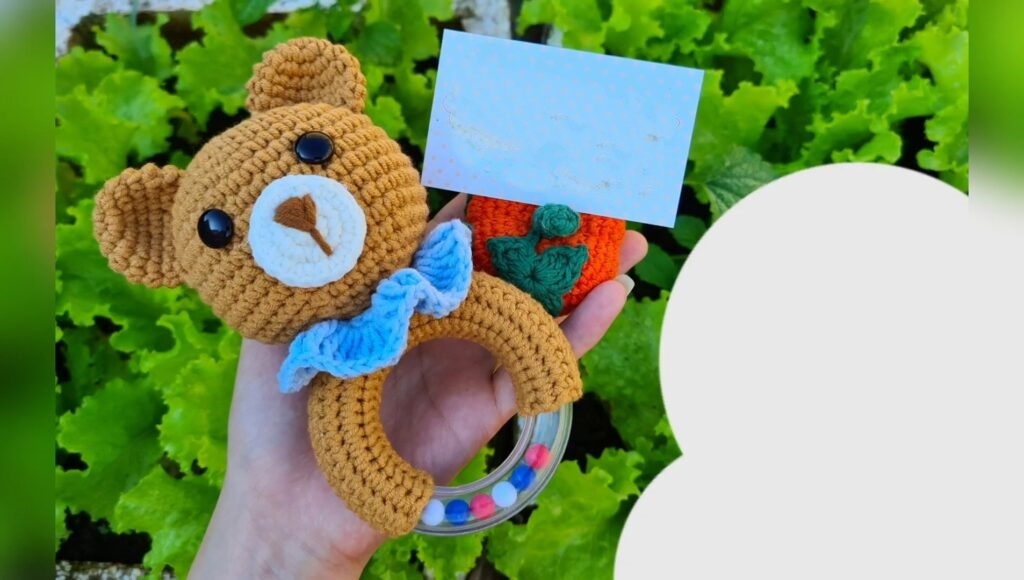
Crochet Bear-shaped Baby Rattle Pattern Step by step
Let’s create a handmade gift that will bring a smile to a baby’s face. This adorable bear-shaped rattle combines a soft, cuddly toy with a fun sound that babies love. It is a lovely way to use your hobby to make a heartfelt gift that is light enough for a baby to hold and soft enough for them to cuddle safely.
Crochet Bear-shaped Baby Rattle
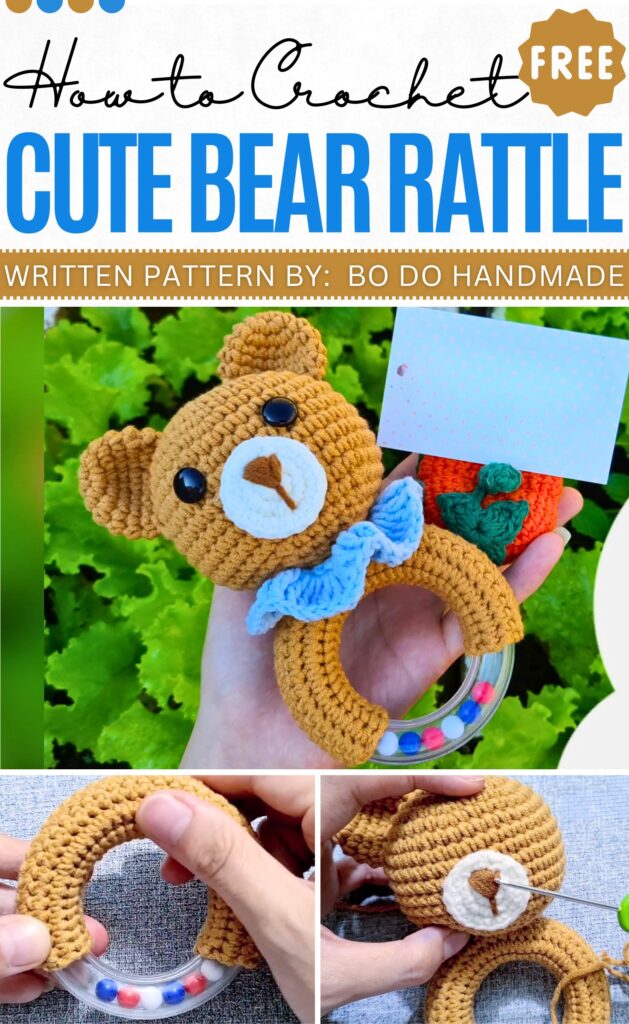
How to Make It
-
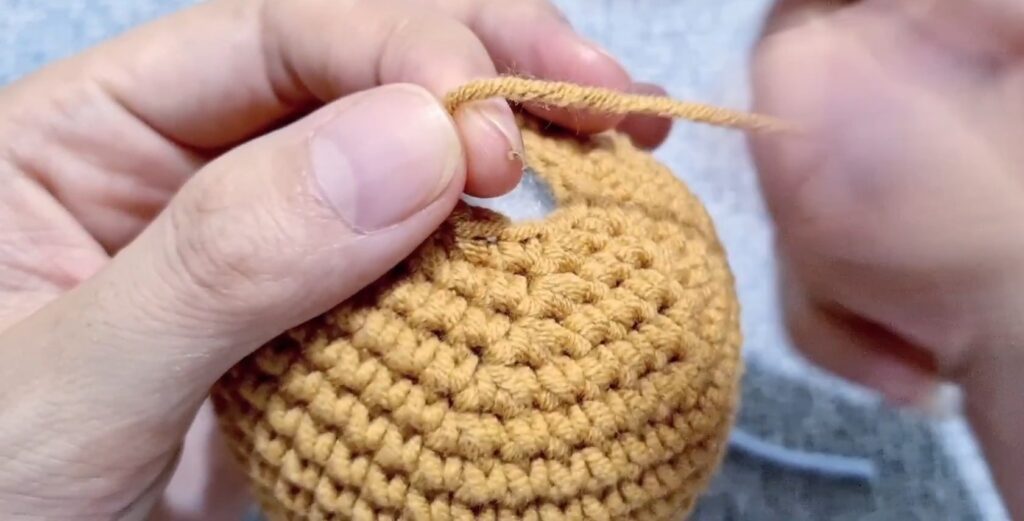
Make the head: Crochet a small ball and fill it with soft stuffing.
-
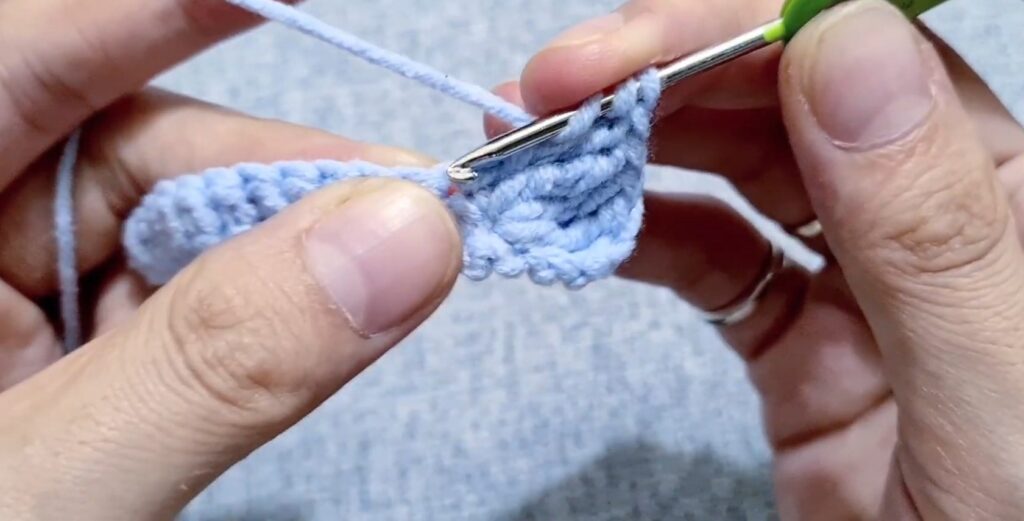
Wrap the ring: Crochet a flat piece to cover the plastic ring.
-
Add details: Make small ears, a snout, and a wavy neck collar.
-
Finish the face: Stitch on the eyes and a cute nose.
-
Join everything: Sew all the pieces onto the ring cover tightly.
About The Creator:
Bi do Handmade has been an expert in crocheting and designing crochet amigurumi, bag charms, and pouches. Also visit her YouTube channel for more exciting projects.
Let’s Crochet Bear Rattle
Terminology: US Terms Materials: 2.0mm – 2.5mm hook, Yarn (sport/baby weight), Rattle ring, Polyfill, Tapestry needle, Beads/Safety eyes.
Abbreviations:
-
ch: chain
-
sc: single crochet
-
inc: increase (2 sc in one st)
-
dec: decrease (sc 2 together)
-
tr: treble crochet (yarn over twice)
-
st(s): stitch(es)
-
sl st: slip stitch
-
MR: Magic Ring
-
FO: Fasten off
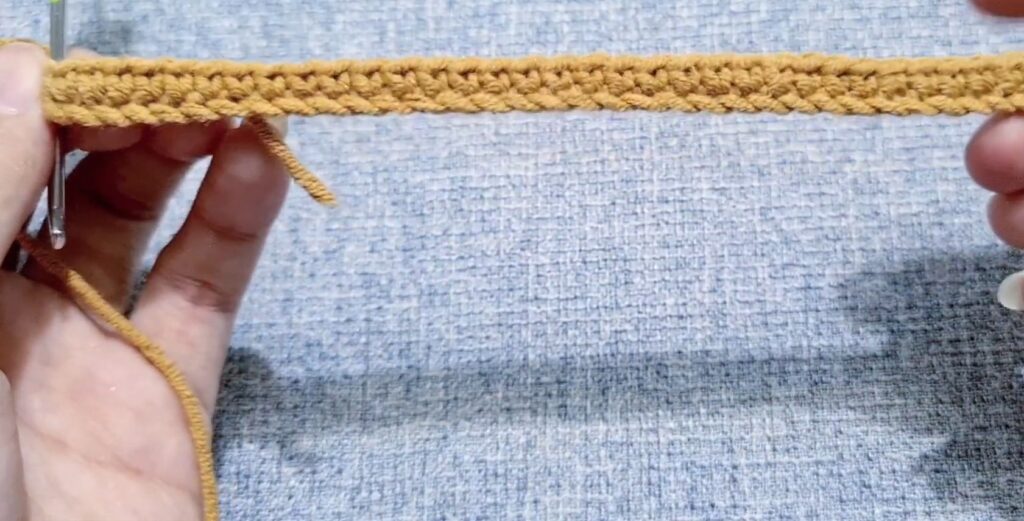
Ring Cover
Make a rectangular strip to cover the rattle ring.
-
Row 1: Ch 35 (or length needed to cover half the ring circumference).
-
Row 2: Sc in 2nd ch from hook and in each ch across.
-
Row 3: Ch 1, turn. Sc in each st across.
-
Row 4-9: Repeat Row 3 until the piece is wide enough to wrap around the thickness of the ring.
-
FO. Leave a very long tail. Wrap the piece around the ring and sew the long edges together securely.

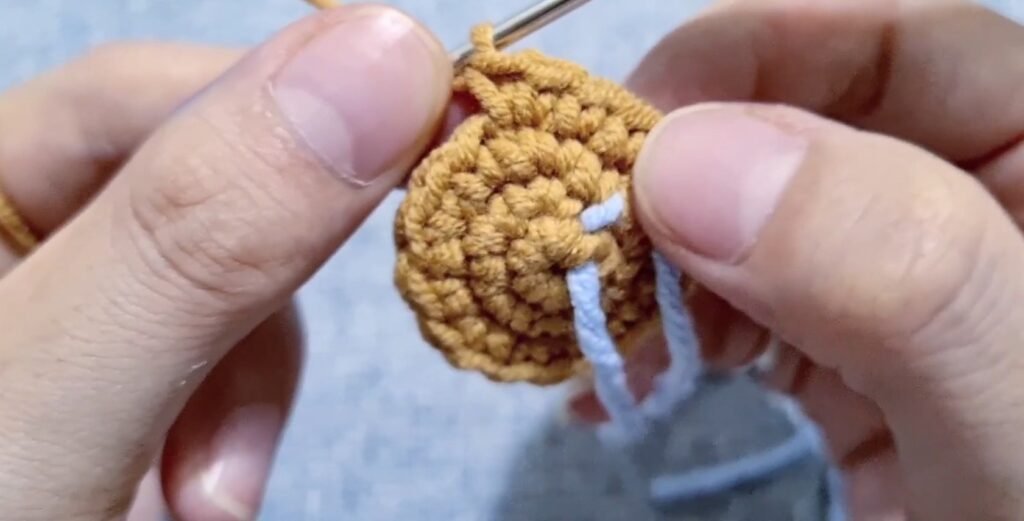
Head
Worked in a spiral. Do not join rounds.
-
Rnd 1: MR, 6 sc. (6 sts)
-
Rnd 2: Inc in each st around. (12 sts)
-
Rnd 3: Sc 1, inc repeat around. (18 sts)
-
Rnd 4: Sc 2, inc repeat around. (24 sts)
-
Rnd 5: Sc 3, inc repeat around. (30 sts)
-
Rnd 6: Sc 4, inc repeat around. (36 sts)
-
Rnd 7: Sc 5, inc repeat around. (42 sts)
-
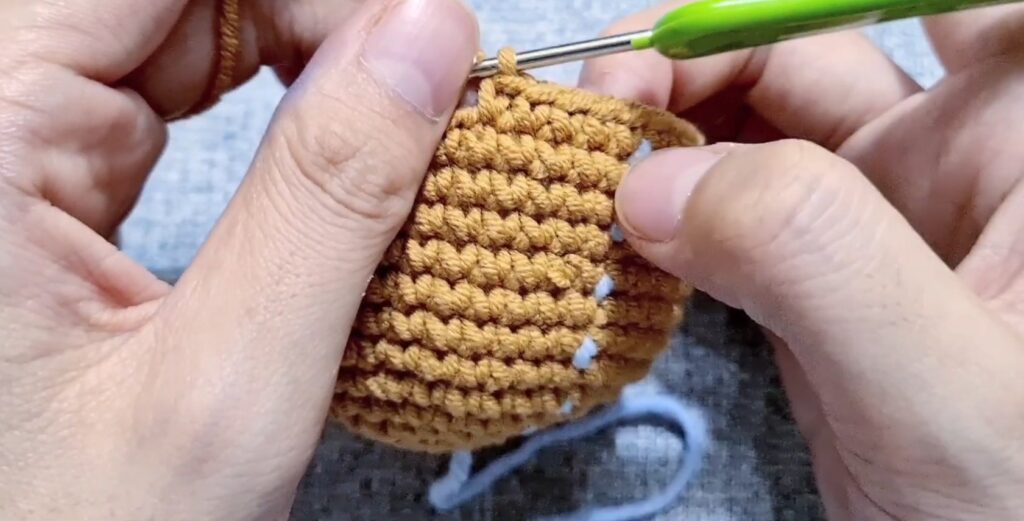
Rnd 8-14: Sc in each st around (7 rounds). (42 sts)
-
Rnd 15: Sc 5, dec repeat around. (36 sts)
-
Rnd 16: Sc 4, dec repeat around. (30 sts)
-
Rnd 17: Sc 3, dec repeat around. (24 sts)
-
Rnd 18: Sc 2, dec repeat around. (18 sts)
-
Rnd 19: Sc 1, dec repeat around. (12 sts)
-
FO. Leave a long tail. Stuff the head firmly. Sew the head onto the covered part of the rattle ring.
Snout
Worked in joined rounds.
-
Rnd 1: MR, 6 sc. Join with sl st. (6 sts)
-
Rnd 2: Ch 1. Inc in each st around. Join. (12 sts)
-
Rnd 3: Ch 1. Sc 1, inc repeat around. Join. (18 sts)
-
FO. Leave a tail for sewing. Embroider a nose on the snout and sew it to the center of the face.
Ears (Make 2)
Worked in joined rounds (or spiral as preferred).
-
Rnd 1: MR, 6 sc. (6 sts)
-
Rnd 2: Inc in each st around. (12 sts)
-
Rnd 3: Sc 1, inc repeat around. (18 sts)
-
Rnd 4-6: Sc in each st around (3 rounds). (18 sts)
-
FO. Leave a tail. Flatten the ears slightly and sew them to the top of the head.

Ruffle Collar
-
Row 1: Ch 25 (ensure it fits around the bear’s neck/base).
-
Row 2: Sc in 2nd ch from hook and in each ch across.
-
Row 3: Ch 4 (counts as first tr), turn. Work 3 tr in same st. Work 3 tr in each remaining st across.
-
FO. Leave a tail. Wrap the collar around the base of the head (where it meets the ring) and sew the ends together.
Assembly
-
-
Sew Snout to Head.
-
Attach Eyes (beads or safety eyes) above the snout.
-
Sew Ears to the top sides of the Head.
-
Securely sew the Head to the Ring Cover.
-
Attach the Ruffle Collar around the neck area.
-
Video Tutorial:
Terminology: UK Terms Materials: 2.0mm – 2.5mm hook, Yarn (4-ply or DK), Rattle ring, Toy stuffing, Tapestry needle, Beads/Safety eyes.
Abbreviations:
-
ch: chain
-
dc: double crochet (US sc)
-
inc: increase (2 dc in one st)
-
dec: decrease (dc 2 together)
-
tr: treble crochet (US dc)
-
dtr: double treble crochet (US tr – yarn over twice)
-
st(s): stitch(es)
-
ss: slip stitch
-
MR: Magic Ring
-
FO: Fasten off
Ring Cover
-
Row 1: Ch 35 (or length to cover half the ring).
-
Row 2: Dc in 2nd ch from hook and in each ch across.
-
Row 3: Ch 1, turn. Dc in each st across.
-
Row 4-9: Repeat Row 3 until wide enough to wrap around the ring.
-
FO. Leave long tail. Sew around the ring.
Head
Worked in a spiral.
-
Rnd 1: MR, 6 dc. (6 sts)
-
Rnd 2: Inc in each st around. (12 sts)
-
Rnd 3: Dc 1, inc repeat around. (18 sts)
-
Rnd 4: Dc 2, inc repeat around. (24 sts)
-
Rnd 5: Dc 3, inc repeat around. (30 sts)
-
Rnd 6: Dc 4, inc repeat around. (36 sts)
-
Rnd 7: Dc 5, inc repeat around. (42 sts)
-
Rnd 8-14: Dc in each st around (7 rounds). (42 sts)
-
Rnd 15: Dc 5, dec repeat around. (36 sts)
-
Rnd 16: Dc 4, dec repeat around. (30 sts)
-
Rnd 17: Dc 3, dec repeat around. (24 sts)
-
Rnd 18: Dc 2, dec repeat around. (18 sts)
-
Rnd 19: Dc 1, dec repeat around. (12 sts)
-
FO. Leave tail. Stuff firmly.
Snout
-
Rnd 1: MR, 6 dc. Join with ss. (6 sts)
-
Rnd 2: Ch 1. Inc in each st around. Join. (12 sts)
-
Rnd 3: Ch 1. Dc 1, inc repeat around. Join. (18 sts)
-
FO. Embroider nose and sew to face.
Ears (Make 2)
-
Rnd 1: MR, 6 dc. (6 sts)
-
Rnd 2: Inc in each st around. (12 sts)
-
Rnd 3: Dc 1, inc repeat around. (18 sts)
-
Rnd 4-6: Dc in each st around (3 rounds). (18 sts)
-
FO. Flatten and sew to head.
Ruffle Collar
-
Row 1: Ch 25.
-
Row 2: Dc in 2nd ch from hook and each ch across.
-
Row 3: Ch 4 (counts as first dtr), turn. 3 dtr in same st. 3 dtr in each st across.
-
FO. Sew around the neck.

Assembly
-
Sew snout, eyes, and ears to the head.
-
Attach the head securely to the covered section of the ring.
-
Wrap the ruffle collar around the neck and stitch ends together.