
How to Crochet Big & Chubby Chick Plushies for Beginners
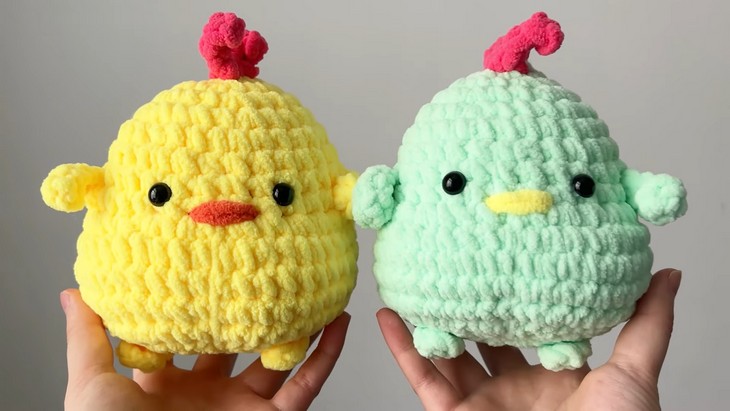
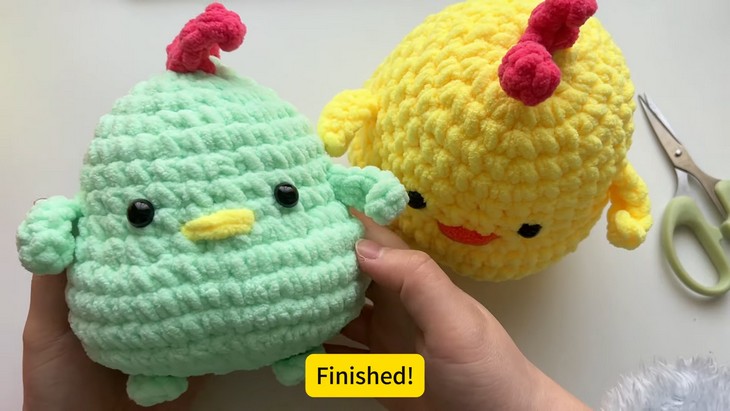
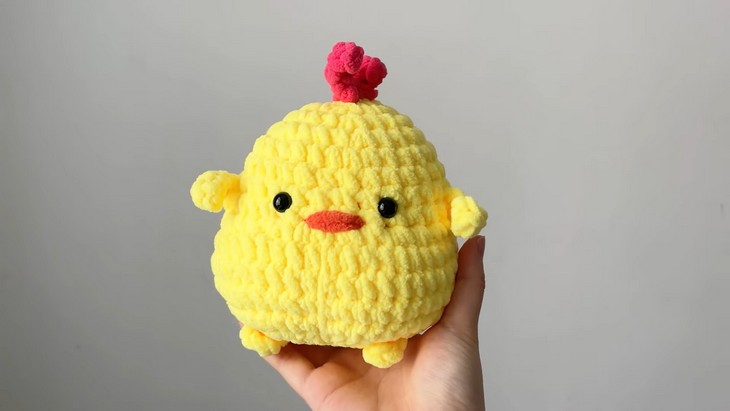
I have found the easiest big plushie idea that I am so excited to share with you in this post. So, learn how to crochet big & chubby chick plushies following a stitch-by-stitch tutorial from Nisa Crochet that are so soft, huggable, and cute. You can crochet the set of two in either yellow or green for Christmas or any time of the year.
Luckily, the design of this big chick plushie is very basic and needs almost no sewing, due to which I say it is the easiest animal plushie. These chicks can be placed desk or shelves as a support toy.
Crochet Big & Chubby Chick Plushies
You will especially love the embroidered beak, the comb, and the tiny flaps and legs. So, if you have made up to crochet this chick set, continue reading this post till the end. There you will find the complete tutorial. It will certainly be the best gift ever!

About the Designer: The designer behind these chubby chick plushies is @Crochetbynisa_ – She is a promising designer of always-cute animal amigurumi, accessories, and organizers. You will love her small bear charm, a tropical fish, and a floppy bunny, alongside practical items such as a cat storage basket and a fish drawstring bag.
For Christmas, she has pixel art (tapestry) crochet tutorials, a tree pouch, and patterns for items like angel wings, making her library super wholesome.
Note: In respect of the creator’s pattern rights, there will be no provision of the written pattern. You can watch the tutorial with on-screen written instructions at the end of this post.
Material Suggestions for ChubbY Chick Plushies
To remake this baby chick plushie set following the tutorial, gather the following suggested tools and materials:
- Chenille yarn (size 6) – Use the super bulky yarn like Bernat Blanket yarn.
- 5.5mm crochet hook – a bit smaller than the recommended.
Other Materials:
- Scissors
- Darning needle
- Glue
- 10mm safety eyes
About the Chick Tutorial
Quick Summary & Skill Level: Beginner. Need to crochet a basic chubby plushie as a base by working in the round using usual amigurumi crochet stitches like single crochet, slip stitch, increase, and decrease. Color changes are not needed at all. The wings, legs, and comb are crocheted directly onto the body using a pattern of chain stitch, slip stitch, and single crochet. So, the whole pattern is simply no-sew. The comb is crocheted in flat rows.
Tutorial-Timing: About 30 minutes only (perfect for learning a popular chubby plushie base that can be used for other animals like reindeer and polar bear.)
Quick Tips before Starting: As mentioned, you can crochet it in either yellow or sea green for the body. The embroidery beak can also be sewn in orange or yellow, depending on your choice. You can also crochet this baby chick using standard yarn. You can crochet a small Santa hat for your baby chicken, like in Crochet Christmas chicks.
Stitch Guides
Here’s a list of quick guides to each crochet stitch for these Christmas plushies. Use this to revise the terms:
Ch (Chain): Yarn over and pull through the loop on your hook.
Sl (Slip Stitch): Insert hook into stitch, yarn over, pull through stitch and loop on hook.
Inc (Increase): Work two stitches into the same stitch.
- Dec (Decrease): For the single crochet decrease, insert the hook into the first stitch, yarn over, pull up a loop, yarn over, insert the hook in the other stitch, yarn over, and pull through all the loops on the hook.
Other Stitches:
Sc (Single Crochet): Insert hook into stitch, yarn over, pull up a loop, yarn over, pull through both loops.
Hdc (Half Double Crochet): Yarn over, insert hook into stitch, yarn over, pull up a loop, yarn over, pull through all three loops.