
Crochet Cat Face Pouch Bag Pattern Free
Turn yarn into a cute cat face pouch with this pattern. The bag has a sweet white face, pointy ears, and a long strap for easy carrying. Hang it on your bag or hold it in your hand; this crochet bag is sure to be your loyal companion!

Bi do Handmade has been an expert in crocheting and designing crochet amigurumi, bag charms, and pouches. Also visit her YouTube channel for more exciting projects.
Crochet Mini Cat Garlic Bag Pattern
Materials
-
Yarn: Milk Cotton (125g), approx. 1.75–2.0mm thickness. (Main color: White; Secondary color: Red/Orange/Ginger for accents).
-
Hook: 3.5mm
-
Notions: 2 black beads for eyes, 1 wooden bead (to slide on strap as a lock), yarn needle, embroidery thread.
Abbreviations
-
ch: chain
-
st: stitch
-
sl st: slip stitch
-
sc: single crochet
-
hdc: half double crochet
-
dc: double crochet
-
tr: treble crochet
-
dtr: double treble crochet (yarn over 2 times)
Part 1: Main Body (Make 2 – Front & Back)
-
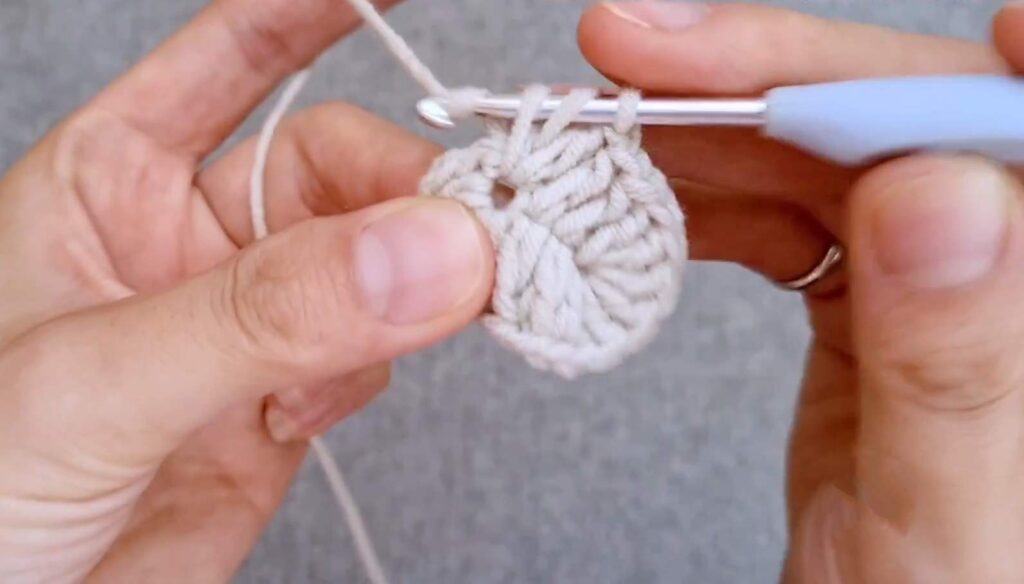
Rnd 1: Ch 4. In 4th ch from hook, work 3 dc. 1 dc in next 2 ch. In the last ch, work 7 dc. Turning to the other side of the foundation chain: 1 dc in next 2 ch. In the very first ch (same as the 3 dc), work 3 more dc. Sl st to top of ch-3 to join.
-
Rnd 2: Ch 3. 2 dc in each of the first 3 dc. 1 dc in next 2 dc. 2 dc in each of the next 7 dc. 1 dc in next 2 dc. 2 dc in each of the remaining 3 dc. Sl st into ch-3.
-
Rnd 3: Ch 3. (1 dc, 2 dc in next st) x 3. 1 dc in next 2 dc. (1 dc, 2 dc in next st) x 7. 1 dc in next 2 dc. (1 dc, 2 dc in next st) x 3. Sl st into ch-3.
-
-
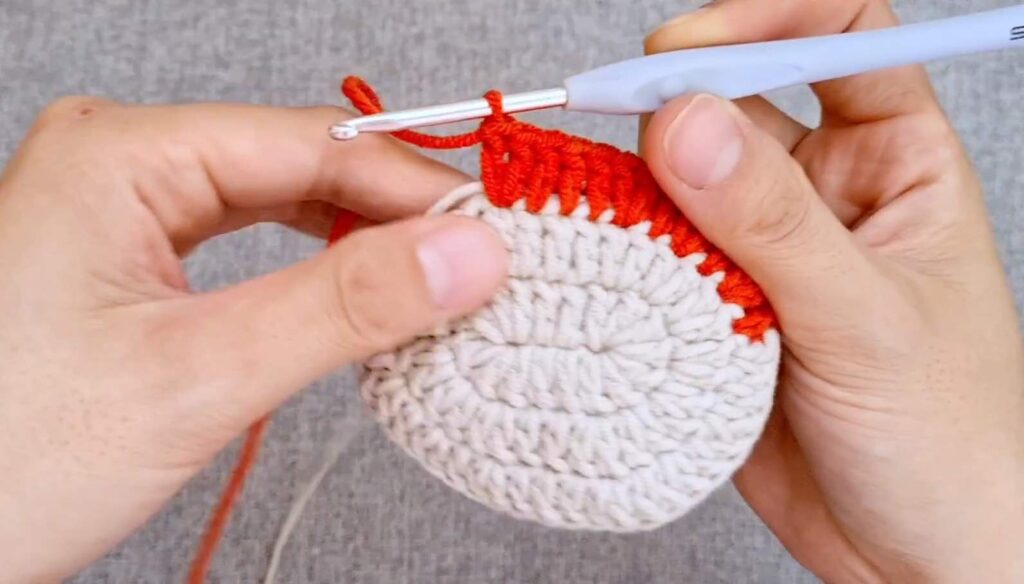
Color Change Note: On the Front Panel, change to the accent color for the last 3 groups of the round to create a color patch.
-
Fasten off the Back Panel. Keep the yarn attached to the Front Panel.
-
Part 2: Joining and Edging
-
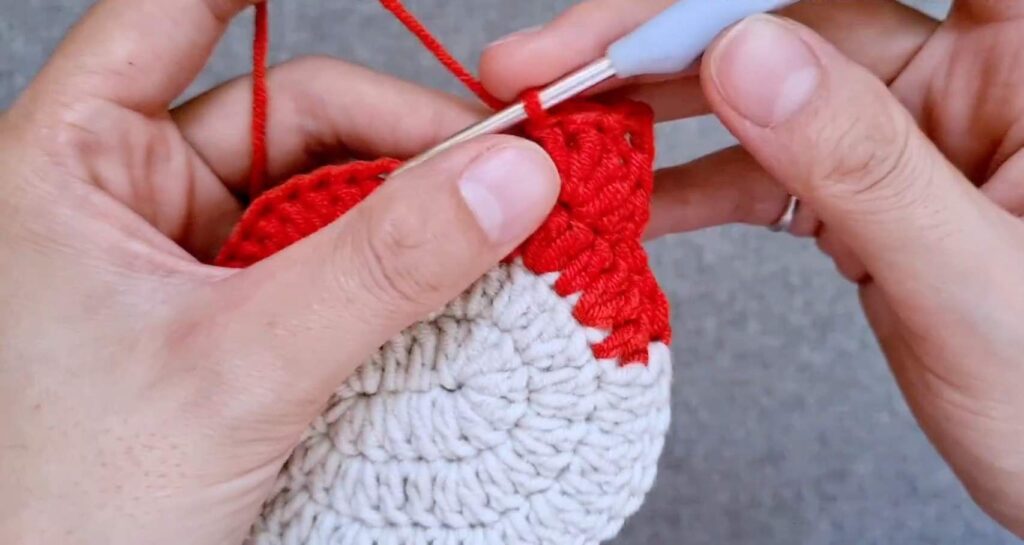
Place Front and Back panels together with wrong sides facing.
-
Joining (Sl st): Starting from the side of the white section, work sl sts through both layers to join the bottom and sides. Stop when you reach the top red/accent section.
-
Top Edging & Ears (Working through both layers for the first 4 sts):
-
Sl st in next 4 sts through both layers.
-
Ear 1 (Front layer only): In next st: 1 sc, 1 hdc. In next st: 1 dc, 1 tr, ch 2, sl st into top of tr, 1 tr, 1 dc. In next st: 1 hdc, 1 sc.
-
Center Gap: Sl st in next 7 sts (front layer only).
-
Ear 2 (Front layer only): In next st: 1 sc, 1 hdc. In next st: 1 dc, 1 tr, ch 2, sl st into top of tr, 1 tr, 1 dc. In next st: 1 hdc, 1 sc.
-
Finish Join: Sl st in remaining 4 sts through both layers. Fasten off.
-

Part 3: Strap
-
Join yarn at the center st between the ears (on the front panel).
-
Ch 130–150 (depending on desired length).
-
Sl st the end of the chain to the corresponding center st on the back panel.
-
Fasten off and weave in ends.

Part 4: Finishing Touches
-
-
Lock: Slide the wooden bead onto the strap. This acts as a drawstring lock for the bag opening.
-
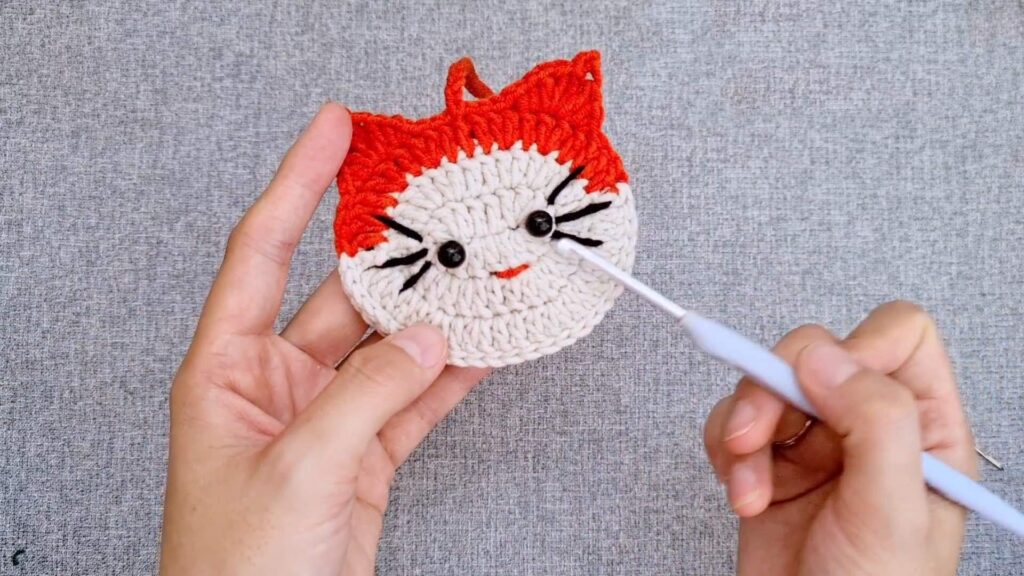
Face:
-
Sew/glue bead eyes onto the front panel.
-
Embroider a small pink or red mouth/nose below the eyes.
-
Embroider whiskers using black thread.
-
-
Video Tutorial:
Pattern In UK Terms
Abbreviations
-
ch: chain
-
st: stitch
-
ss: slip stitch
-
dc: double crochet (US single crochet)
-
htr: half treble crochet (US half double crochet)
-
tr: treble crochet (US double crochet)
-
dtr: double treble crochet (US treble crochet)
Part 1: Main Body (Make 2 – Front & Back)
-
Rnd 1: Ch 4. In 4th ch from hook, work 3 tr. 1 tr in next 2 ch. In the last ch, work 7 tr. Turning to the other side of the foundation chain: 1 tr in next 2 ch. In the very first ch (same as the 3 tr), work 3 more tr. ss to top of ch-3 to join.
-
Rnd 2: Ch 3. 2 tr in each of the first 3 tr. 1 tr in next 2 tr. 2 tr in each of the next 7 tr. 1 tr in next 2 tr. 2 tr in each of the remaining 3 tr. ss into ch-3.
-
Rnd 3: Ch 3. (1 tr, 2 tr in next st) x 3. 1 tr in next 2 tr. (1 tr, 2 tr in next st) x 7. 1 tr in next 2 tr. (1 tr, 2 tr in next st) x 3. ss into ch-3.
-
Colour Change Note: On the Front Panel, change to the accent colour for the last 3 groups of the round to create the patch.
-
Fasten off the Back Panel. Keep the yarn attached to the Front Panel.
-
Part 2: Joining and Edging
-
Place Front and Back panels together with wrong sides facing.
-
Joining (ss): Starting from the side of the white section, work ss through both layers to join the bottom and sides. Stop when you reach the top accent section.
-
Top Edging & Ears (Working through both layers for the first 4 sts):
-
ss in next 4 sts through both layers.
-
Ear 1 (Front layer only): In next st: 1 dc, 1 htr. In next st: 1 tr, 1 dtr, ch 2, ss into top of dtr, 1 dtr, 1 tr. In next st: 1 htr, 1 dc.
-
Centre Gap: ss in next 7 sts (front layer only).
-
Ear 2 (Front layer only): In next st: 1 dc, 1 htr. In next st: 1 tr, 1 dtr, ch 2, ss into top of dtr, 1 dtr, 1 tr. In next st: 1 htr, 1 dc.
-
Finish Join: ss in remaining 4 sts through both layers. Fasten off.
-
Part 3: Strap
-
Join yarn at the centre st between the ears (on the front panel).
-
Ch 130–150 (depending on child’s height).
-
ss the end of the chain to the corresponding centre st on the back panel.
-
Fasten off and weave in ends.
Part 4: Finishing Touches
-
Lock: Slide the wooden bead onto the strap. Pull the strap through to create a loop that closes the bag.
-
Face:
-
Sew or glue bead eyes onto the front panel.
-
Embroider a small pink mouth and nose.
-
Add black whiskers with thin embroidery thread.
-