
Crochet Cherry Wallet & Handbag Pattern
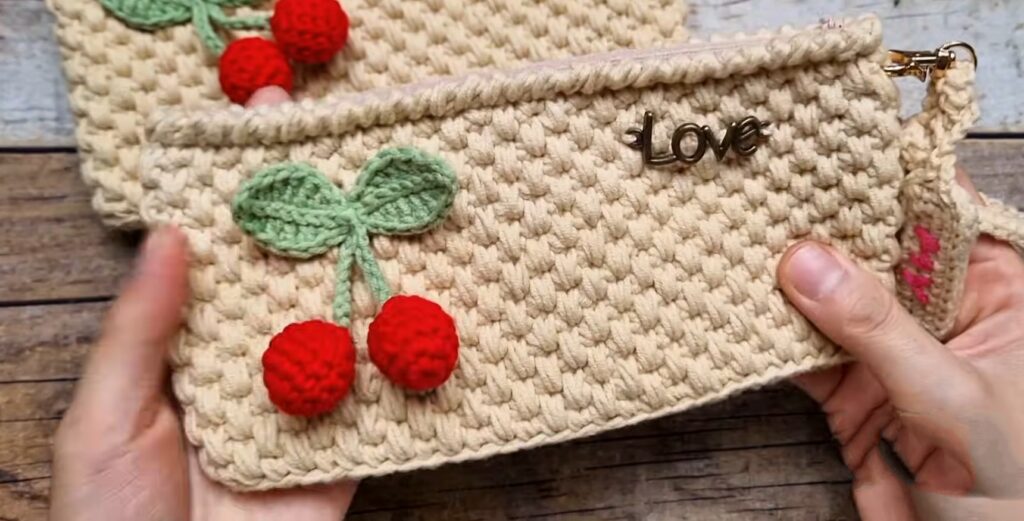
This project is a small and cute bag that you can use as a wallet or a tiny purse to hold your things. It features a bright cherry decoration on the front and has a zipper at the top to keep your phone and money safe. There is also a soft strap for your wrist and a little tag for your name, which makes it a very special handmade accessory.
Crochet Cherry Wallet & Handbag
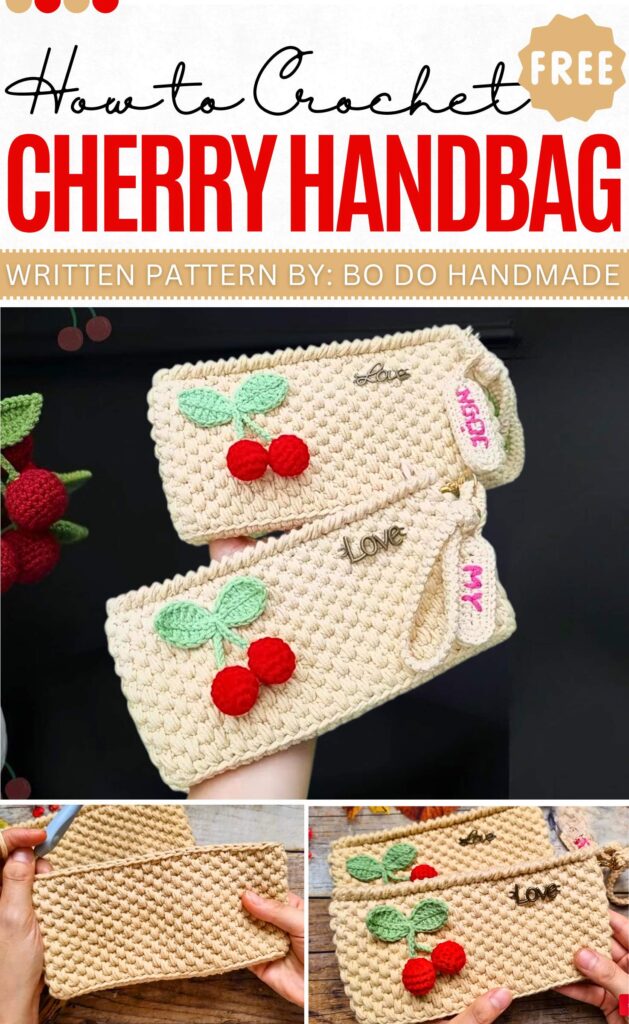
The Making Process
-
Crochet the base: Start with a flat bottom and then work in circles to make the sides.
-
Create texture: Use a repeating stitch to make the bag feel thick and strong.
-
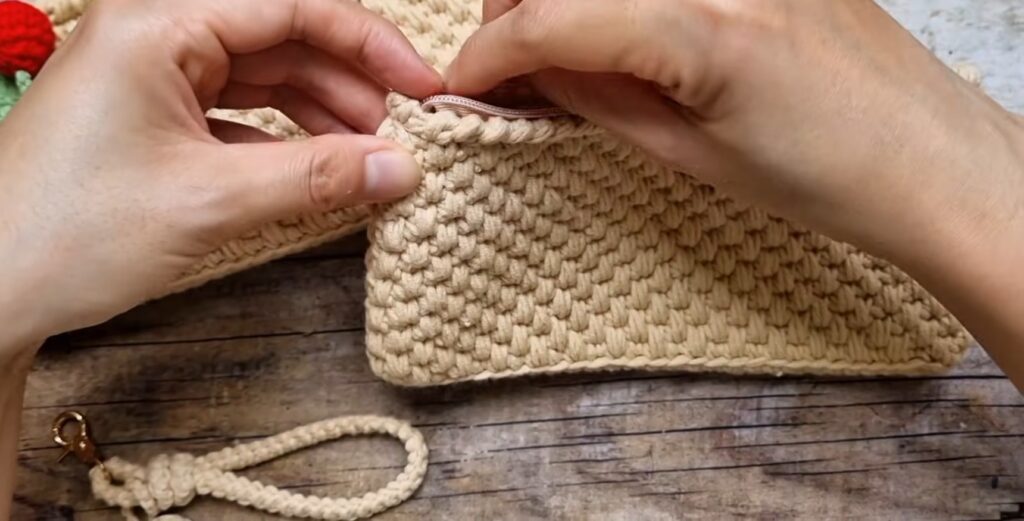
Add the zipper: Sew a zipper across the top to keep your items safe.
-
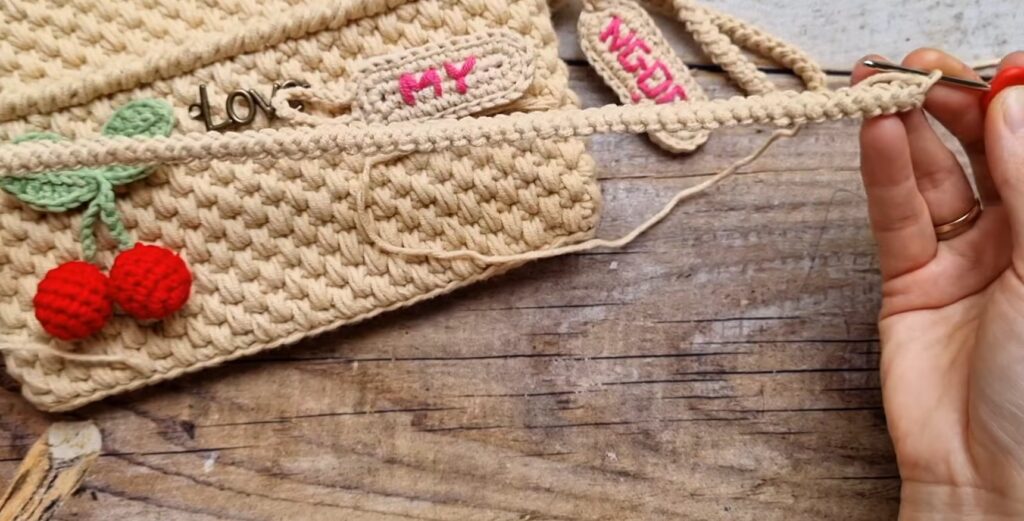
Finish the bag: Crochet a small strap, a name tag, and a cherry to sew on the front.
About The Creator:
Bi do Handmade has been an expert in crocheting and designing crochet amigurumi, bag charms, and pouches. Also visit her YouTube channel for more exciting projects.
Let’s Crochet Cherry Handbag
Terminology: US Terms Materials:
-
Yarn: Milk Cotton (approx. 125g), used double stranded (or suitable thick yarn).
-
Hook: 4.0mm (for bag), 2.0mm or 2.5mm (for tag/strap).
-
Zipper (approx. 20cm).
-
Lobster clasp.
-
Tapestry needle, scissors, measuring tape.
Abbreviations:
-
ch: chain
-
sc: single crochet
-
inc: increase (2 sc in same st)
-
sl st: slip stitch
-
BLO: back loop only
-
Spike sc: spike single crochet (long single crochet worked into the stitch one row below the current row)
-
Reverse sc: reverse single crochet (crab stitch) – working sc from left to right.
-
st(s): stitch(es)
Bag Pattern
Base
-
Foundation: Ch 26 (25 base ch + 1 turning ch). (Adjust chain count to reach approx. 19cm width if needed).
-
Rnd 1: 2 sc in 2nd ch from hook. Sc in next 23 ch. 4 sc in last ch. Working up the other side of the chain: Sc in next 23 ch. 2 sc in the same ch as the first 2 sc. Join with sl st to first sc.
Body
-
Rnd 1: Ch 1. Working in BLO, sc in each st around. Join with sl st.
-
Rnd 2: Ch 1. Sc in next st, Spike sc in next st. Repeat from * to * around. Join with sl st.
-
Rnd 3: Ch 1. Spike sc in next st, sc in next st. Repeat from * to * around. (Work a Spike sc over the normal sc of the previous row, and a normal sc over the Spike sc of the previous row). Join with sl st.
-
Rnd 4 – End: Repeat Rnds 2 and 3 alternating until the bag reaches approximately 9cm in height (or desired height).
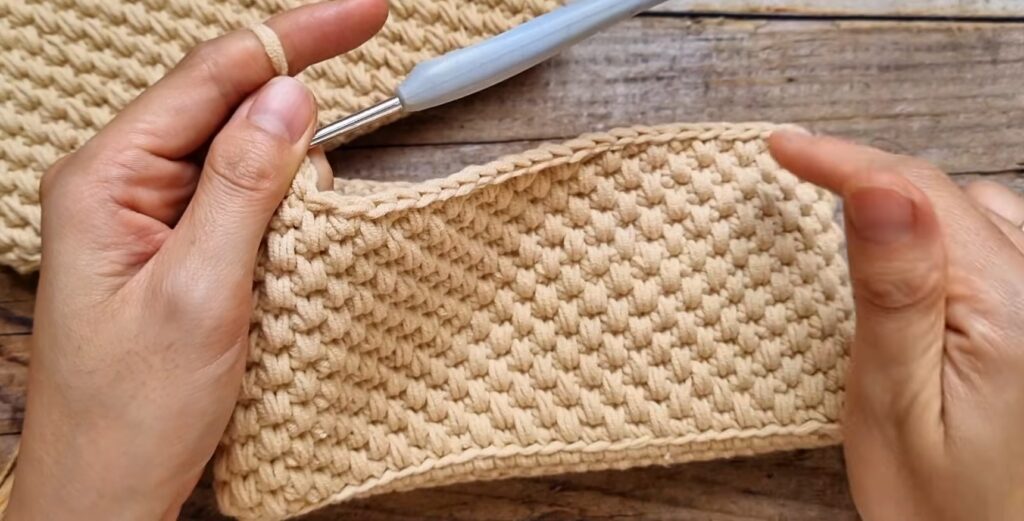
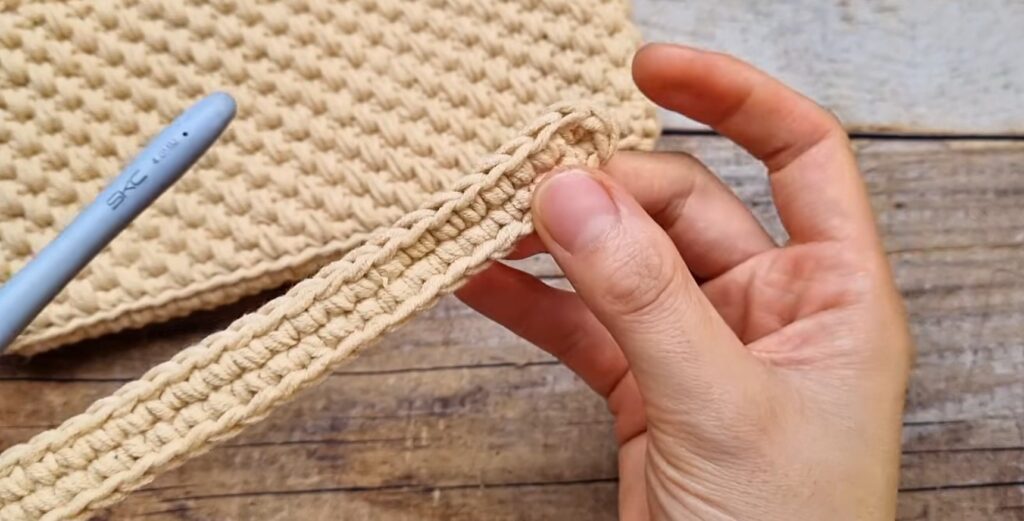
Border
-
Final Rnd: Ch 1. Work Reverse sc (Crab Stitch) in each st around the opening. Join and fasten off. Weave in ends.
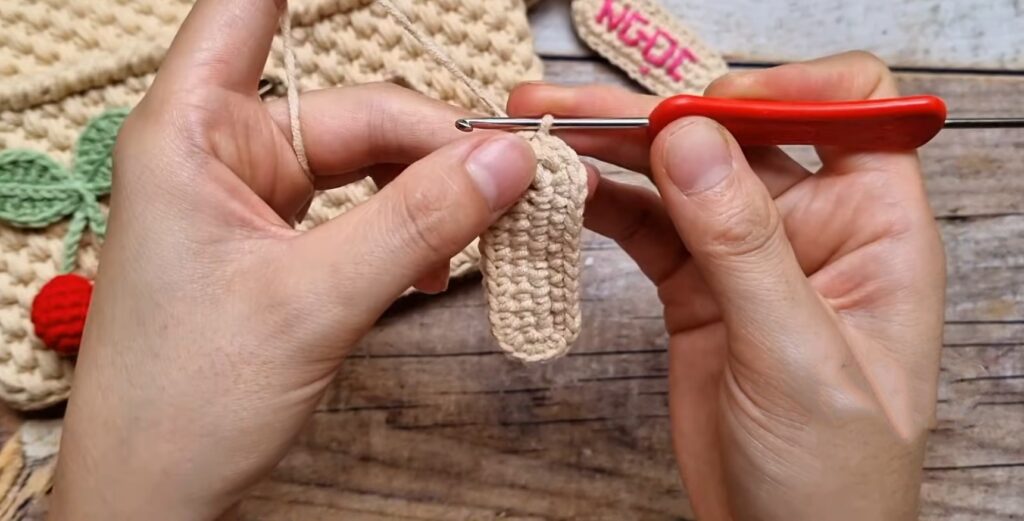
Name Tag / Sticker
Use the smaller hook (2.0mm – 2.5mm). Make 2 pieces.
-
Foundation: Ch 11 (10 base + 1 turning).
-
Rnd 1: 2 sc in 2nd ch from hook. Sc in next 8 ch. 4 sc in last ch. Working on other side: Sc in next 8 ch. 2 sc in same st as start. Join with sl st.
-
Rnd 2: Ch 1. Inc in first 2 sts. Sc in next 8 sts. Inc in next 4 sts. Sc in next 8 sts. Inc in last 2 sts. Join with sl st.
-
Assembly:
-
Embroider name/letters on one piece.
-
Place pieces wrong sides together.
-
Insert hook through both layers and sl st around to join.
-
At the end, Ch 15 (or desired length) to create a hanging loop. Sl st back to base to secure. Fasten off.
-
Wrist Strap
Use the smaller hook.
-
Row 1: Ch 2. Sc in 2nd ch from hook.
-
Row 2: Turn slightly to find the loop at the base/side of the sc just made. Insert hook, yo, pull up loop, yo, pull through 2 loops.
-
Row 3: Turn slightly. Insert hook under the two loops on the side. Yo, pull up loop, yo, pull through 2 loops.
-
Rows 4+: Repeat Row 3 until strap reaches desired length.
-
Finishing:
-
Create a sliding knot (adjustable loop) at one end using the yarn tails.
-
Attach a lobster clasp to the other end.
-
Thread the Name Tag onto the strap before securing if desired.
-
Assembly & Finishing
-
-
Zipper: Pin the zipper inside the bag opening. Using a needle and split yarn (one strand), sew the zipper tape securely to the inside edge of the bag.
-
Decoration: Attach the Cherry applique (pattern not included in this video, refer to creator’s previous tutorial) or other stickers to the front of the bag using glue or sewing.
-
Strap: Attach the lobster clasp to the D-ring or directly to the side of the bag fabric.
-
Pattern In UK Terms
Base
-
Foundation: Ch 26 (25 base ch + 1 turning ch). (Adjust chain count to reach approx. 19cm width if needed).
-
Rnd 1: 2 dc in 2nd ch from hook. Dc in next 23 ch. 4 dc in last ch. Working up the other side of the chain: Dc in next 23 ch. 2 dc in the same ch as the first 2 dc. Join with ss to first dc.
Body
-
Rnd 1: Ch 1. Working in BLO, dc in each st around. Join with ss.
-
Rnd 2: Ch 1. Dc in next st, Spike dc in next st. Repeat from * to * around. Join with ss.
-
Rnd 3: Ch 1. Spike dc in next st, dc in next st. Repeat from * to * around. (Work a Spike dc over the normal dc of the previous row, and a normal dc over the Spike dc of the previous row). Join with ss.
-
Rnd 4 – End: Repeat Rnds 2 and 3 alternating until the bag reaches approximately 9cm in height (or desired height).
Border
-
Final Rnd: Ch 1. Work Reverse dc (Crab Stitch) in each st around the opening. Join and fasten off. Weave in ends.
Name Tag / Sticker
Use the smaller hook (2.0mm – 2.5mm). Make 2 pieces.
-
Foundation: Ch 11 (10 base + 1 turning).
-
Rnd 1: 2 dc in 2nd ch from hook. Dc in next 8 ch. 4 dc in last ch. Working on other side: Dc in next 8 ch. 2 dc in same st as start. Join with ss.
-
Rnd 2: Ch 1. Inc in first 2 sts. Dc in next 8 sts. Inc in next 4 sts. Dc in next 8 sts. Inc in last 2 sts. Join with ss.
-
Assembly:
-
Embroider name/letters on one piece.
-
Place pieces wrong sides together.
-
Insert hook through both layers and ss around to join.
-
At the end, Ch 15 (or desired length) to create a hanging loop. Ss back to base to secure. Fasten off.
-
Wrist Strap
Use the smaller hook.
-
Row 1: Ch 2. Dc in 2nd ch from hook.
-
Row 2: Turn slightly to find the loop at the base/side of the dc just made. Insert hook, yo, pull up loop, yo, pull through 2 loops.
-
Row 3: Turn slightly. Insert hook under the two loops on the side. Yo, pull up loop, yo, pull through 2 loops.
-
Rows 4+: Repeat Row 3 until strap reaches desired length.
-
Finishing:
-
Create a sliding knot (adjustable loop) at one end using the yarn tails.
-
Attach a lobster clasp to the other end.
-
Thread the Name Tag onto the strap before securing if desired.
-
Assembly & Finishing
-
Zipper: Pin the zipper inside the bag opening. Using a needle and split yarn (one strand), sew the zipper tape securely to the inside edge of the bag.
-
Decoration: Attach the Cherry applique (pattern not included in this video, refer to creator’s previous tutorial) or other stickers to the front of the bag using glue or sewing.
-
Strap: Attach the lobster clasp to the D-ring or directly to the side of the bag fabric.