How to Crochet Fruit Baby Turtle Plushies – 5 Fruit Versions
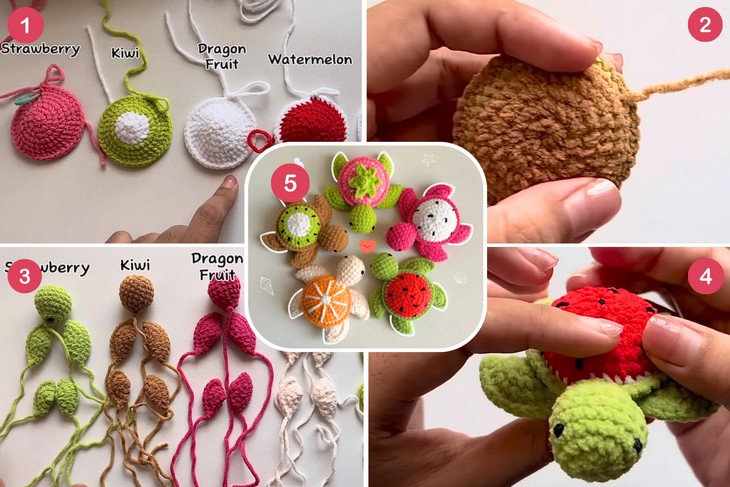
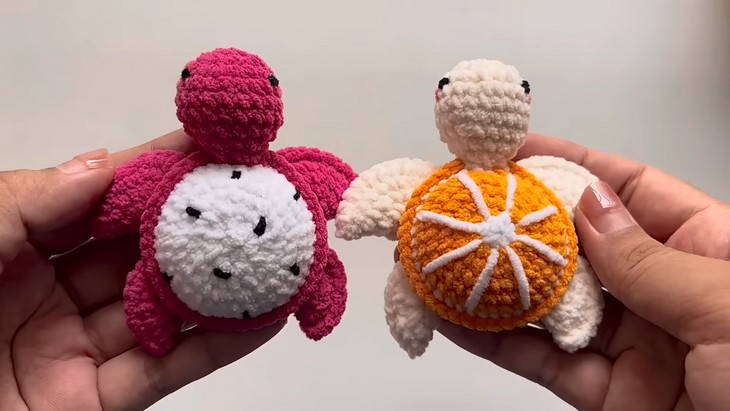
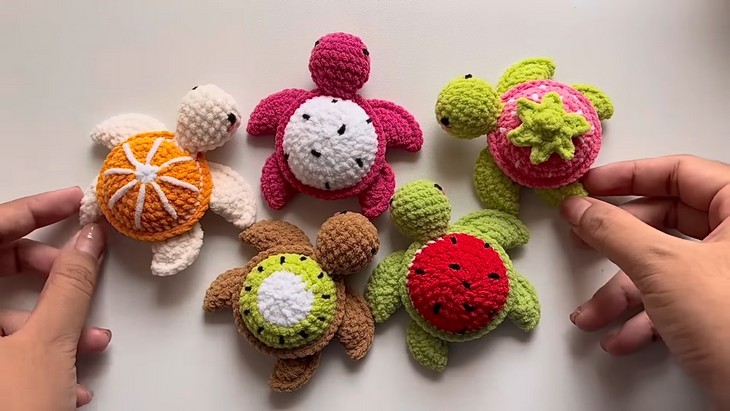
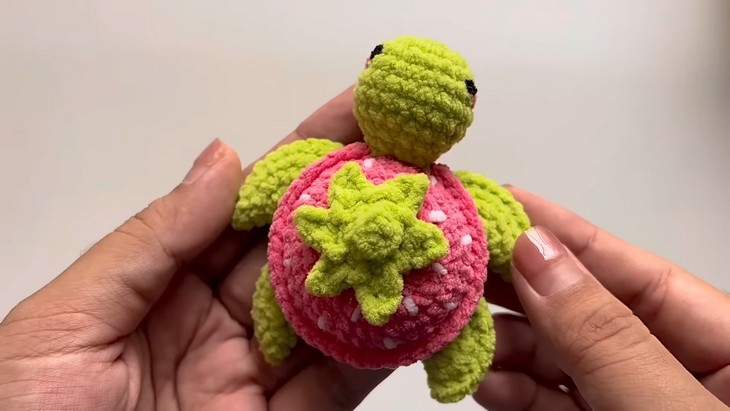
Wanna make one’s summer truly special? Learn how to crochet these oh-so-cute 5 baby fruit turtle plushies following an all-in-one tutorial for beginners. These fruit shell turtles have five different versions: kiwi, watermelon, dragon fruit, tangerine, and strawberry. With the clever teaching, the tutor will cover how to make the upper and lower shells, the fins, and the head for all mini turtle amigurumi in just 1 hour. Each turtle has its fruit color combo and a few basic additions like the seeds and slice embroidery on the shell.
So, if you have made up your mind to crochet your favorite fruit turtle from them, continue reading this post till the end. These are colorful, bright, and huggable!
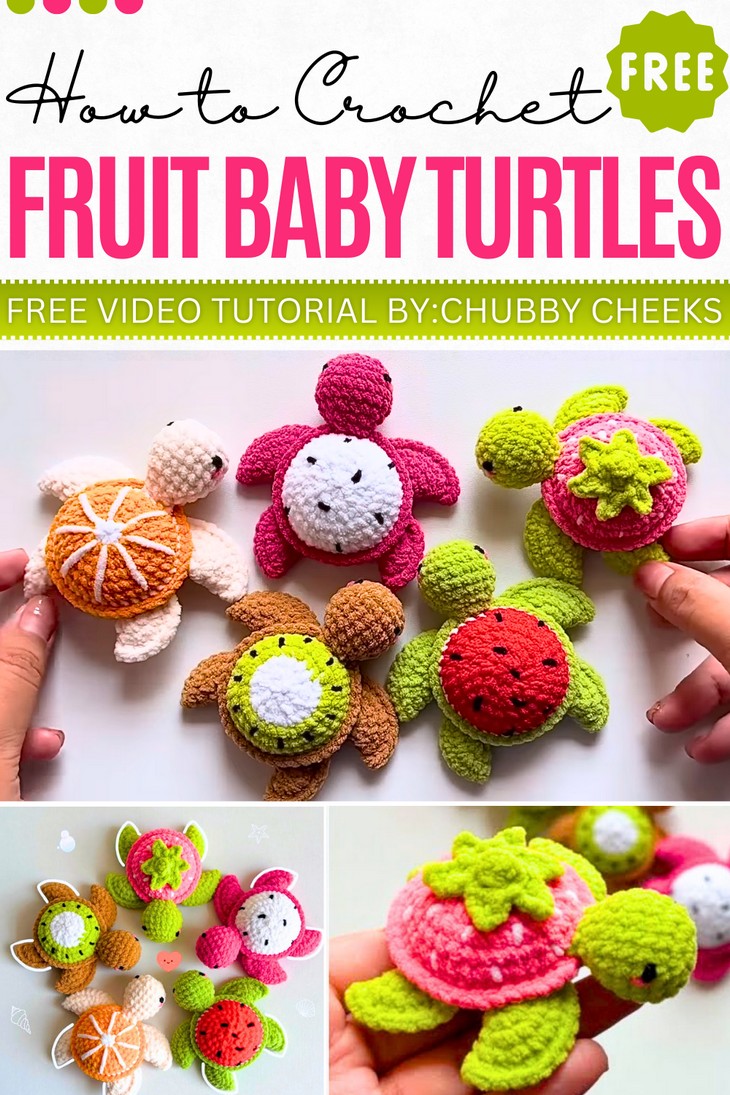
About the Designer: The designer behind these turtle amigurumi is @ChubbyCheeks – her so creative library is currently not very large but filled with the brightest projects I have ever seen. She has a variety of projects, such as tutorials for crocheting baby turtles, low-sew chubby puppies, and a Crochet Beach Day Set that includes a float, surfboard, basket, and beach ball. The channel also features videos on building miniature kits and other creative DIY projects.
Note: In respect of the creator’s pattern rights, there will be no provision of the written pattern. You can watch the tutorial with on-screen written instructions at the end of this post.
Crochet Fruit Baby Turtle Amigurumi Tutorial
Skill Level: Intermediate. The tutorial on crocheting baby fruit turtles uses a variety of techniques and stitches. The project starts with a magic ring and primarily uses single crochet. The video also demonstrates how to create increases and decreases to shape the pieces. Techniques like crocheting in the front loop only and the back loop only are used to create specific textures and ridges.
The tutorial also covers practical skills such as changing colors, stuffing the pieces, sewing them together, and hiding yarn tails.

Tutorial Timing: Approximately 60 minutes (perfect for learning sewing, modifying a crochet pattern, and practicing the fundamentals of amigurumi.)
Pattern Type: An on-screen written pattern is available if you find written instructions easy to follow along with.
Materials Needed
The materials used in this tutorial are:
- Yarn: The video uses Chanel brand yarn.
- Hook: A 2.5 mm crochet hook is used for the entire project.
- Needle: A needle is used for sewing the parts together and for making the seed details.
- Stitch marker: A stitch marker is used to mark the beginning of each round.
- Stuffing: The tutorial mentions using stuffing for the body and head of the turtles.
Yarn Colors
Red, Pink – For watermelon and strawberry upper shells
White – For kiwi and dragon fruit bases
Green – For watermelon rind and strawberry leaves
Brown – For kiwi outer layer and lower shell
Hot pink – For dragon fruit lower shell
Orange – For tangerine shell
Light peach – For tangerine lower shell
Black yarn – For embroidering eyes and fruit seeds
White yarn – For strawberry seeds and tangerine wedges
Pink yarn – For blush on turtle faces
Crochet Stitches and Techniques:
- Magic Ring: Wrap the yarn around your fingers, pull up a loop with the hook, and crochet stitches into the adjustable ring to form the base.
- Color Change: At the end of a round, drop the current yarn, loop the new color onto the hook, and pull it through to continue.
- Crocheting in Front Loop Only: Insert the hook under the front loop of the stitch only and complete your stitch, leaving the back loop unworked.
- Crocheting in Back Loop Only: Insert the hook under the back loop of the stitch only and complete your stitch, leaving the front loop unworked.
- Stuffing: Use polyfill or similar material to fill the body or head, adding shape and volume to the piece.
- Closing a Hole: Thread yarn onto a needle, weave through the remaining stitches, pull tight to close the hole, and secure.
- Hiding Yarn Tails: Thread the loose yarn ends onto a needle and weave them into the crocheted piece to hide them.
- Sewing: With a needle, use yarn to attach the head, fins, and other parts securely to the body.
- Single Crochet (Sc): Insert the hook into the stitch, yarn over, pull through, yarn over again, and pull through both loops on the hook.
- Increase (Inc): Create two single crochet stitches in the same stitch to expand the size.
- Decrease (Dec): Insert the hook into the first stitch, yarn over, pull through, insert into the next stitch, yarn over, pull through, yarn over again, and pull through all loops.
- Slip Stitch (Sl st): Insert the hook into the stitch, yarn over, and pull through both the stitch and loop on the hook to join or finish.
- Half Double Crochet (Hdc): Yarn over, insert the hook into the stitch, yarn over again, pull through, and pull yarn through all three loops on the hook.
- Chain (Ch): Yarn over, pull the yarn through the loop on the hook, and repeat to create a chain of stitches.