
Crochet Green Frog Amigurumi Keychain Pattern
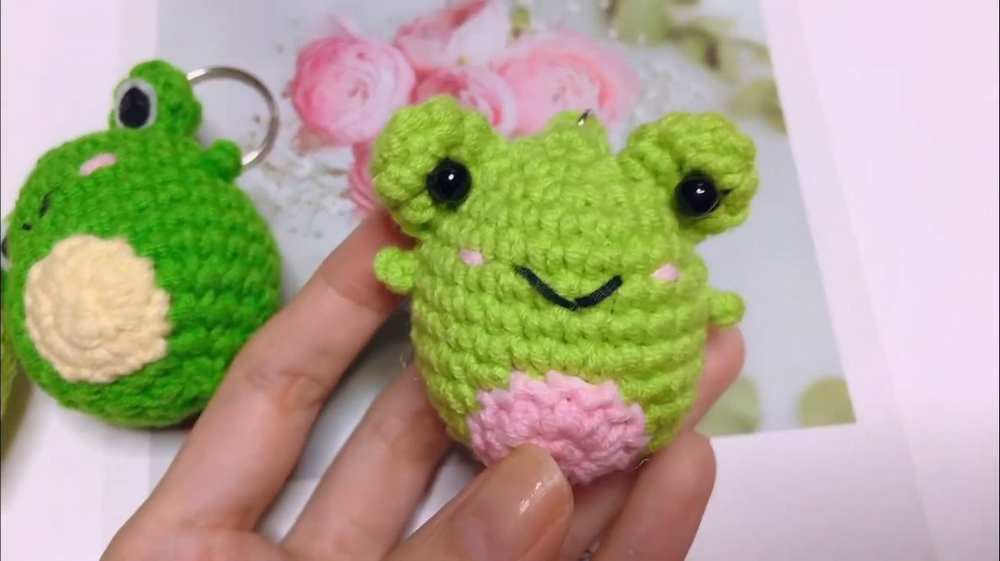
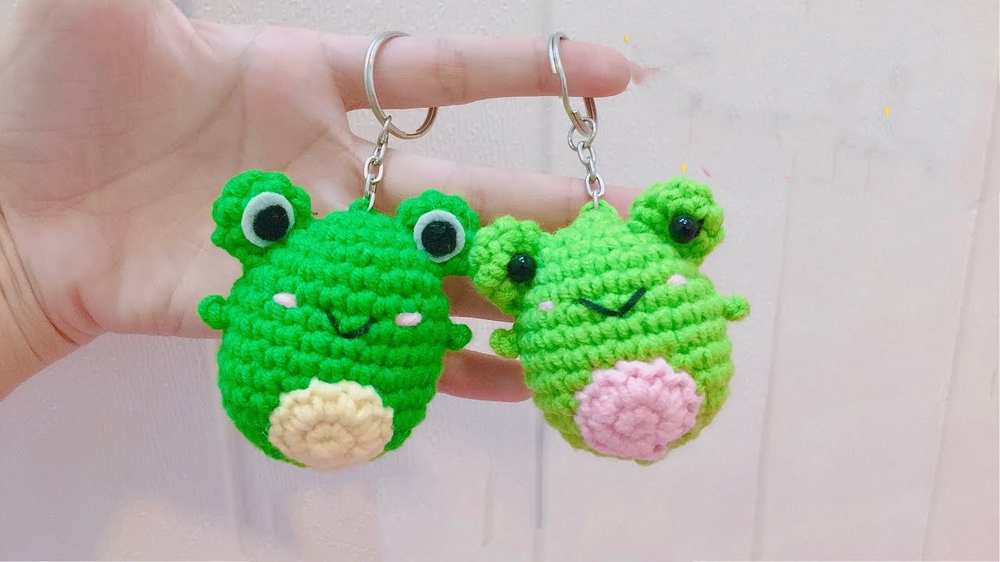
This pattern shows you how to make the cutest amigurumi frog keychain in the simplest way possible. The blushing frog is tiny to fit in your palm and nicely snuggle into your pocket, protecting your keys. Besides being a keychain, this small amigurumi little friend can be used as a bag charm, a little fidget toy, or a desk charm for a whole day of happiness!
The construction of this amigurumi frog is also quite easy. Make the small ball for the body and head in one piece, then make two small circles for the eyes and a small one for the belly. When done with the body and little arms, sew the mouth with black yarn and the blush with pink yarn.
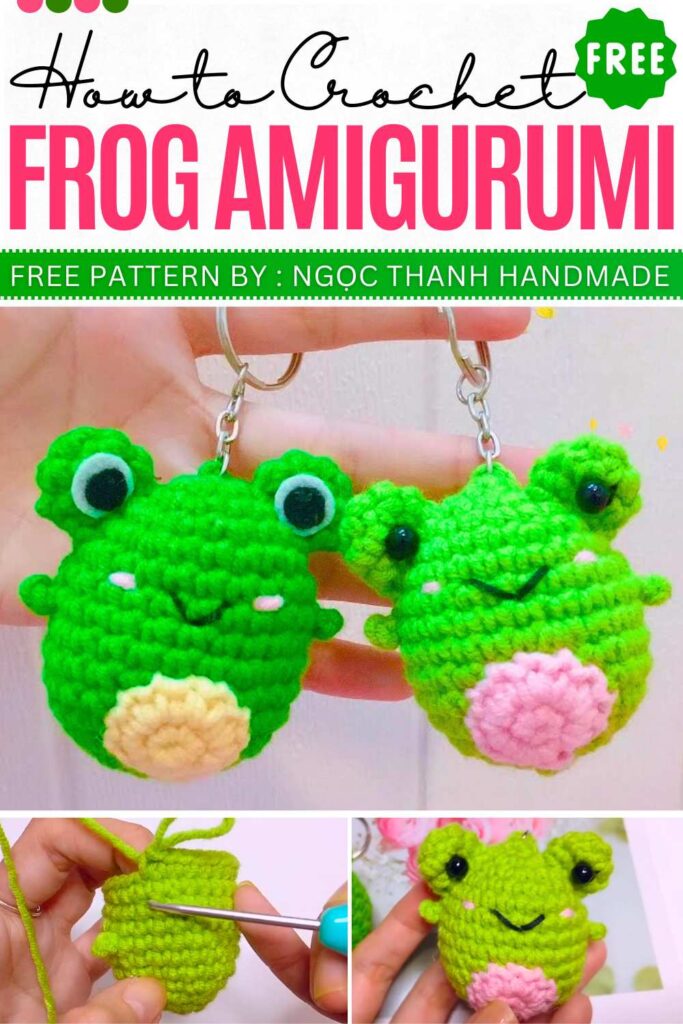
The designer behind this avocado keychain is Ngọc Thanh Handmade – she has quite a good grasp on kawaii amigurumi designing with added cuteness and surprises.
Crochet Mini Green Frog Pattern
Materials:
- Yarn: Milk Cotton (Green, White/Pink for belly, Black for mouth)
- Hook: 2.5 mm
- Stuffing: Fiberfill
- Tools: Yarn needle, Stitch marker, Scissors
Abbreviations (English):
- MR: Magic ring
- sc: Single crochet
- inc: Increase (2 sc in 1 st)
- dec: Decrease (sc 2 together)
- ch: Chain
- sl st: Slip stitch
- st(s): Stitch(es)
- FO: Fasten off
Pattern Instructions
Body (Green Yarn)
- R1: 6 sc in MR (6)
- R2: 6 inc (12)
- R3: (1 sc, inc) * 6 (18)
- R4: (2 sc, inc) * 6 (24)
- R5: 24 sc (24)

- R6 (Arms): 6 sc, ch 3, sl st in 2nd ch from hook, sl st in next ch, 12 sc, ch 3, sl st in 2nd ch from hook, sl st in next ch, 6 sc (24)
- R7: 24 sc (Push arms forward/outward and sc into the R6 sts) (24)
- R8: (5 sc, inc) * 4 (28)
- R9-10: 28 sc (28)
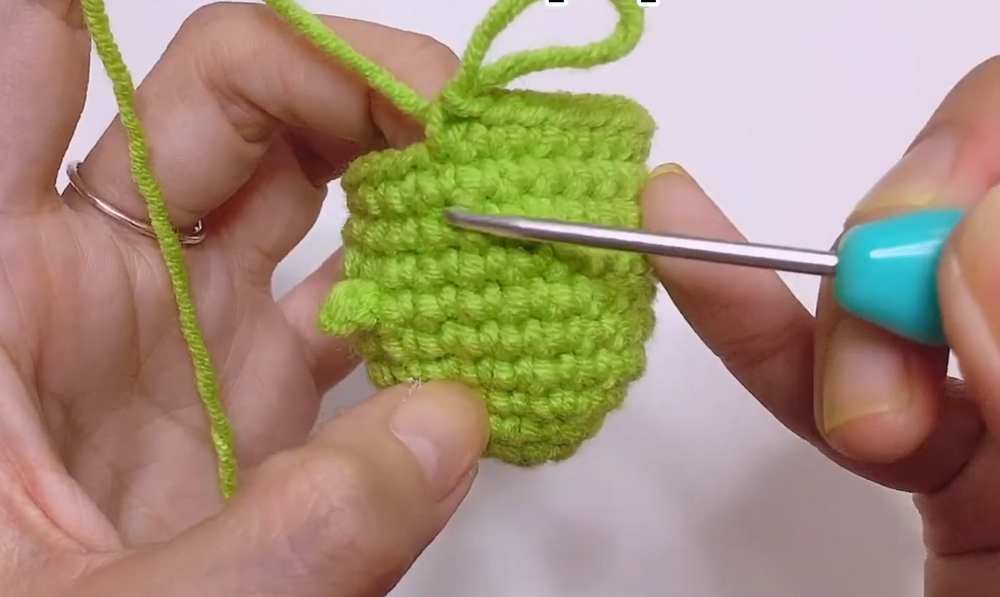
- R11: (5 sc, dec) * 4 (24)
- R12: (2 sc, dec) * 6 (18)
- R13: (1 sc, dec) * 6 (12)
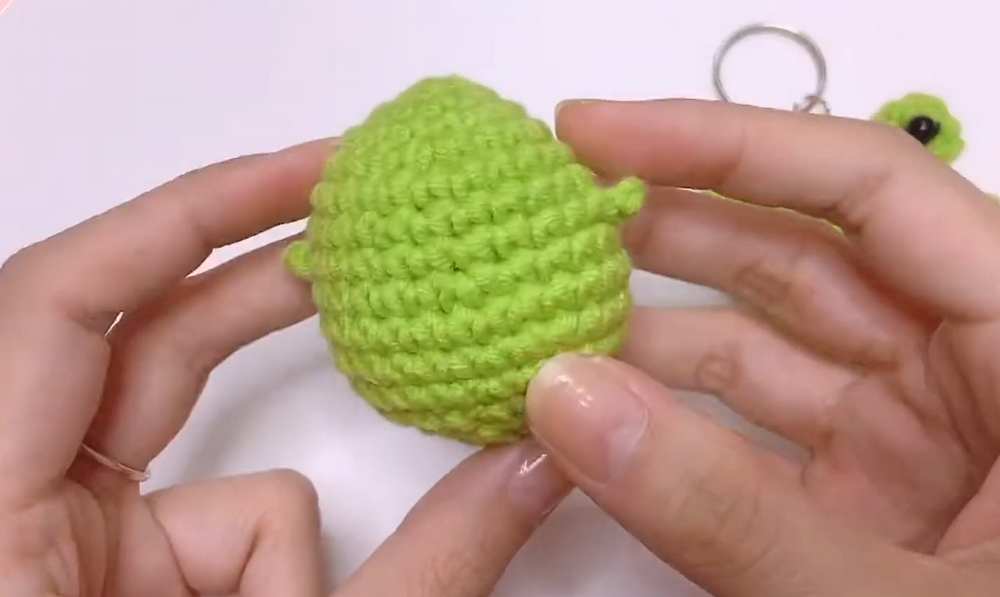
- Stuff with fiberfill.
- R14: 6 dec (6)
- FO. Leave tail for closing.
Eyes (Make 2 – Green Yarn)
- R1: 6 sc in MR, sl st to join (6)
- R2: ch 1, (2 sc, inc) * 2, sl st (8)
- R3: ch 1, 8 sc, sl st (8)
- FO. Leave tail for sewing.
Belly (White or Light Pink Yarn)
- R1: 6 sc in MR, sl st (6)
- R2: ch 1, 6 inc, sl st (12)
- FO. Leave tail for sewing.
Assembly Detail
- Closing the Body: Thread the yarn needle with the tail from R14. Weave the needle through the front loops of the remaining 6 stitches. Pull firmly to close the bottom hole, knot, and hide the tail inside the body.
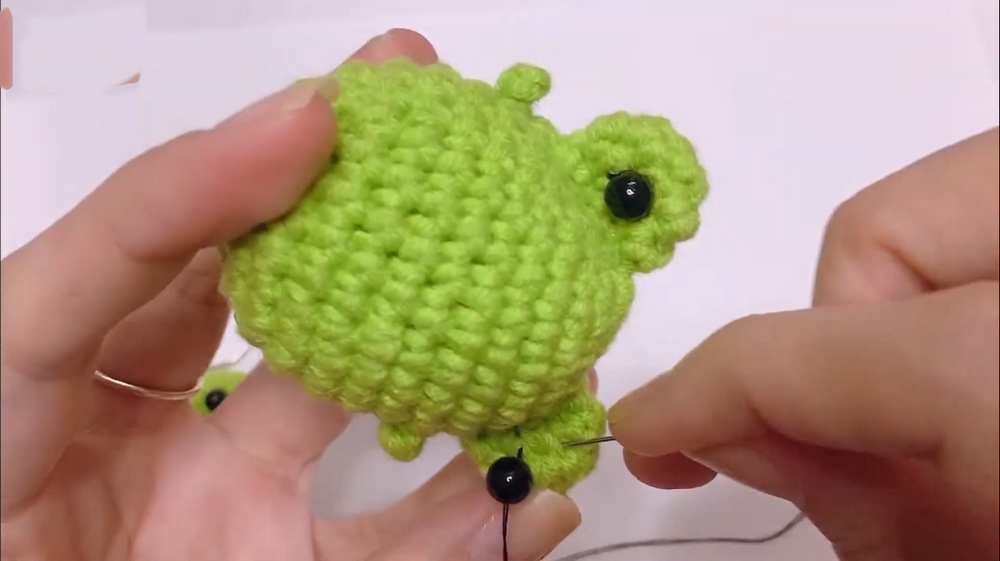
- Attaching Eyes: Position the two eye pieces on top of the head (between R2 and R4). Space them slightly apart. Sew them securely to the head using the yarn tails.
- Eye Details: Attach small black safety eyes to the center of the green eye pieces, or embroider black pupils using black yarn or felt.
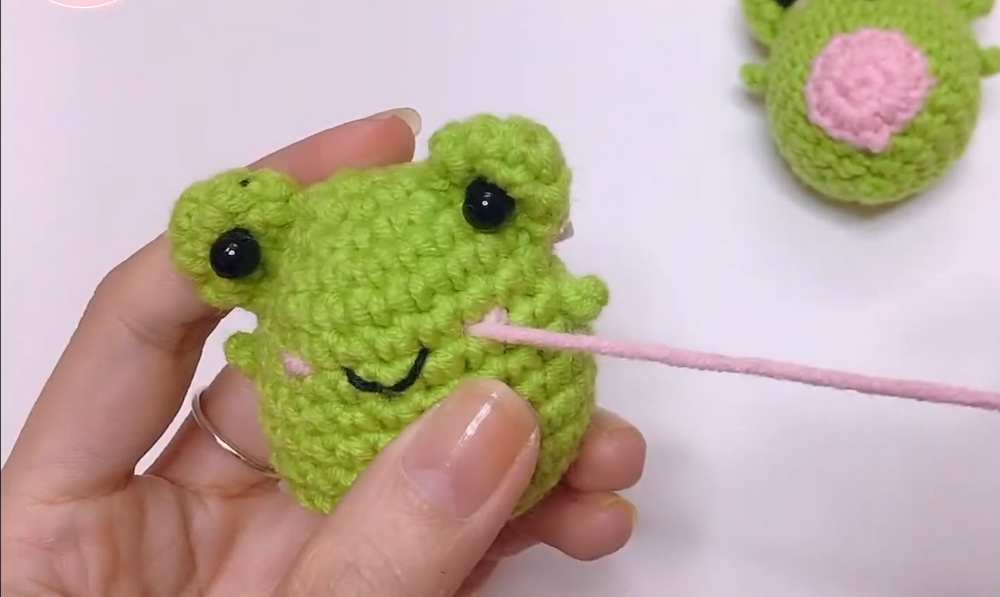
- Sewing the Belly: Place the belly circle on the front center of the frog, starting roughly one row below the arms (around R8–R11). Sew around the entire circumference of the circle to secure it to the body.
- Embroidering the Mouth: Use black yarn and a needle. Locate the row directly between the arms. Insert the needle and create a wide line or a shallow “V” shape to form the smile.
- Adding Cheeks: Use pink yarn to embroider two small horizontal stitches or “blush” spots just below and to the outside of the eyes, near the corners of the mouth.
- Finishing: If using as a keychain, attach a metal jump ring and keychain clasp to the top center of the head (R1–R2 area).
Video Pattern:
Pattern (UK Terminology)
Body (Green Yarn)
- R1: 6 dc in MR (6)
- R2: 6 inc (12)
- R3: (1 dc, inc) * 6 (18)
- R4: (2 dc, inc) * 6 (24)
- R5: 24 dc (24)
- R6 (Arms): 6 dc, ch 3, sl st in 2nd ch from hook, sl st in next ch, 12 dc, ch 3, sl st in 2nd ch from hook, sl st in next ch, 6 dc (24)
- R7: 24 dc (Push arms forward/outward and dc into the R6 sts) (24)
- R8: (5 dc, inc) * 4 (28)
- R9-10: 28 dc (28)
- R11: (5 dc, dec) * 4 (24)
- R12: (2 dc, dec) * 6 (18)
- R13: (1 dc, dec) * 6 (12)
- Stuff with fiberfill.
- R14: 6 dec (6)
- FO. Leave tail for closing.
Eyes (Make 2 – Green Yarn)
- R1: 6 dc in MR, sl st to join (6)
- R2: ch 1, (2 dc, inc) * 2, sl st (8)
- R3: ch 1, 8 dc, sl st (8)
- FO. Leave tail for sewing.
Belly (White or Light Pink Yarn)
- R1: 6 dc in MR, sl st (6)
- R2: ch 1, 6 inc, sl st (12)
- FO. Leave tail for sewing.
Assembly Detail
- Closing the Body: Thread the yarn needle with the tail from R14. Weave the needle through the front loops of the remaining 6 stitches. Pull firmly to close the bottom hole, knot, and hide the tail inside the body.
- Attaching Eyes: Position the two eye pieces on top of the head (between R2 and R4). Space them slightly apart. Sew them securely to the head using the yarn tails.
- Eye Details: Attach small black safety eyes to the center of the green eye pieces, or embroider black pupils using black yarn or felt.
- Sewing the Belly: Place the belly circle on the front center of the frog, starting roughly one row below the arms (around R8–R11). Sew around the entire circumference of the circle to secure it to the body.
- Embroidering the Mouth: Use black yarn and a needle. Locate the row directly between the arms. Insert the needle and create a wide line or a shallow “V” shape to form the smile.
- Adding Cheeks: Use pink yarn to embroider two small horizontal stitches or “blush” spots just below and to the outside of the eyes, near the corners of the mouth.
- Finishing: If using as a keychain, attach a metal jump ring and keychain clasp to the top center of the head (R1–R2 area).