
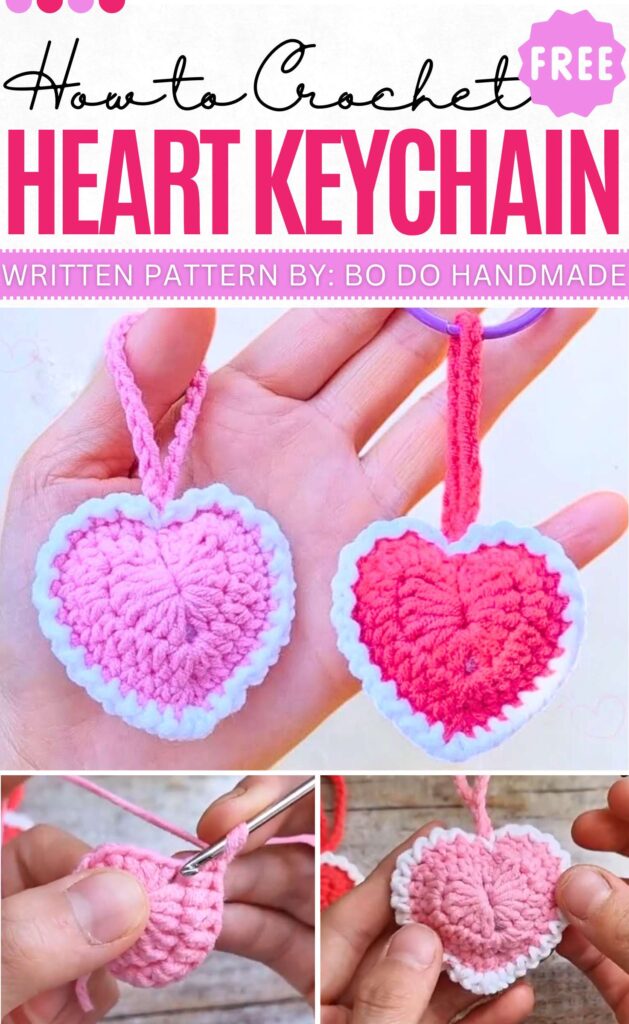
Crochet Heart Keychain & Bag Charm Pattern Free
For Valentine’s day make a small heart keychain that is cute and useful. It is a tiny heart shape made with yarn and a crochet hook, then turned into a keychain you can hang on keys, bags, or backpacks. The heart keychain is simple and lovely, so it makes a nice gift or a fun little accessory for yourself.
You use basic crochet stitches to build the heart and shape it as you go. After the heart is finished, you attach a small loop or keyring so it can hang on your keys or bag. For your assistance, there is a video guide by Bi do Handmade that shows each part slowly, so it is easy to see how the heart becomes a keychain.
Bi do Handmade is an had been an expert in crocheting and designing crochet amigurumi, bag charms, and pouches. Also visit her youtube channel for more exiting projects.
More Crochet Hearts:
Crochet Heart Keychain Pattern
Materials:
-
Milk Cotton Yarn (125g)
-
2.5mm Crochet Hook
-
Small amount of fiberfill stuffing
-
Contrast yarn for edging (optional)
-
Keychain ring (optional)
Abbreviations (US Terms):
-
MR: Magic Ring
-
ch: Chain
-
sl st: Slip stitch
-
sc: Single crochet
-
hdc: Half double crochet
-
dc: Double crochet
-
inc: Increase
-
hdc inc: Half double crochet increase (2 hdc in same st)
-
st(s): Stitch(es)
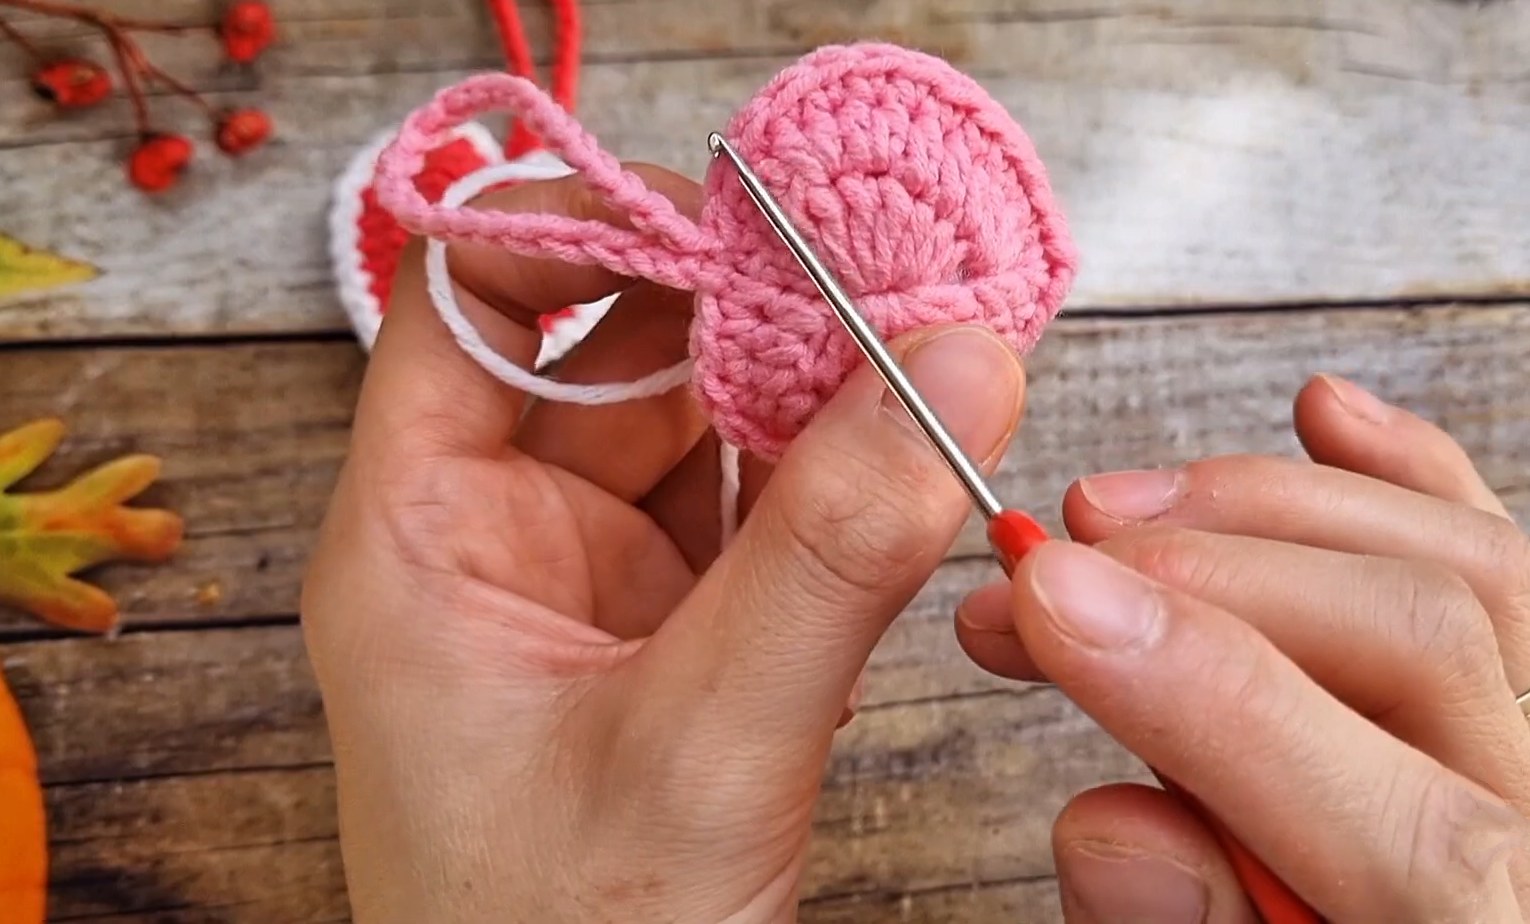
Heart Panels (Make 2)
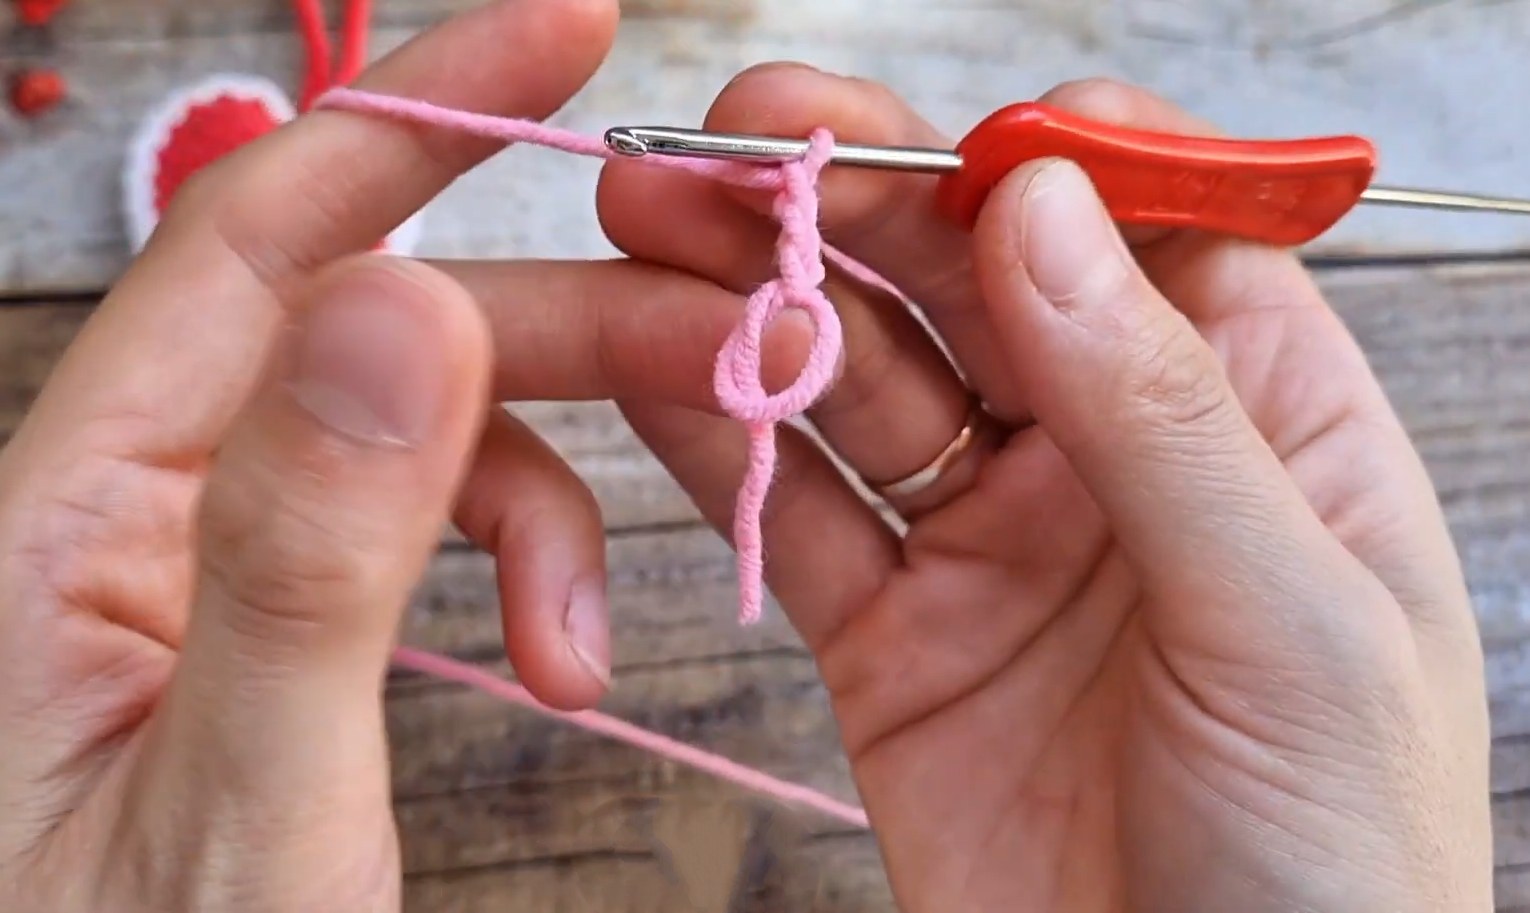
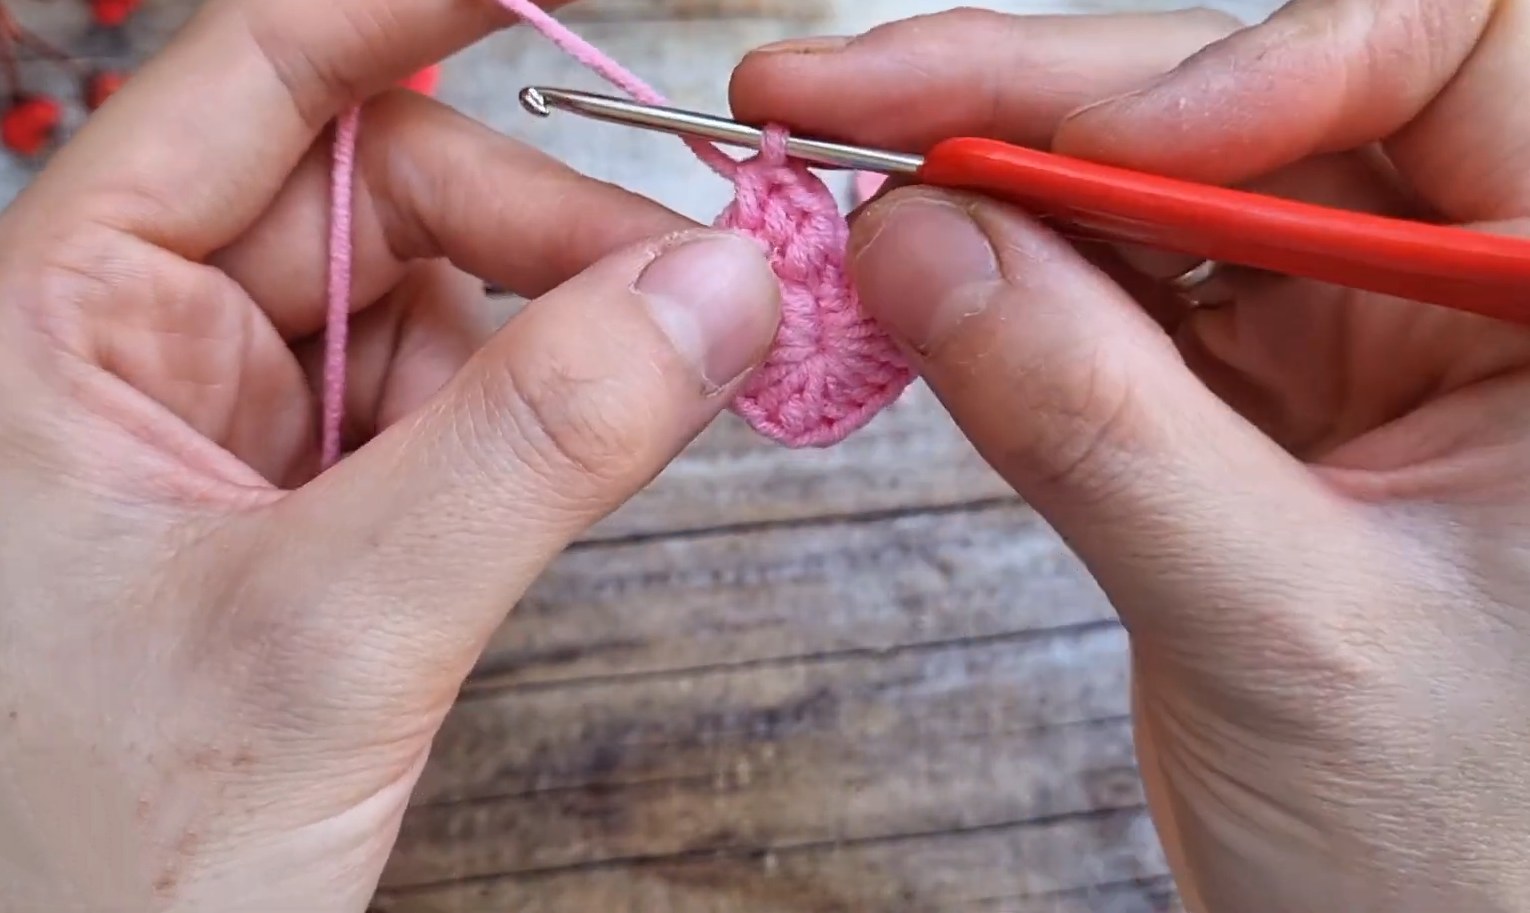
Round 1:
-
Create a MR.
-
Ch 3.
-
Work 3 dc into the MR.
-
Work 3 hdc into the MR.
-
Ch 1.
-
Work 3 hdc into the MR.
-
Work 3 dc into the MR.
-
Ch 3, sl st into the MR.
-
Tighten the MR. Ch 1.
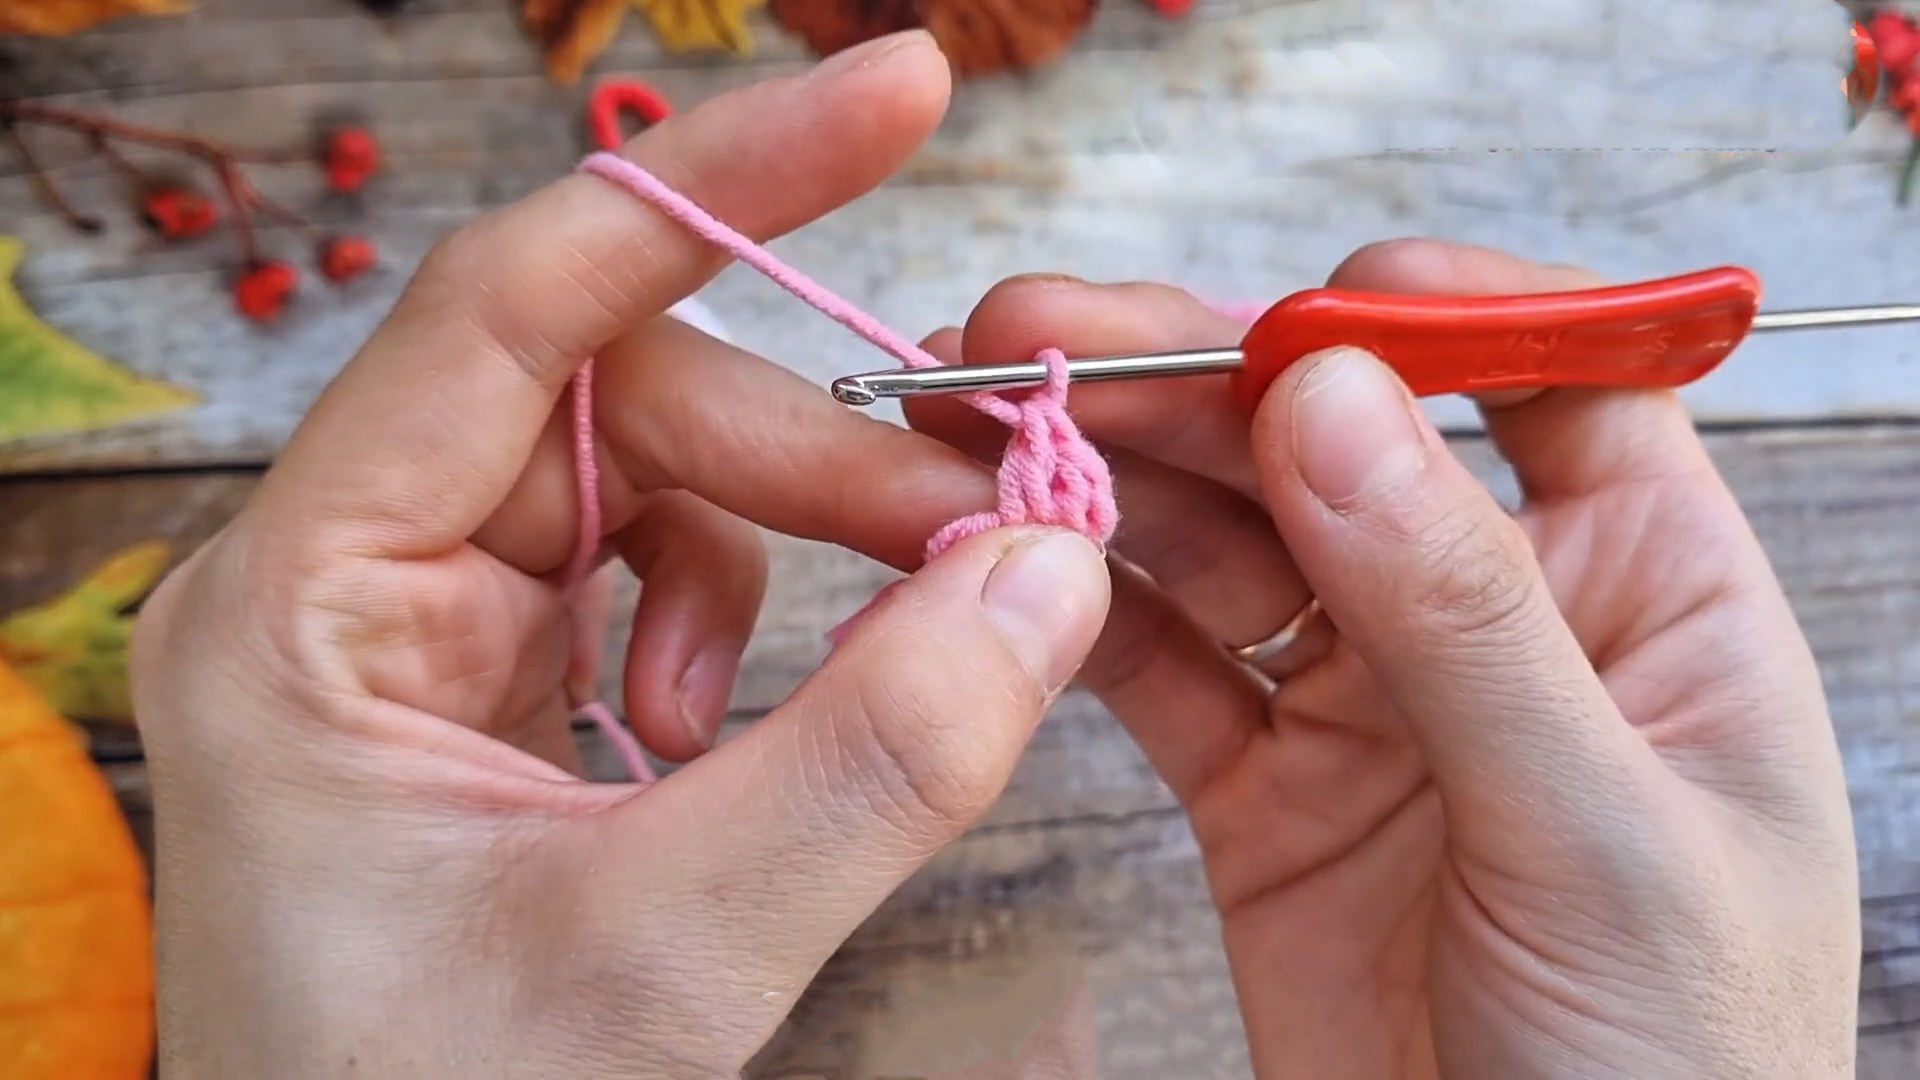
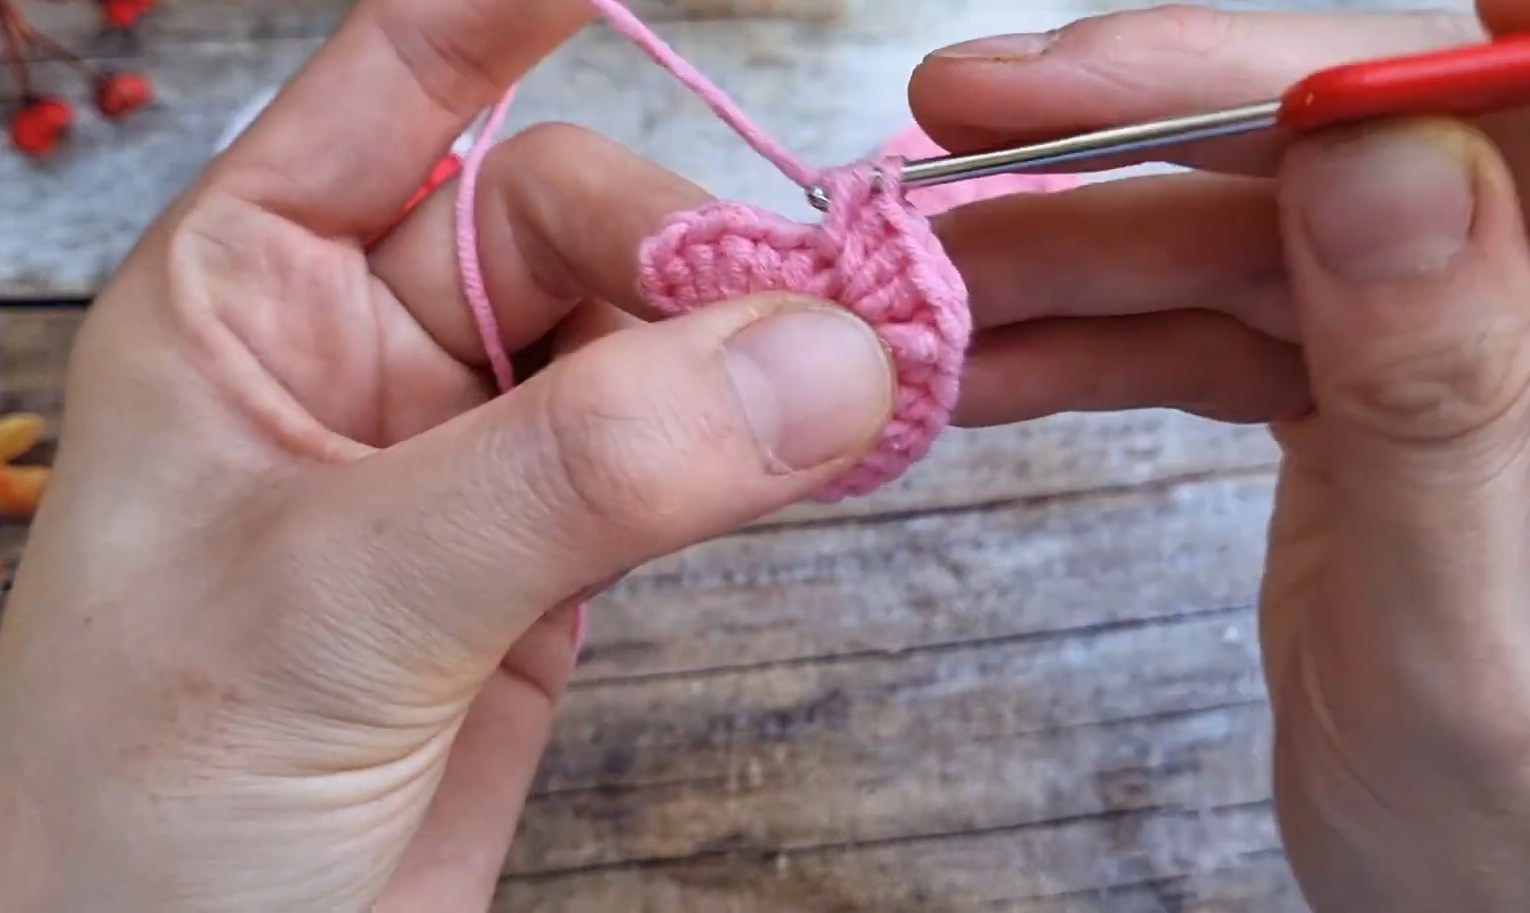
Round 2:
-
Work 1 hdc into each of the first 3 ch sts (from the beginning ch-3 of Round 1).
-
In the next 3 sts (which are the 3 dc from Round 1):
-
Work 2 hdc (hdc inc) in the 1st dc.
-
Work 2 hdc (hdc inc) in the 2nd dc.
-
Work 1 hdc in the 3rd dc.
-
-
Work 1 hdc in each of the next 3 sts (the 3 hdc from Round 1).
-
Point of the Heart: In the ch-1 space from Round 1, work (2 hdc, ch 1, 2 hdc).
-
Work 1 hdc in each of the next 3 sts (the 3 hdc from Round 1).
-
In the next 3 sts (the 3 dc from Round 1):
-
-
Work 1 hdc in the 1st dc.
-
Work 2 hdc (hdc inc) in the 2nd dc.
-
Work 2 hdc (hdc inc) in the 3rd dc.
-
-
Work 1 hdc into each of the last 3 ch sts (from the ending ch-3 of Round 1).
-
Sl st into the first hdc of the round to join.
-
First Panel: Fasten off and weave in ends.
-
Second Panel: Do not fasten off. Continue to Assembly.
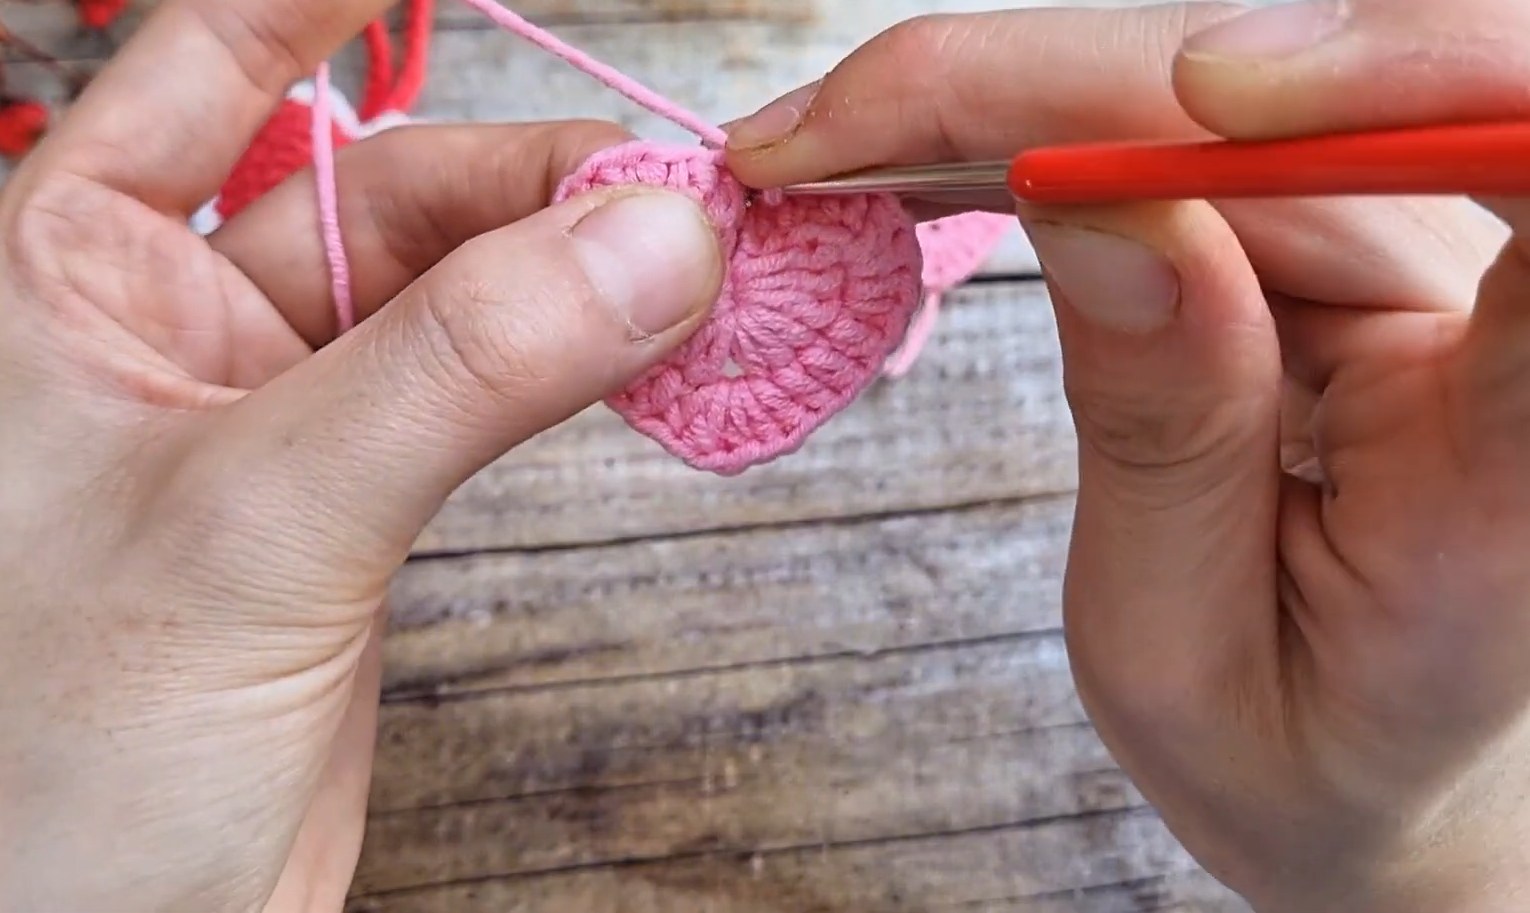
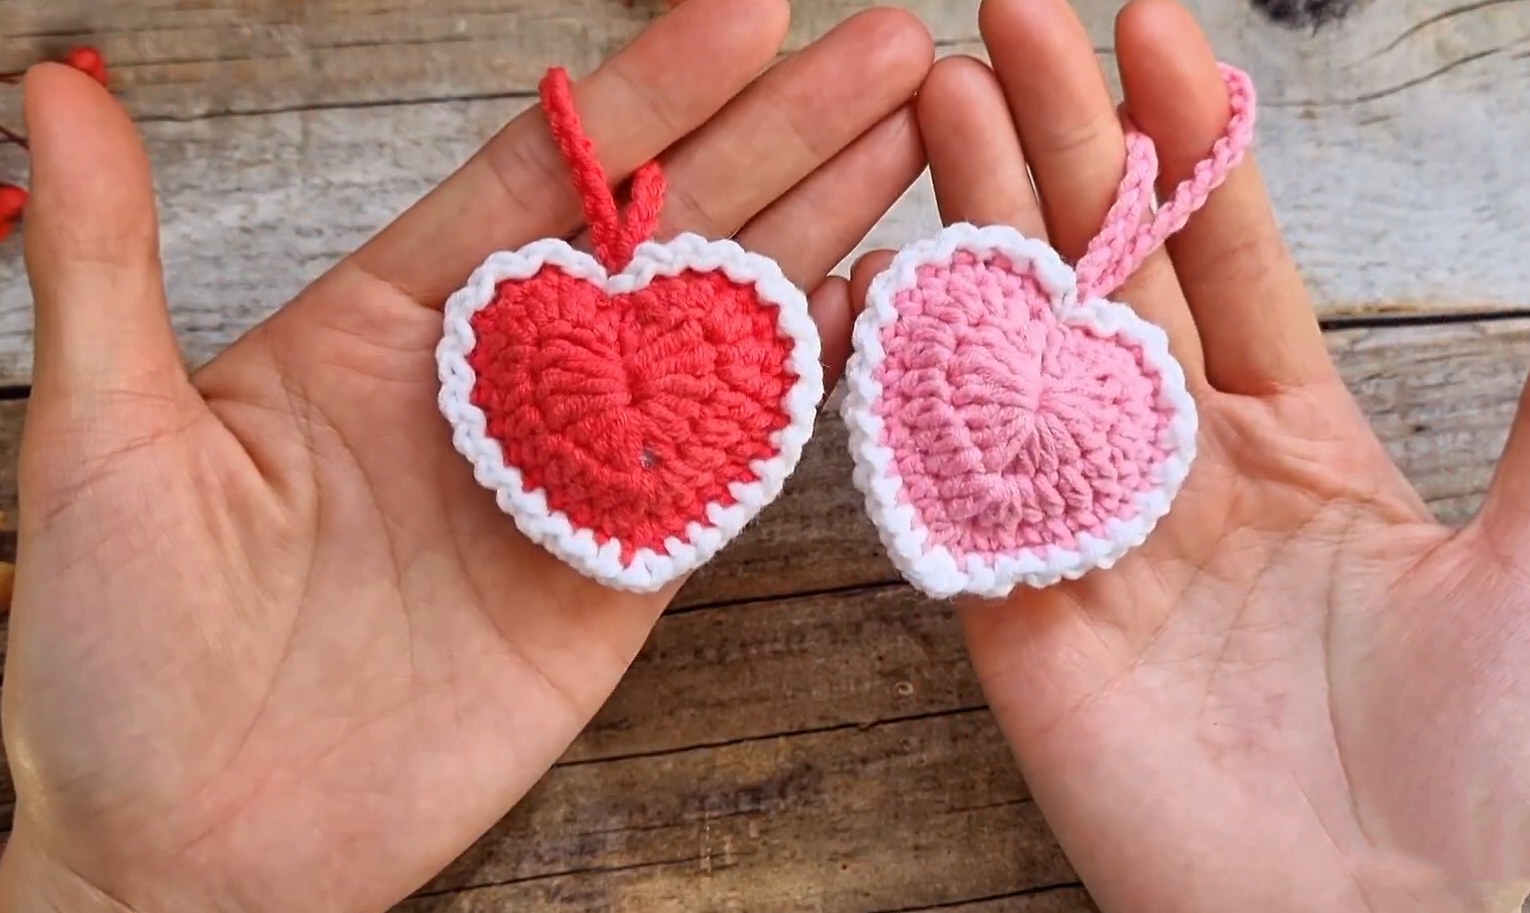
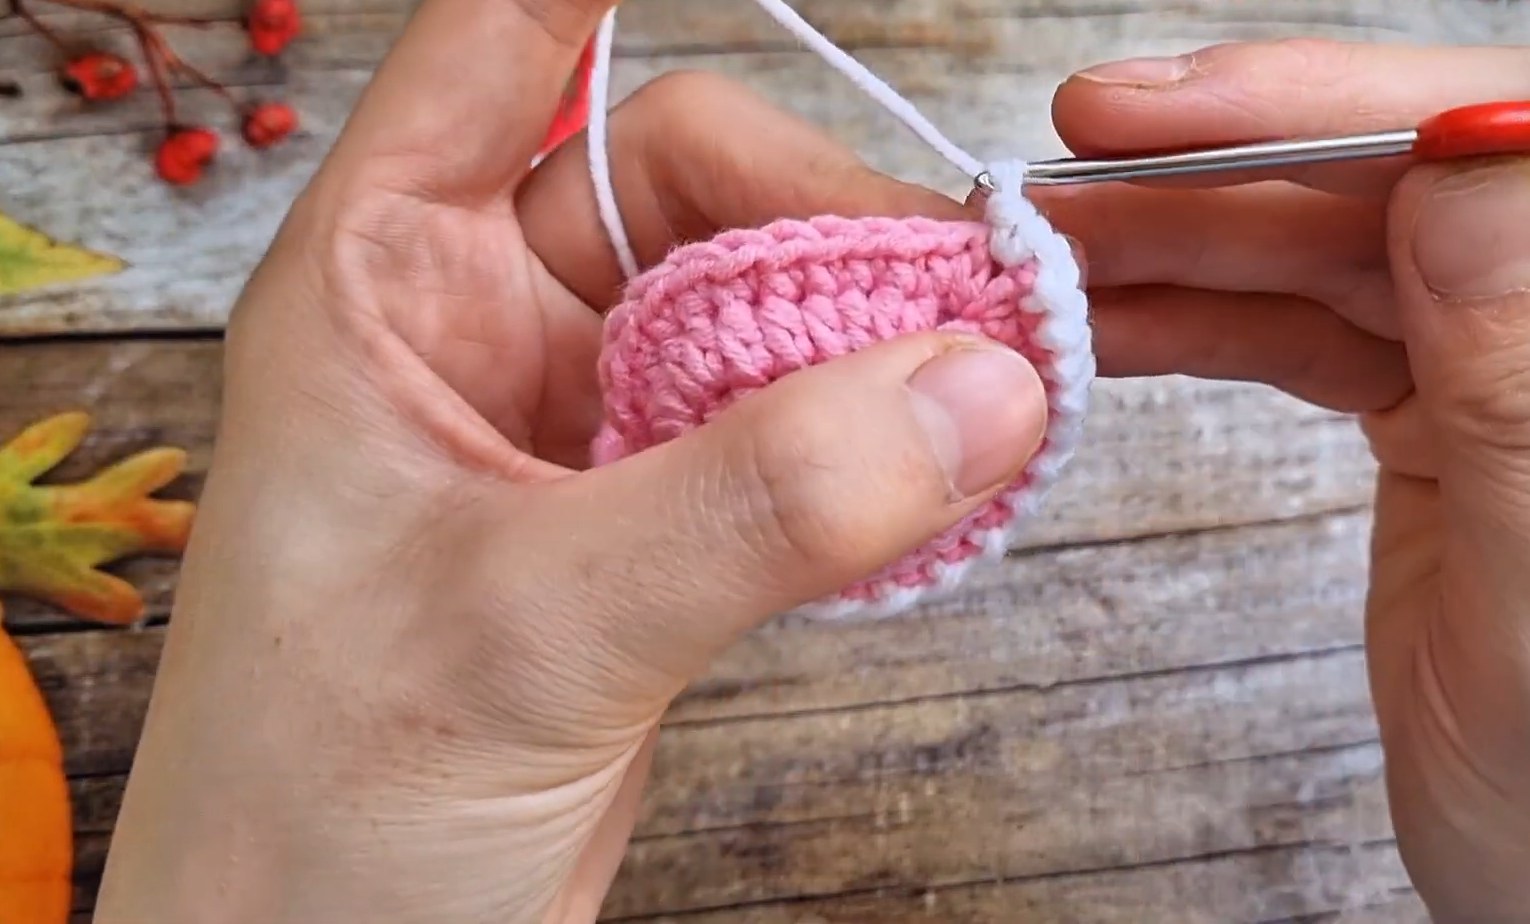
Assembly
-
Place the two hearts with wrong sides facing each other.
-
Align the stitches of both panels.
-
Insert hook through the corresponding stitches of both panels (start from the top center dip).
-
Joining Round: Work 1 sc through both layers in each st around.
-
At the bottom point (ch-1 space): Work (1 sc, ch 1, 1 sc) into the space.
-
Continue working sc around the other side.
-
Before closing completely, stuff lightly with fiberfill.
-
Finish the round of sc. Sl st to the first sc to join.
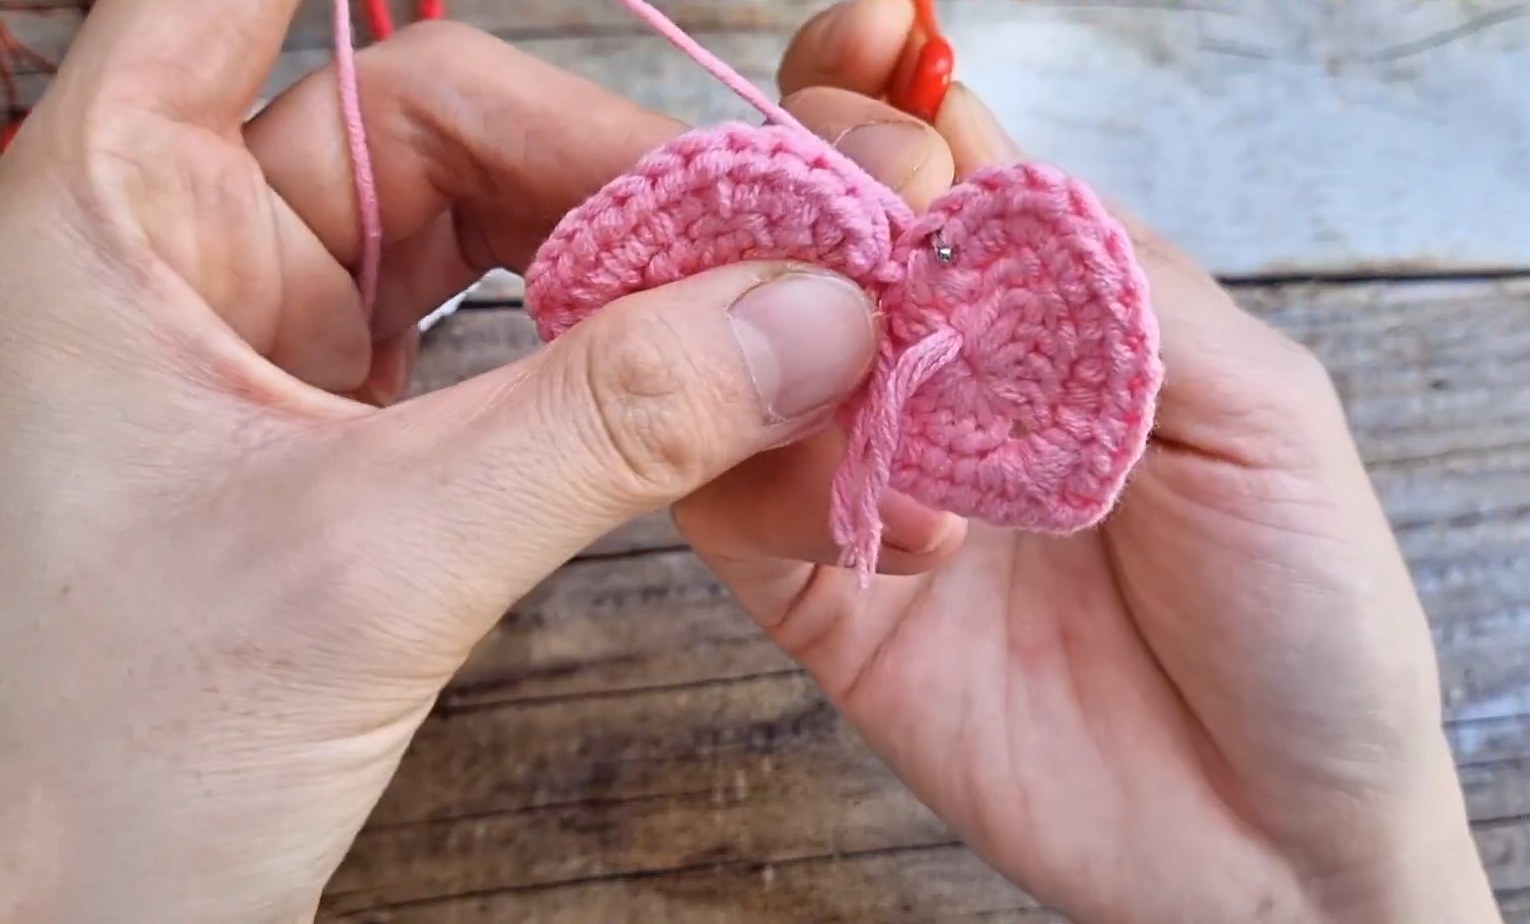
Hanging Loop:
-
Ch 25-30 (or desired length).
-
Sl st back into the same space as the join to form a loop.
-
Fasten off and weave in ends.
Decorative Edge (Optional)
-
Attach a contrasting color yarn to any stitch on the edge (can start near the hanging loop).
-
Edging Pattern: Sl st in next st, ch 1. Repeat * to * around the entire heart.
-
At the bottom point: Work (sl st, ch 1, sl st) into the ch-1 space.
-
Join with a sl st to the start.
-
Fasten off and weave in ends.
-
Use fingers to adjust the edging so it looks uniform on both sides.
Crochet Heart Keychain Pattern (UK Terms)
Materials:
-
Milk Cotton Yarn (125g)
-
2.5 mm Crochet Hook
-
Small amount of fiberfill stuffing
-
Contrast yarn for edging (optional)
-
MR: Magic Ring
-
ch: Chain
-
ss: Slip stitch
-
dc: Double crochet (US sc)
-
htr: Half treble crochet (US hdc)
-
tr: Treble crochet (US dc)
Heart Panels (Make 2)
Round 1:
-
Create a MR.
-
ch 3.
-
Work 3 tr into the MR.
-
Work 3 htr into the MR.
-
ch 1.
-
Work 3 htr into the MR.
-
Work 3 tr into the MR.
-
ch 3, ss into the MR.
-
Tighten the MR. ch 1.
Round 2:
-
Work 1 htr into each of the first 3 ch sts.
-
In the next 3 tr sts:
-
2 htr in the 1st tr.
-
2 htr in the 2nd tr.
-
1 htr in the 3rd tr.
-
-
Work 1 htr in each of the next 3 htr sts.
-
Point of the Heart: In the ch-1 space, work (2 htr, ch 1, 2 htr).
-
Work 1 htr in each of the next 3 htr sts.
-
In the next 3 tr sts:
-
1 htr in the 1st tr.
-
2 htr in the 2nd tr.
-
2 htr in the 3rd tr.
-
-
Work 1 htr into each of the last 3 ch sts.
-
ss into the first htr to join.
-
First Panel: Fasten off and weave in ends.
-
Second Panel: Do not fasten off.
Assembly
-
Place panels with wrong sides together.
-
Joining Round: Work 1 dc through both layers in each st around.
-
At bottom point (ch-1 space): Work (1 dc, ch 1, 1 dc).
-
Stuff lightly with fiberfill before closing.
-
ss to the first dc to join.
Hanging Loop:
-
ch 25–30.
-
ss back into the same space as the join.
-
Fasten off.
Decorative Edge (Optional)
-
Join contrast yarn to any edge stitch.
-
Pattern: * ss in next st, ch 1 *. Repeat * to * around.
-
At bottom point: Work (ss, ch 1, ss) into the ch-1 space.
-
Join with ss.
-
Fasten off and weave in all ends.