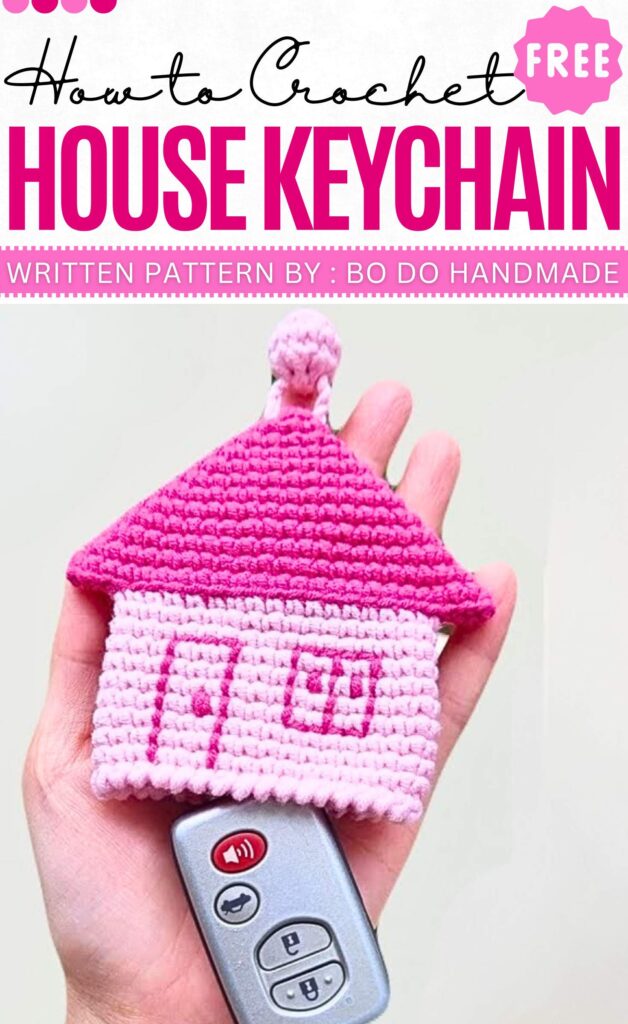
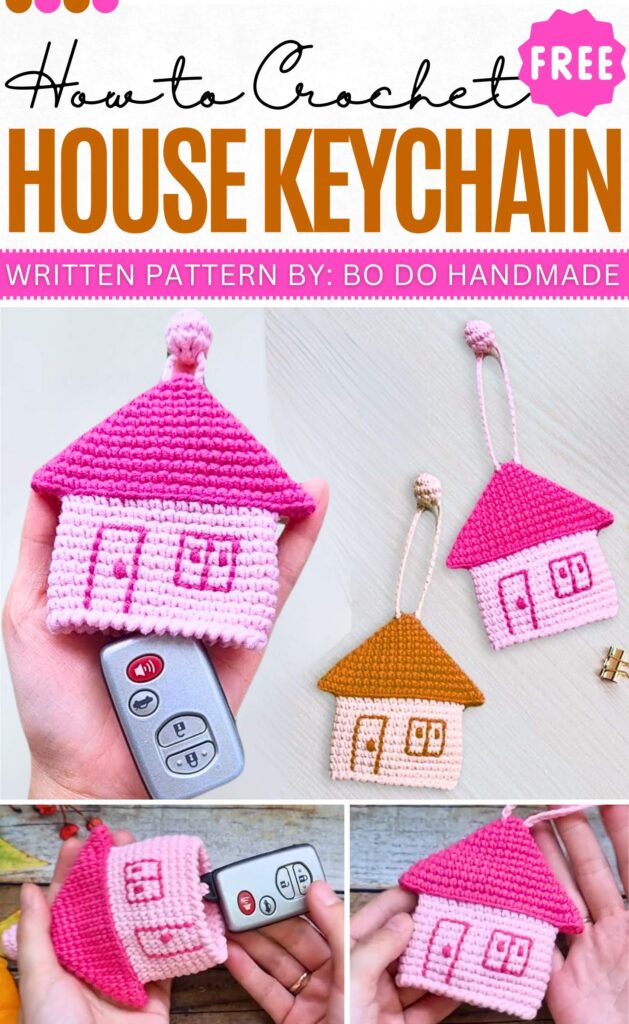
Crochet House Keychain & Key Case Pattern
Make a tiny, colorful house to hold your keys. It is a small pouch that hides your keys inside to keep them safe. This stops them from scratching things in your bag. You can use any colors you like and even sew on a tiny door or window to make it look real.
About The Creator:
Bi do Handmade has been an expert in crocheting and designing crochet amigurumi, bag charms, and pouches. Also visit her YouTube channel for more exciting projects.
Crochet House Keychain Pattern
Materials
-
Yarn: Milk Cotton (125g) in two colors (e.g., Brown for roof/door and Cream for body).
-
Hook: 2.5mm
-
Other: Fiberfill stuffing, yarn needle, scissors, stitch markers.
Abbreviations
-
MR: Magic Ring
-
ch: chain
-
st: stitch
-
sl st: slip stitch
-
sc: single crochet
-
inc: increase (2 sc in same st)
-
dec: decrease (sc 2 together)
-
BLO: back loop only
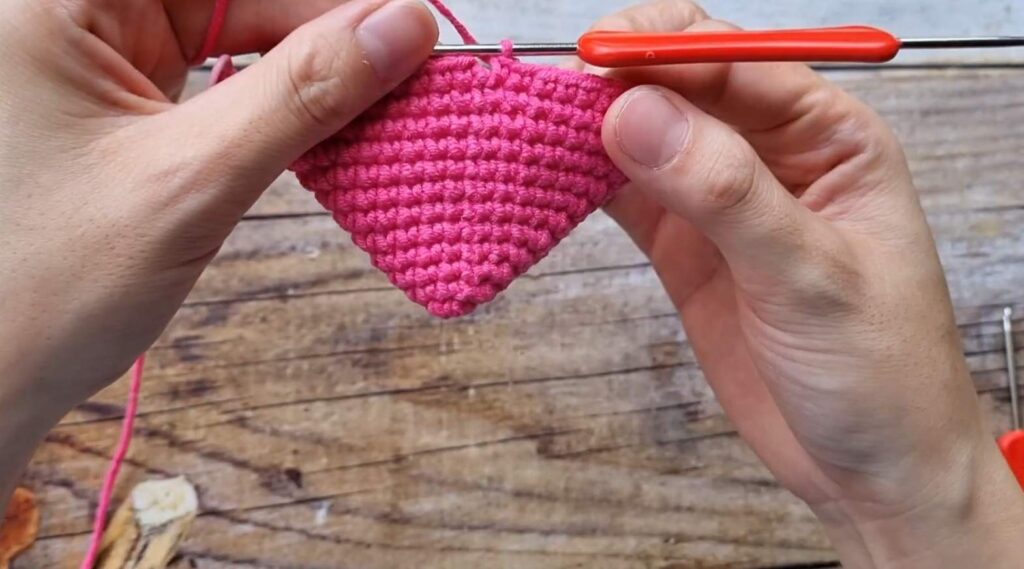
Part 1: Roof (Top-Down)
-
Rnd 1: MR, 6 sc. Join with sl st, ch 1. [6]
-
Rnd 2: 1 sc in next 2 sts, 3 sc in next st (mark the 2nd sc), 1 sc in next 2 sts, 3 sc in next st (mark the 2nd sc). Join with sl st, ch 1. [10]
-
Rnd 3: Sc in each st until marker. In marked st, work 3 sc (mark the 2nd sc). Sc in each st until next marker. In marked st, work 3 sc (mark the 2nd sc). Sc in remaining sts. Join with sl st, ch 1.
-
Rnd 4–12: Repeat Rnd 3. Each round increases by 4 sts.
-
Fasten off after Rnd 12, leaving a long tail for shaping.
-
Shaping: Use a needle to pinch the corners of the roof (where increases were made) and sew through 4 sts to create a folded eaves effect on both sides.


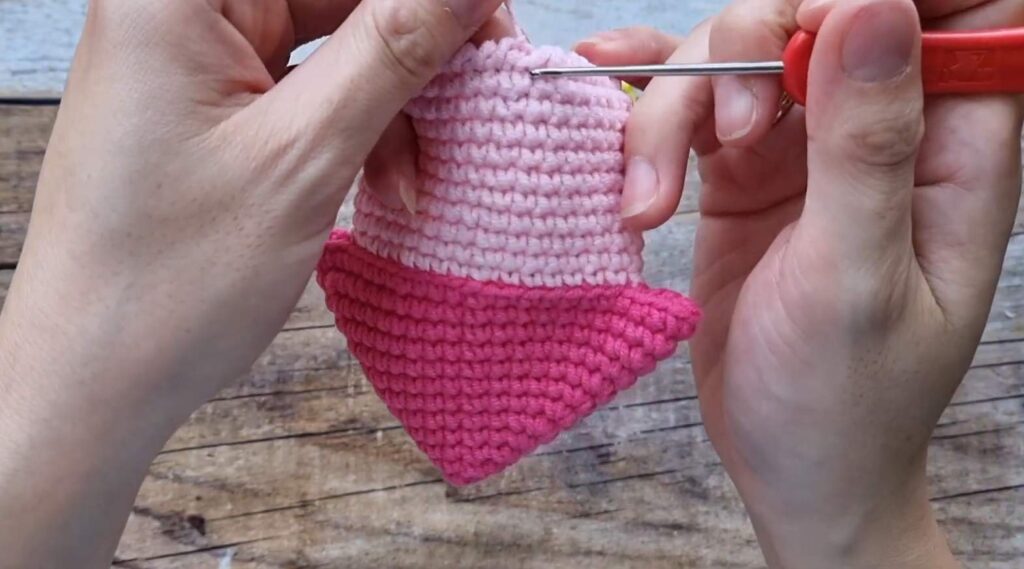
Part 2: House Body
-
Rnd 1: Join body yarn to the BLO of any st at the base of the roof. Ch 1, sc in each st around. Join with sl st, ch 1.
-
Rnd 2–11: Sc in each st around (through both loops). Join with sl st, ch 1.
-
Rnd 12 (Edging): Work Reverse Single Crochet (Crab Stitch) in each st around.
-
Fasten off and weave in ends.
Part 3: Decorative Ball (For Top of Roof)
-
Rnd 1: MR, 6 sc. Join with sl st, ch 1. [6]
-
Rnd 2: 6 inc. Join with sl st, ch 1. [12]
-
Rnd 3: 12 sc. Join with sl st, ch 1. [12]
-
Rnd 4: 6 dec. [6]
-
Stuff with fiberfill. Use needle to close the hole. Fasten off.

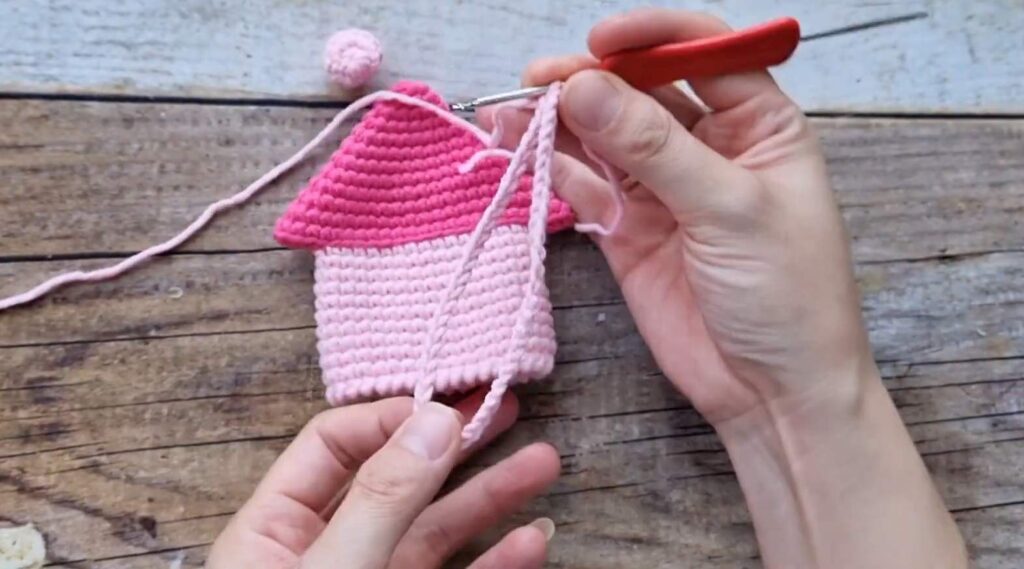
Part 4: Drawstring & Assembly
-
Chain Cord: Ch 50 (or enough to reach from top to bottom and back). Fasten off.
-
Assembly: * Thread the chain cord through the center hole of the roof.
-
Attach the decorative ball to the top end of the cord.
-
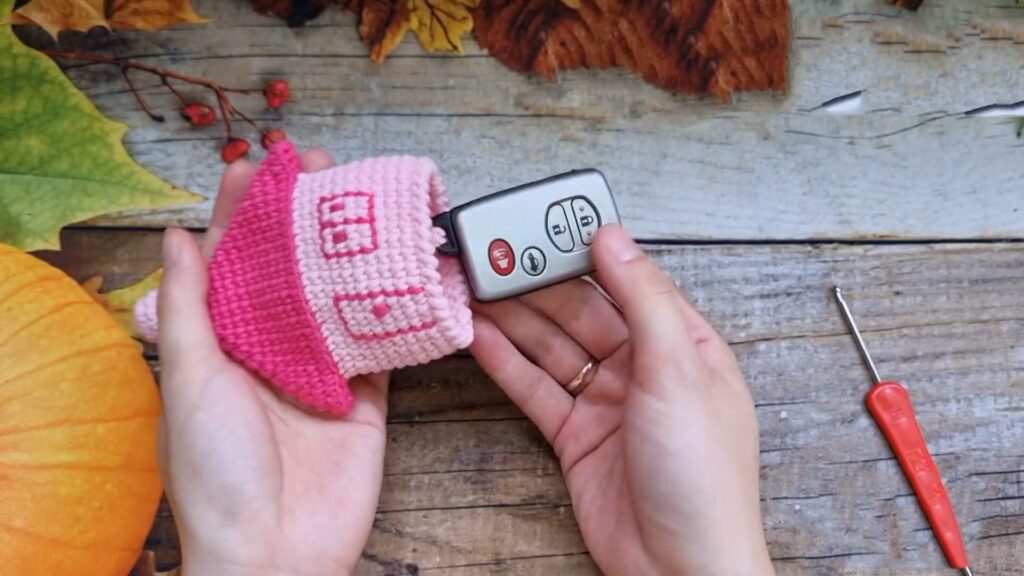
The bottom end of the cord inside the house is used to attach your keys.
-
-
Door Detail: Use a yarn needle and roof-color yarn to embroider a rectangle on the front of the body. Work 2-3 extra stitches in one spot to create a “doorknob” bump.
Pattern Features
-
-
Standard Construction: Starts with a Magic Ring and uses basic increases to form the roof.
-
Functional Design: The drawstring allows keys to be pulled inside the “house” for protection.
-
Finishing: Reverse sc edging provides a sturdy and decorative base.
-
Video Tutorial:
Pattern In UK Terms
Abbreviations
-
MR: Magic Ring
-
ch: chain
-
st: stitch
-
ss: slip stitch
-
dc: double crochet (US single crochet)
-
inc: increase (2 dc in same st)
-
dec: decrease (dc 2 together)
-
BLO: back loop only

Part 1: Roof (Top-Down)
-
Rnd 1: MR, 6 dc. Join with ss, ch 1. [6]
-
Rnd 2: 1 dc in next 2 sts, 3 dc in next st (place marker in the 2nd dc), 1 dc in next 2 sts, 3 dc in next st (place marker in the 2nd dc). Join with ss, ch 1. [10]
-
Rnd 3: dc in each st until marker. In marked st, work 3 dc (remark the 2nd dc). dc in each st until next marker. In marked st, work 3 dc (remark the 2nd dc). dc in remaining sts. Join with ss, ch 1.
-
Rnd 4–12: Repeat Rnd 3. Each round increases the stitch count by 4.
-
Fasten off after Rnd 12, leaving a long tail for sewing.
-
Shaping: Use the needle to pinch the eaves at the increase points and sew through 4 sts to create the structural “overhang” seen in the video.
Part 2: House Body
-
Rnd 1: Join body yarn to the BLO of any st at the base of the roof. Ch 1, 1 dc in each st around. Join with ss, ch 1.
-
Rnd 2–11: 1 dc in each st around (through both loops). Join with ss, ch 1.
-
Rnd 12 (Edging): Work Reverse Double Crochet (Crab Stitch) in each st around.
-
Fasten off and weave in all ends.
Part 3: Decorative Ball (For Drawstring Top)
-
Rnd 1: MR, 6 dc. Join with ss, ch 1. [6]
-
Rnd 2: 6 inc. Join with ss, ch 1. [12]
-
Rnd 3: 12 dc. Join with ss, ch 1. [12]
-
Rnd 4: 6 dec. [6]
-
Add a small amount of stuffing. Use a needle to weave through the front loops and pull tight to close. Fasten off.
Part 4: Drawstring & Assembly
-
Chain Cord: Ch 50. Fasten off.
-
Assembly: * Thread the ch-50 cord through the very centre of the roof MR.
-
Attach the Decorative Ball to the top end of the cord outside the house.
-
Tie the bottom end of the cord (inside the house) to your key ring.
-
-
Door Detail: Use the tapestry needle and roof-coloured yarn to embroider a door shape on the front. To create the doorknob, stitch 2-3 times into the same spot to form a raised knot.