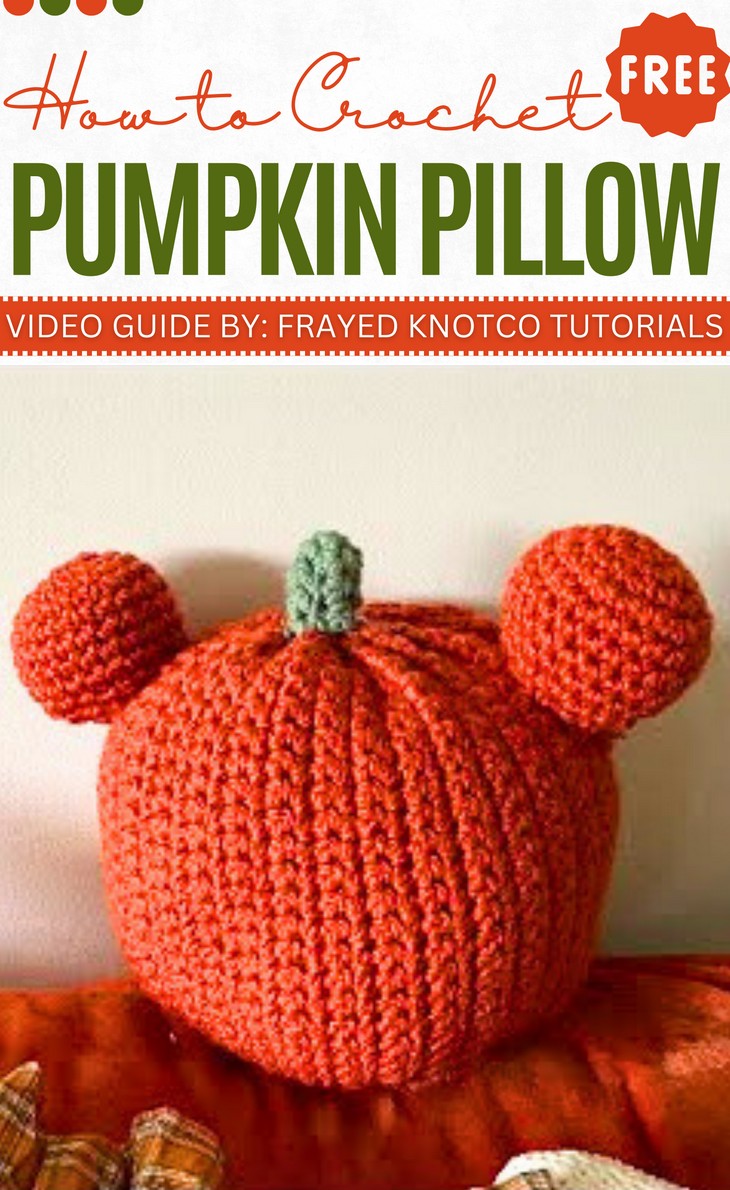
How to Crochet Mickey Mouse Pumpkin Pillow for Fall
When you need a pumpkin amigurumi that is useful, too, a pumpkin pillow will save your day. So, learn with a beginner-friendly tutorial, learn how to crochet this Mickey Mouse pumpkin pillow for fall celebrations and kids’ rooms, such as Halloween and Thanksgiving. Besides crocheting a simple large pumpkin, this pillow needs the ear amigurumi as sew-on, making it easy and quick. You will also need not to produce the usual ribbed texture.
The tutorial will also share tips on making adjustments like ear size and stem length. So, if you have made your mind to crochet this pillow pumpkin for your home, continue reading this post till the end. You can put it over your sofa, bed, and even use a pouf.
About the Designer: The designer behind this crochet pumpkin pillow project is @randihutchison – her library is dedicated mostly to amigurumi usually using the fuzz yarn making them look like store-bought. Her nice amigurumi ideas are floppy frogs, a unique dinosaur, a bee, a shark headband, an onigiri sushi amigurumi, and a floppy dragon. She has a large collection of crochet tutorials around 331 currently so you will certainly find your next crochet project here!
Note: In respect of the creator’s rights, there will be no provision of the written pattern. You can watch the tutorial with instructions at the end of this post.
Falls Pumpkin Pillow Tutorial Features
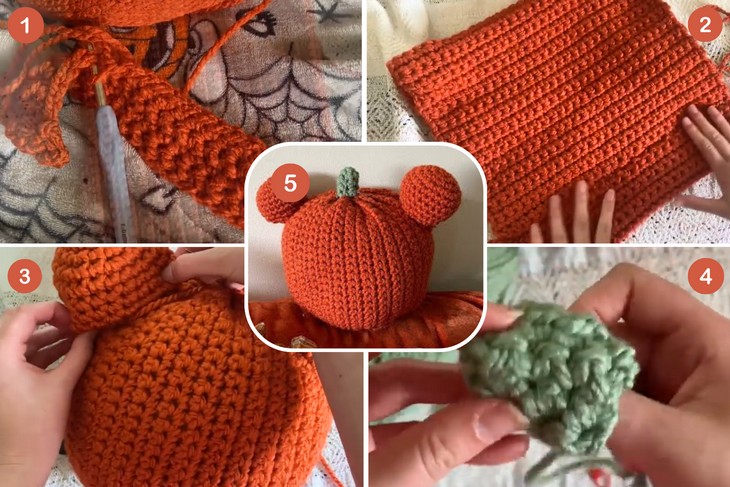
Skill Level: Beginner – Intermediate. The main stitch used is the single crochet, starting from a slip knot for the pumpkin and stem. To form the different shapes, the you’ll need increasing stitches (two single crochets in one stitch) and decreasing stitches (combining two stitches into one). The project also uses a magic ring alternative for starting the ears, and the creator shows how to weave the different pieces together to form the pillow and close up the openings.
Tutorial Timing: Approximately 19 minutes only. (perfect for learning how to turn a crochet cylinder using the straight rows into a pumpkin amigurumi by stuffing and sewing. This technique can also be used to crochet slippers and baskets.)

Personalization Tips: Using the felt, you can either make the Mickey Mouse face or of Jack-o-lantern that kids will certainly love. A tiny crocheted leaf and curly vines can also be tried.
Pattern Type: No on-screen written pattern is available, but the verbal instructions since the project is not complicated. Both English instructions are available.
Materials Used
The materials used in this tutorial are as follows to crochet the same pumpkin amigurumi:
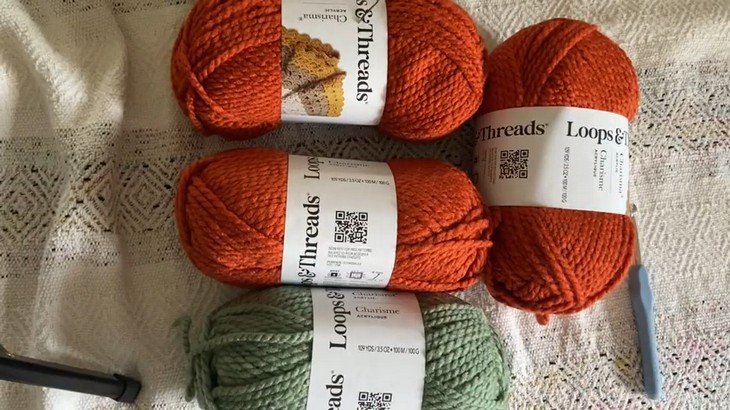
- Yarn: A little over two skeins of Loops & Threads Charisma yarn in a pumpkin color, and a small amount of green yarn.
- Crochet Hook: A 7mm hook was used to get a tighter stitch.
- Other supplies: A stitch marker, stuffing, and a needle.
Stitches Used
Here’s a one-line guide for crocheting each of the stitches to crochet this pumpkin amigurumi and pillow:
- Single Crochet (SC): Insert the hook into the stitch, yarn over, pull through, yarn over again, and pull through both loops.
- Magic Ring Alternative: Chain 4, join into a loop with a slip stitch, and crochet into the center of the loop for your starting round.
- Increasing (INC): Crochet two single crochet stitches into the same stitch to increase the stitch count.
- Reducing (DEC): Use invisible decrease by crocheting together the front loops of two consecutive stitches.
- Weaving: Use a yarn needle to stitch through pieces and secure ends to join or close the project.