
Crochet Milk Bottle Bag Pattern For Little Ones
Let’s make the cutest crochet accessory for your child’s adventures. This pattern is for making a cute bag shaped like a milk bottle with the hollow inside. You can put small goods in it or stuff it to make a cute cuddly toy your child would love to play with. For Your visuals we have a video tutorial at the bottom!
About The Creator:
Bi do Handmade has been an expert in crocheting and designing crochet amigurumi, bag charms, and pouches. Also visit her YouTube channel for more exciting projects.
Crochet Milk Bottle Bag Pattern
Materials Needed
-
Yarn: Milk Cotton yarn (4-ply or 5-ply) in three colors: White (bottle body), Tan/Skin (nipple), and an Accent color like Blue or Pink (cap).
-
Crochet Hook: 2.5mm or 3.0mm hook.
-
Button: One button (approx. 1.5cm diameter) for the front closure.
-
Stuffing: A small amount of polyester fiberfill (optional, to help the bottle hold its shape).
-
Tapestry Needle: For sewing the lid to the body and weaving in ends.
-
Embroidery Thread: A small amount of black yarn or thread for the measurement lines.
-
Scissors: For cutting yarn.
-
Measuring Tape: To check the size of the bag and strap.
Terminology: US Terms Abbreviations:
-
MR: Magic Ring
-
ch: Chain
-
sc: Single Crochet
-
inc: Increase (2 sc in 1 st)
-
sl st: Slip Stitch
-
BLO: Back Loop Only
-
st(s): Stitch(es)
-
yo: Yarn Over
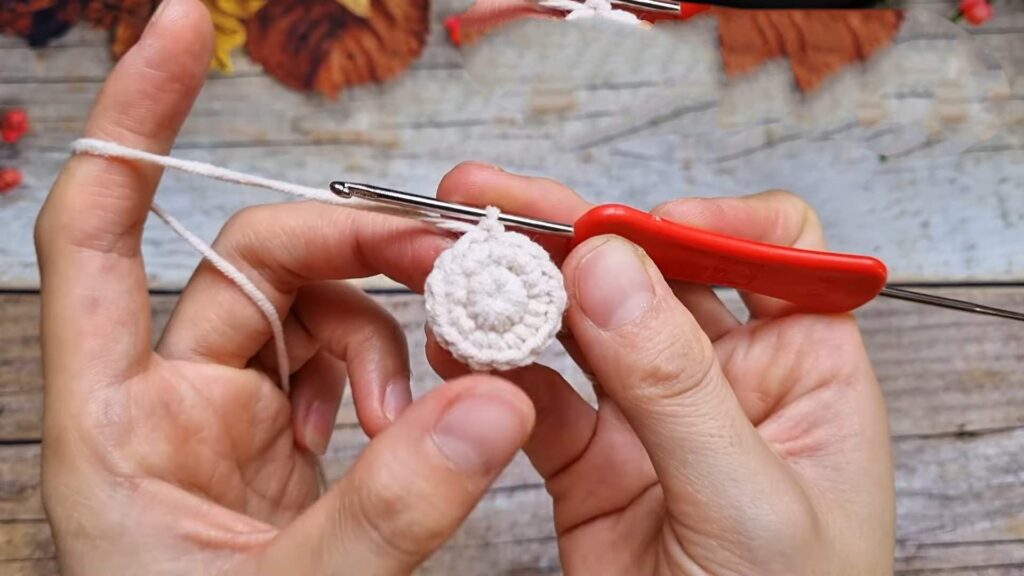
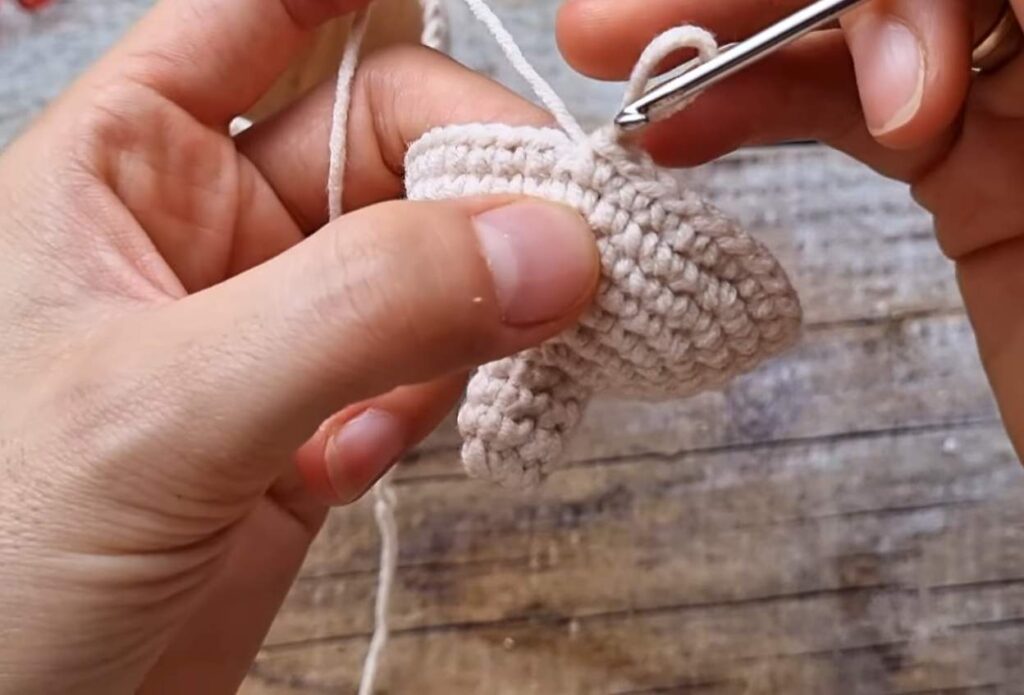
Bag Body (White Yarn)
-
R1: MR, 8 sc. Sl st to join. [8]
-
R2: ch 1, 8 inc. Sl st to join. [16]
-
R3: ch 1, (1 sc, inc) * 8. Sl st to join. [24]
-
R4: ch 1, (3 sc, inc) * 6. Sl st to join. [30]
-
R5: ch 1, (4 sc, inc) * 6. Sl st to join. [36]
-
R6: ch 1, BLO sc around. Sl st to join. [36]
-
R7–R20: ch 1, sc around. Sl st to join. (14 rows total). [36]
-
Finish: Fasten off and weave in ends.


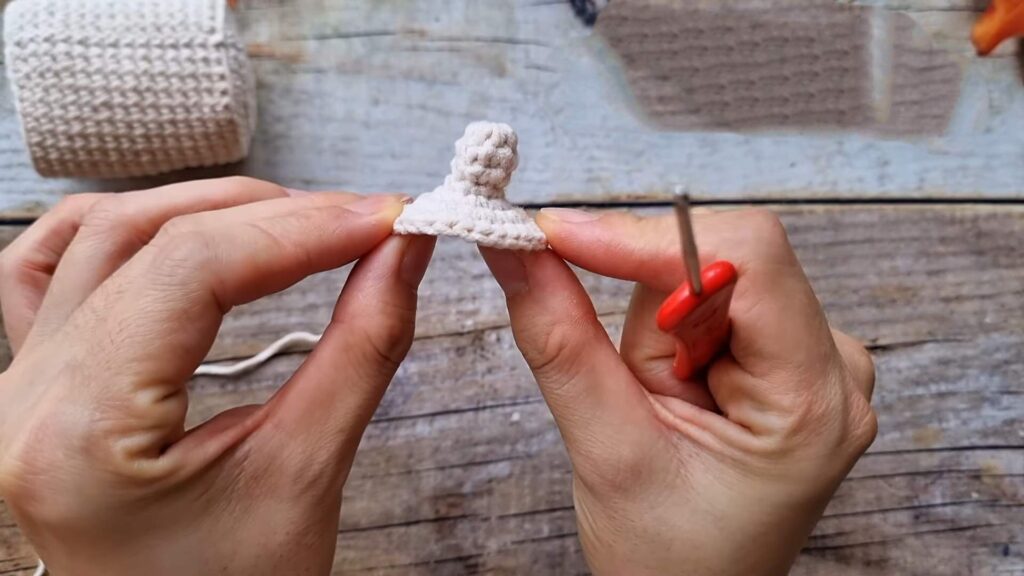
Bottle Lid (Nipple & Cap)
Nipple Section (Tan/Nude Yarn):
-
R1: MR, 8 sc. Sl st to join. [8]
-
R2–R4: ch 1, sc around. Sl st to join. [8]
-
R5: ch 1, 8 inc. Sl st to join. [16]
-
R6: ch 1, (1 sc, inc) * 8. Sl st to join. [24]
-
R7: ch 1, (7 sc, inc) * 3. Sl st to join. [27]
-
R8: ch 1, (8 sc, inc) * 3. Sl st to join. [30]
-
R9: ch 1, (9 sc, inc) * 3. Sl st to join. [33]
-
R10: ch 1, (10 sc, inc) * 3. Sl st to join. [36]
-
R11: ch 1, (11 sc, inc) * 3. Sl st to join. [39]
Screw Cap Section (Change Color):
-
R12: Change to accent color, ch 1, sc around. Sl st to join. [39]
-
R13 (Ridge Row): Insert hook from back-to-front through st 1, then front-to-back through st 2, yo and pull up loop, yo and pull through both loops. Repeat this “horizontal” stitch around. [39]
-
R14–R17: ch 1, sc around. Sl st to join. [39]
-
Finish: Fasten off, leave a long tail for sewing.

Assembly & Finishing
-
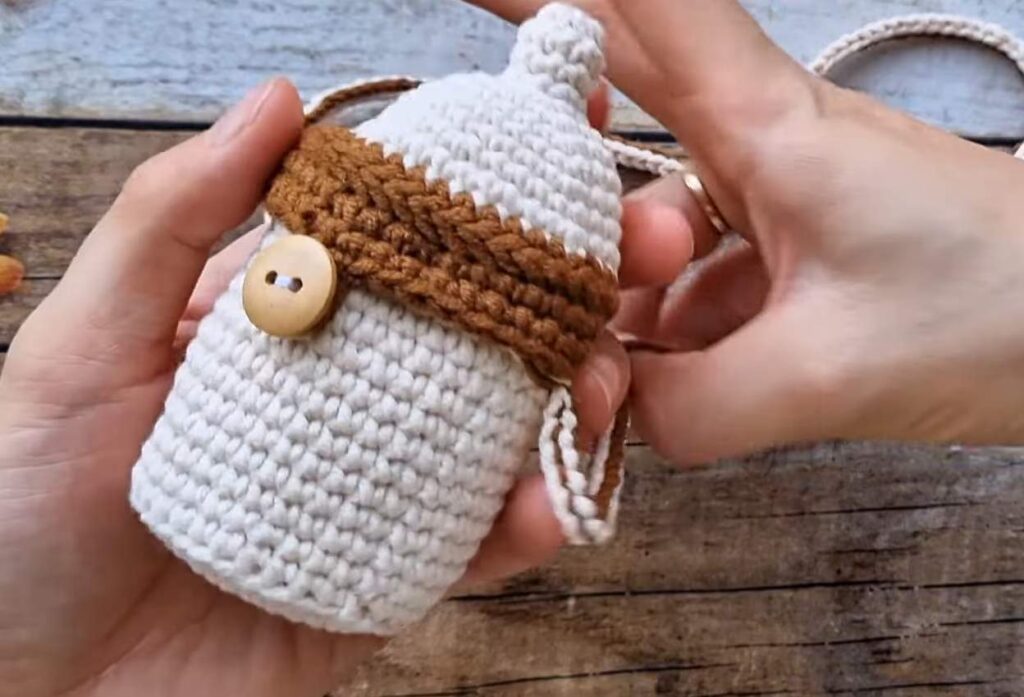
Attachment: Align the lid over the bag body. Use the yarn tail to sew approximately half (18–20 sts) of the lid edge to the top of the white bag body.
-
Button Loop: Attach yarn to the front center edge of the lid. ch 6 (adjust based on button size), sl st into the same stitch to form a loop.
-
Button: Sew a button onto the white bag body, aligned with the lid’s loop.
-
Strap: Use double-stranded yarn. ch 2. Insert hook into 1st ch, yo, pull through 1 loop, yo, pull through 2 loops. Turn, insert hook into side loops, yo, pull through 2 loops. Repeat until desired length. Tie ends to the sides of the bag.
-
Details: Use black yarn and a needle to embroider short horizontal lines on the front of the white body to mimic milk measurement markings.
Video Tutorial By Bi Do Handmade:
Pattern In UK Terms
Terminology: UK Terms Abbreviations:
-
MR: Magic Ring
-
ch: Chain
-
dc: Double Crochet (US sc)
-
inc: Increase (2 dc in 1 st)
-
ss: Slip Stitch
-
BLO: Back Loop Only
-
st(s): Stitch(es)
-
yo: Yarn Over
Bag Body (White Yarn)
-
R1: MR, 8 dc. ss to join. [8]
-
R2: ch 1, 8 inc. ss to join. [16]
-
R3: ch 1, (1 dc, inc) * 8. ss to join. [24]
-
R4: ch 1, (3 dc, inc) * 6. ss to join. [30]
-
R5: ch 1, (4 dc, inc) * 6. ss to join. [36]
-
R6: ch 1, BLO dc around. ss to join. [36]
-
R7–R20: ch 1, dc around. ss to join. (14 rows total). [36]
-
Finish: Fasten off and weave in ends.
Bottle Lid (Teat & Cap)
Teat Section (Tan/Nude Yarn):
-
R1: MR, 8 dc. ss to join. [8]
-
R2–R4: ch 1, dc around. ss to join. [8]
-
R5: ch 1, 8 inc. ss to join. [16]
-
R6: ch 1, (1 dc, inc) * 8. ss to join. [24]
-
R7: ch 1, (7 dc, inc) * 3. ss to join. [27]
-
R8: ch 1, (8 dc, inc) * 3. ss to join. [30]
-
R9: ch 1, (9 dc, inc) * 3. ss to join. [33]
-
R10: ch 1, (10 dc, inc) * 3. ss to join. [36]
-
R11: ch 1, (11 dc, inc) * 3. ss to join. [39]
Screw Cap Section (Change Colour):
-
R12: Change to accent colour, ch 1, dc around. ss to join. [39]
-
R13 (Ridge Row): Insert hook from back-to-front through st 1, then front-to-back through st 2, yo and pull up loop, yo and pull through both loops. Repeat this horizontal stitch around. [39]
-
R14–R17: ch 1, dc around. ss to join. [39]
-
Finish: Fasten off, leave a long tail for sewing.
Assembly & Finishing
-
Attachment: Align the lid over the bag body. Use the yarn tail to sew approximately half (18–20 sts) of the lid edge to the top of the white bag body.
-
Button Loop: Attach yarn to the front centre edge of the lid. ch 6 (adjust for button size), ss into the same stitch to form a loop.
-
Button: Sew a button onto the white bag body, aligned with the lid’s loop.
-
Strap: Use double-stranded yarn. ch 2. Insert hook into 1st ch, yo, pull through 1 loop, yo, pull through 2 loops. Turn, insert hook into side loops, yo, pull through 2 loops. Repeat until desired length. Tie ends to the sides of the bag.
-
Details: Use black yarn and a needle to embroider short horizontal lines on the front of the white body to mimic volume markings.