
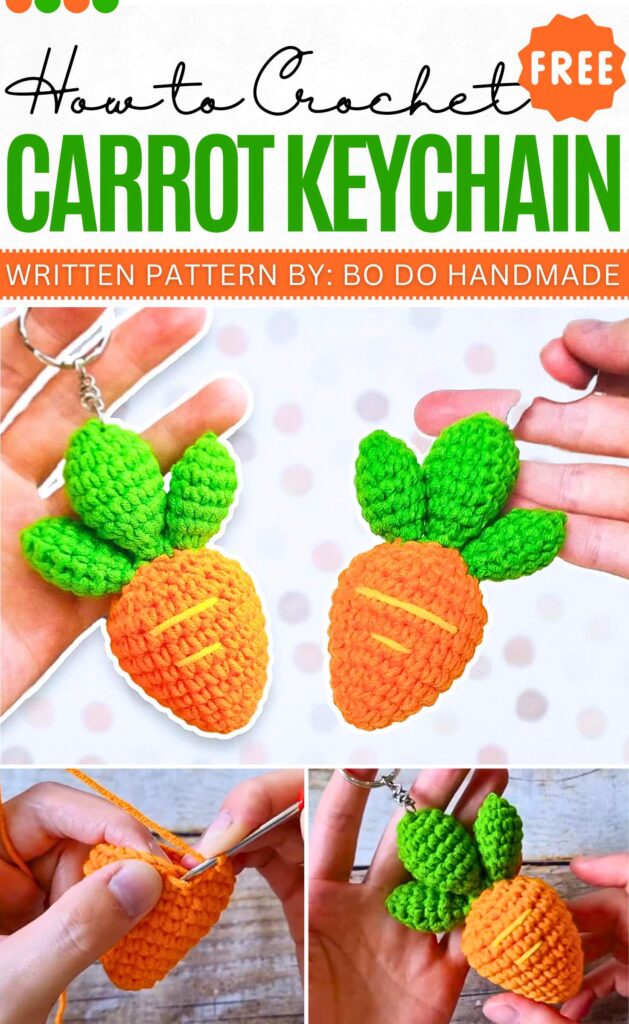
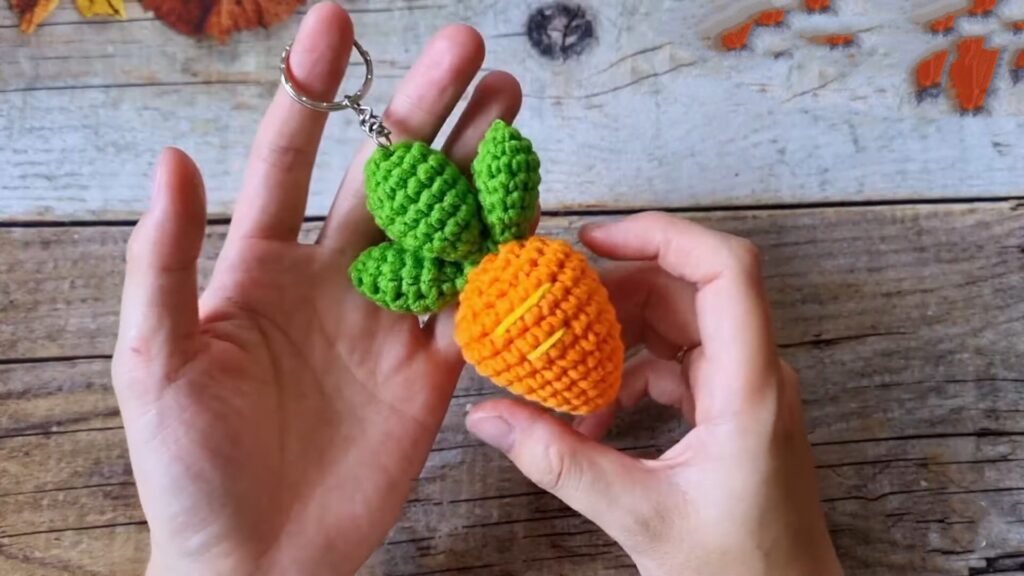
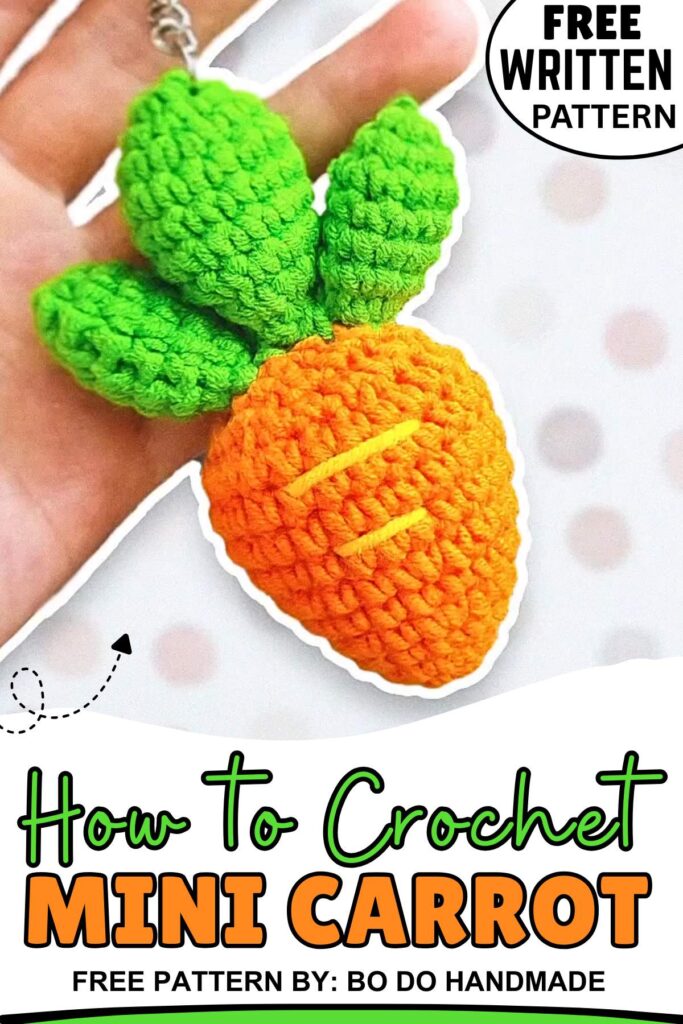
Crochet Mini Carrot Keychain & Ornament Pattern
Here is the cutest project to brighten up your keys or bag! This mini crochet carrot is a lovely little craft that makes a wonderful gift or a cute accessory for your own backpack. It is soft, bright, and the perfect size to carry around with you wherever you go!
Crochet Mini Carrot Keychain
How to Make It
-
Crochet the carrot: Make a small orange cone and fill it with soft fluff.
-
Close the top: Sew the opening shut so the stuffing stays inside.
-
Add the leaves: Crochet three green pieces and sew them to the top.
-
Finish it: Add a metal ring so you can hang it on your keys.
About The Creator:
Bi do Handmade has been an expert in crocheting and designing crochet amigurumi, bag charms, and pouches. Also visit her YouTube channel for more exciting projects.
Let’s Crochet Mini Carrot Keychain
Abbreviations
-
MR: Magic Ring
-
ch: Chain
-
sc: Single Crochet
-
inc: Increase (2 sc in the same st)
-
dec: Decrease (Invisible Decrease: insert hook into front loops of next 2 sts, yarn over, pull through 2 loops, yarn over, pull through 2 loops)
-
sl st: Slip Stitch
-
st(s): Stitch(es)
-
[ … ] x N: Repeat the instructions in brackets N times.
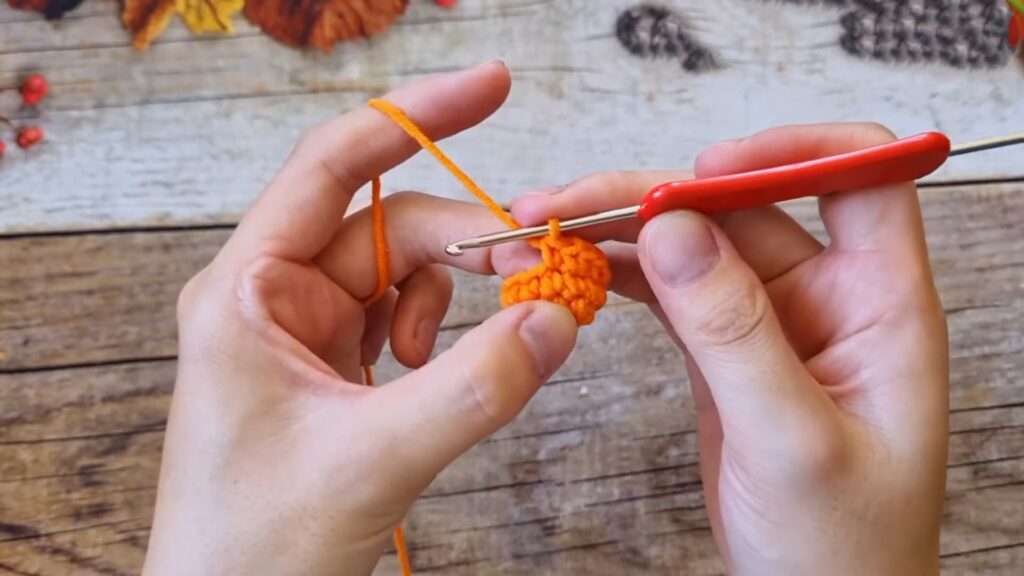
1. Carrot Body (Orange)
Work in joined rounds. Join with a sl st to the first sc and ch 1 at the end of each round unless otherwise stated.
-
R1: 6 sc in MR. Join. (6)
-
R2: 6 inc. Join. (12)
-
R3: sc in each st around. Join. (12)
-
R4: [1 sc, inc] x 6. Join. (18)
-
R5: sc in each st around. Join. (18)
-
R6: [2 sc, inc] x 6. Join. (24)
-
R7: sc in each st around. Join. (24)
-
R8: [3 sc, inc] x 6. Join. (30)
-
R9 – R12 (4 rounds): sc in each st around. Join. (30)
-
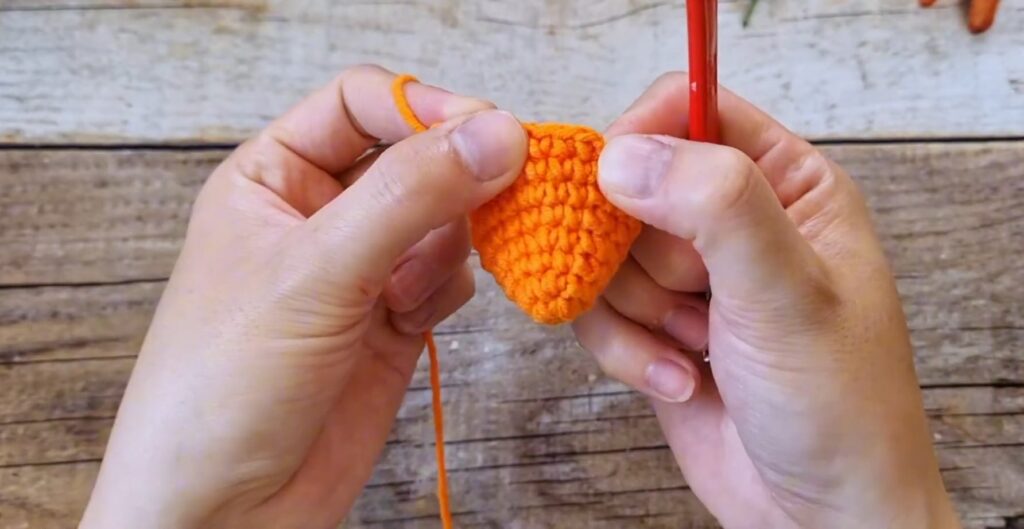
R13: [2 sc, dec] x 6. Join. (24)
-
Note: The video instructs to decrease by working 2 sc then 1 dec.
-
-
R14 (Decrease Round): [1 sc, dec] x 6. Join. (18)
-
Note: The video shifts to continuous spiral reduction logic here but maintains joined rounds.
-
-
R15: 6 dec (dec around). Join. (6)
-
Stuff the carrot firmly with fiberfill.
-
Finish: Fasten off, leaving a long tail. Weave the tail through the front loops of the remaining 6 sts, pull tight to close the hole, and hide the end.

2. Small Leaves (Green) – Make 2
Work in joined rounds.
-
R1: 5 sc in MR. Join. (5)
-
R2: 5 inc. Join. (10)
-
R3 – R6 (4 rounds): sc in each st around. Join. (10)
-
Stuff lightly.
-
R7: 5 dec. Join. (5)
-
Finish: Fasten off, leaving a long tail for sewing.

3. Large Leaf (Green) – Make 1
Work in joined rounds.
-
R1: 5 sc in MR. Join. (5)
-
R2: 5 inc. Join. (10)
-
R3: [1 sc, inc] x 5. Join. (15)
-
R4 – R7 (4 rounds): sc in each st around. Join. (15)
-
R8: [1 sc, dec] x 5. Join. (10)
-
Stuff lightly.
-
R9: 5 dec. Join. (5)
-
Finish: Fasten off, leaving a long tail for sewing.
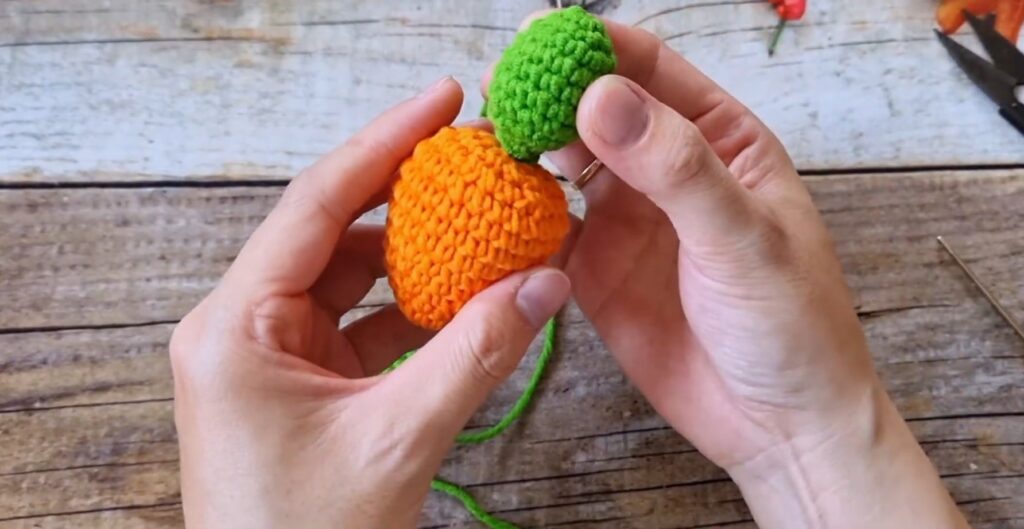
4. Assembly & Decoration
-
Sew Leaves: Sew the Large Leaf to the center of the top of the carrot body. Sew the two Small Leaves on either side of the large leaf.
-
Add Details: Using brown or black yarn/thread, embroider small horizontal lines across the carrot body to create texture.
-
Keychain: Attach a jump ring and keychain strap to the top of the Large Leaf.
Video Tutorial:
Pattern In UK Terms
Abbreviations (UK Terms)
-
MR: Magic Ring
-
ch: Chain
-
dc: Double Crochet (US sc)
-
inc: Increase (2 dc in the same st)
-
dec: Decrease (Invisible Decrease: insert hook into front loops of next 2 sts, yarn over, pull through 2 loops, yarn over, pull through 2 loops)
-
ss: Slip Stitch
-
st(s): Stitch(es)
-
[ … ] x N: Repeat the instructions in brackets N times.
1. Carrot Body (Orange)
Work in joined rounds. Join with a ss to the first dc and ch 1 at the end of each round unless otherwise stated.
-
R1: 6 dc in MR. Join. (6)
-
R2: 6 inc. Join. (12)
-
R3: dc in each st around. Join. (12)
-
R4: [1 dc, inc] x 6. Join. (18)
-
R5: dc in each st around. Join. (18)
-
R6: [2 dc, inc] x 6. Join. (24)
-
R7: dc in each st around. Join. (24)
-
R8: [3 dc, inc] x 6. Join. (30)
-
R9 – R12 (4 rounds): dc in each st around. Join. (30)
-
R13: [2 dc, dec] x 6. Join. (24)
-
R14 (Decrease Round): [1 dc, dec] x 6. Join. (18)
-
R15: 6 dec (dec around). Join. (6)
-
Stuff the carrot firmly with fiberfill.
-
Finish: Fasten off, leaving a long tail. Weave the tail through the front loops of the remaining 6 sts, pull tight to close the hole, and hide the end.
2. Small Leaves (Green) – Make 2
Work in joined rounds.
-
R1: 5 dc in MR. Join. (5)
-
R2: 5 inc. Join. (10)
-
R3 – R6 (4 rounds): dc in each st around. Join. (10)
-
Stuff lightly.
-
R7: 5 dec. Join. (5)
-
Finish: Fasten off, leaving a long tail for sewing.
3. Large Leaf (Green) – Make 1
Work in joined rounds.
-
R1: 5 dc in MR. Join. (5)
-
R2: 5 inc. Join. (10)
-
R3: [1 dc, inc] x 5. Join. (15)
-
R4 – R7 (4 rounds): dc in each st around. Join. (15)
-
R8: [1 dc, dec] x 5. Join. (10)
-
Stuff lightly.
-
R9: 5 dec. Join. (5)
-
Finish: Fasten off, leaving a long tail for sewing.
4. Assembly & Decoration
-
Sew Leaves: Sew the Large Leaf to the centre of the top of the carrot body. Sew the two Small Leaves on either side of the large leaf.
-
Add Details: Using brown or black yarn/thread, embroider small horizontal lines across the carrot body to create texture.
-
Keychain: Attach a jump ring and keychain strap to the top of the Large Leaf.