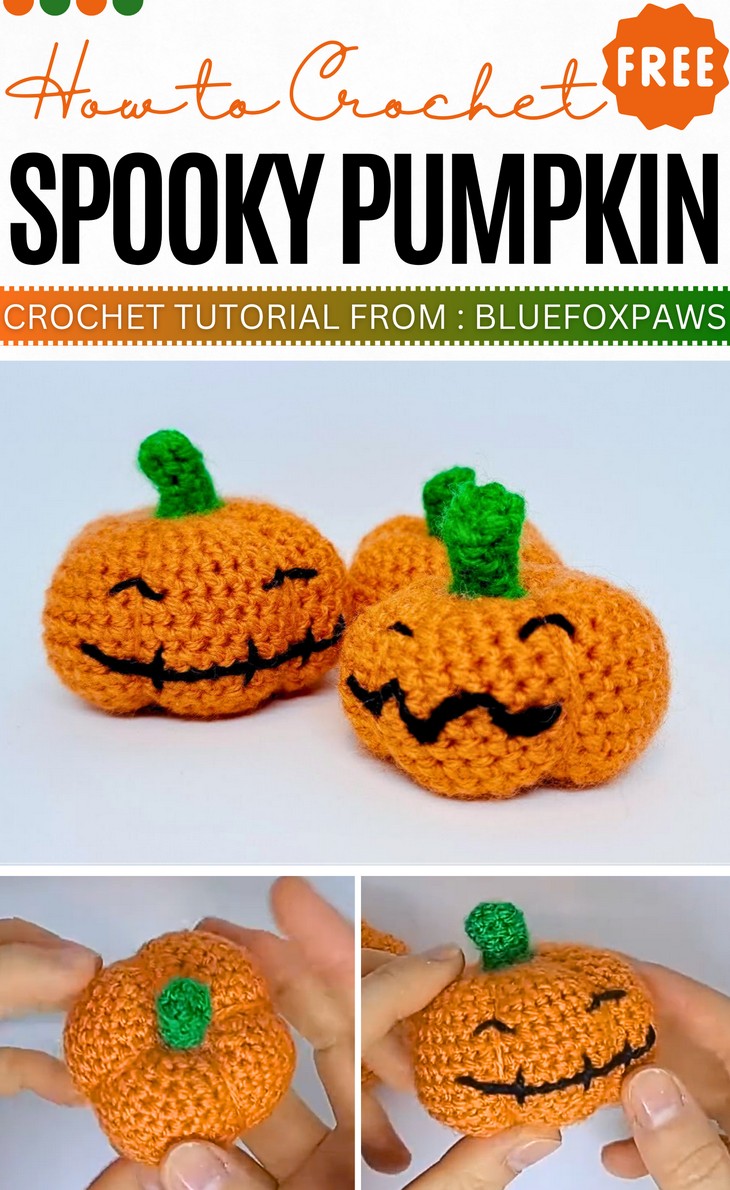
How To Crochet Mini Pumpkin with Halloween Face
With some embroidery, you can turn anything into a Halloween irresistible. So, with two unique embroidery faces and sizes, learn how to crochet this mini Halloween pumpkin by watching a 20-minute stitch-by-stitch tutorial for beginners. You will crochet this pumpkin by working in the round a crochet ball with no little piddly bits to sew on, and then creating the ridges through thread to achieve the perfect pumpkin shape. You can choose from the closed eye, wavy mouth, and closed mouth embroideries and crochet them as a keychain.
So, if you have made up your mind to crochet this easiest pattern for pumpkin amigurumi, continue reading this post till the end. There you will find the complete tutorial.
About the Designer: The designer behind this most detailed Halloween pumpkin project is @ludaritz – she turned into a tutor after realizing potential in herself for making amigurumi, which was her hobby initially. Her library is centered on making crochet versions of characters and items, particularly from video games like Pokémon and Monster Hunter. She has patterns and tutorials for making items such as the Shiny Charm from Pokémon, as well as a variety of “worry pets.” Seldom did she try the Halloween projects, stitch guides, and certain informational and this project is one of her Halloween series.
Note: In respect of the creator’s pattern rights, there will be no provision of the written pattern. You can watch the tutorial with CC instructions at the end of this post.
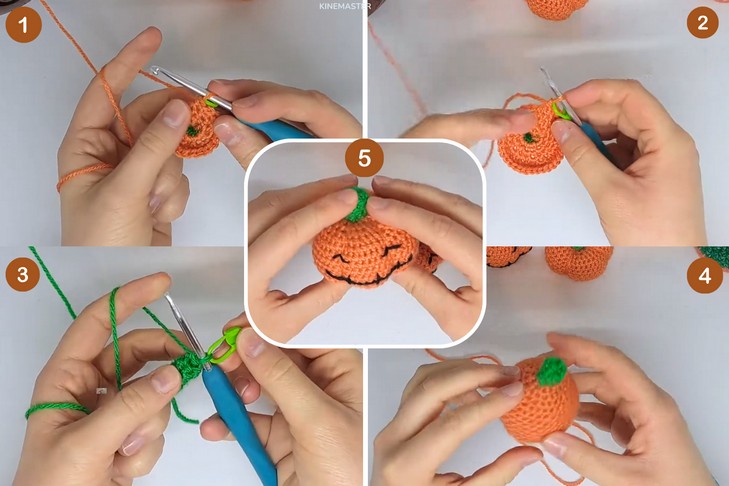
Crochet A Jack Pumpkin Tutorial
Skill Level: Beginner. This pumpkin from ball projects starts with the magic ring to create the stem and uses rounds of single crochet stitches to form the pumpkin’s ball shape. So, you will need little sewing since the pumpkin and stem are worked as one piece! Techniques such as increasing, decreasing, and segmenting the pumpkin with a long tail are used to achieve its realistic look. The tutorial also includes the option to add charming embroidered faces.
Tutorial Timing: Approximately 22 minutes only. (usual pumpkin amigurumi, like crochet pumpkin from a rectangle, and even pumpkin amigurumi as you go, needs a lot more sewing than everybody may achieve seamlessly. But this tutorial is worth watching as minimal sewing and little time is needed.)
Personalization Tips: You can also play with size by adjusting the stitch count in the magic ring – for a bigger pumpkin, start with 8 single crochets instead of 6. Add embroidered expressions ranging from happy to spooky, or use beads or buttons for unique eyes. For a festive touch, consider adding curly green vines with chain stitches.
Pattern Type: A detailed on-screen written pattern is available if you find written instructions easy to follow along with.

Materials Needed
Gather the following suggested tools and materials for crocheting this pumpkin for Halloween:
- Yarn: Orange, green, and black for the pumpkin and optional face details.
- Crochet Hook: 4mm (G).
- Tapestry Needle: For sewing and embroidering.
- Optional Stitch Marker: To track rounds.
- Scissors: For cutting yarn.
- Stuffing: To plump up the pumpkin.
Techniques Used
Here’s a one-line guide for crocheting each stitch and technique in the Halloween pumpkin pattern:
- Magic Ring: Make a tight, adjustable base for circular projects.
- Single Crochet (sc): Insert hook, yarn over, pull through two loops for a compact, sturdy stitch.
- Increase: Add two stitches in the same space to widen the project.
- Decrease: Combine two stitches into one to shape and reduce the work.
- Segmentation: Use a long tail to pull and divide the pumpkin into ridges.
- Embroidery: Use thread and needle to stitch on face details or other embellishments.