
Free Crochet Mini Snake Pouch for Chinese New Year
Here is another Zodiac animal crochet project for the Chinese New Year. This time, you will learn how to crochet a mini snake pouch with a free pattern with both US and UK abbreviations.
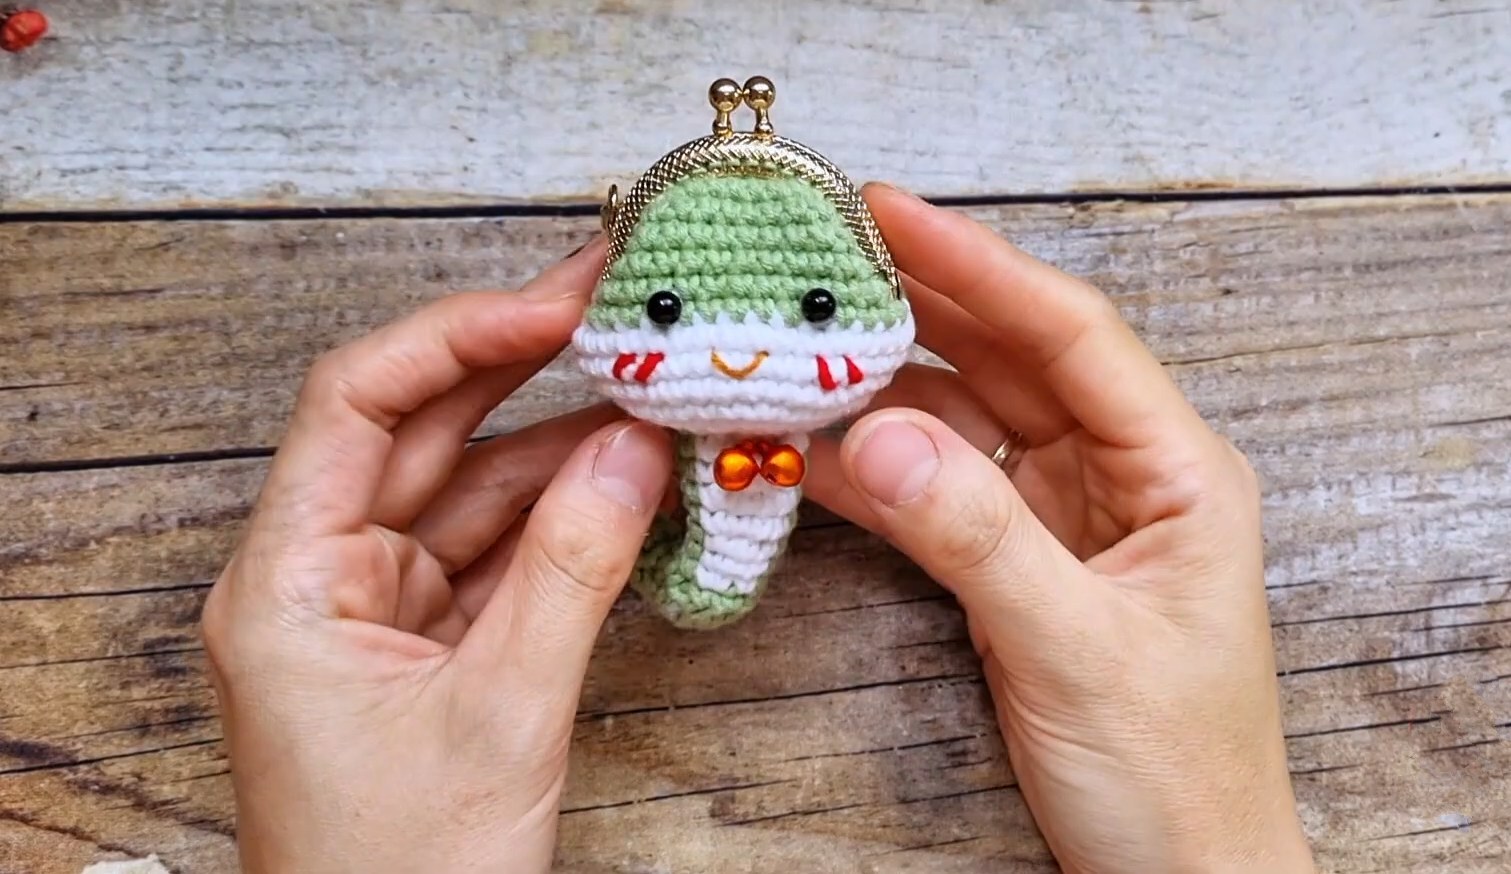
We shall crochet a kawaii Zodiac baby snake amigurumi whose head can be used as a small coin purse.
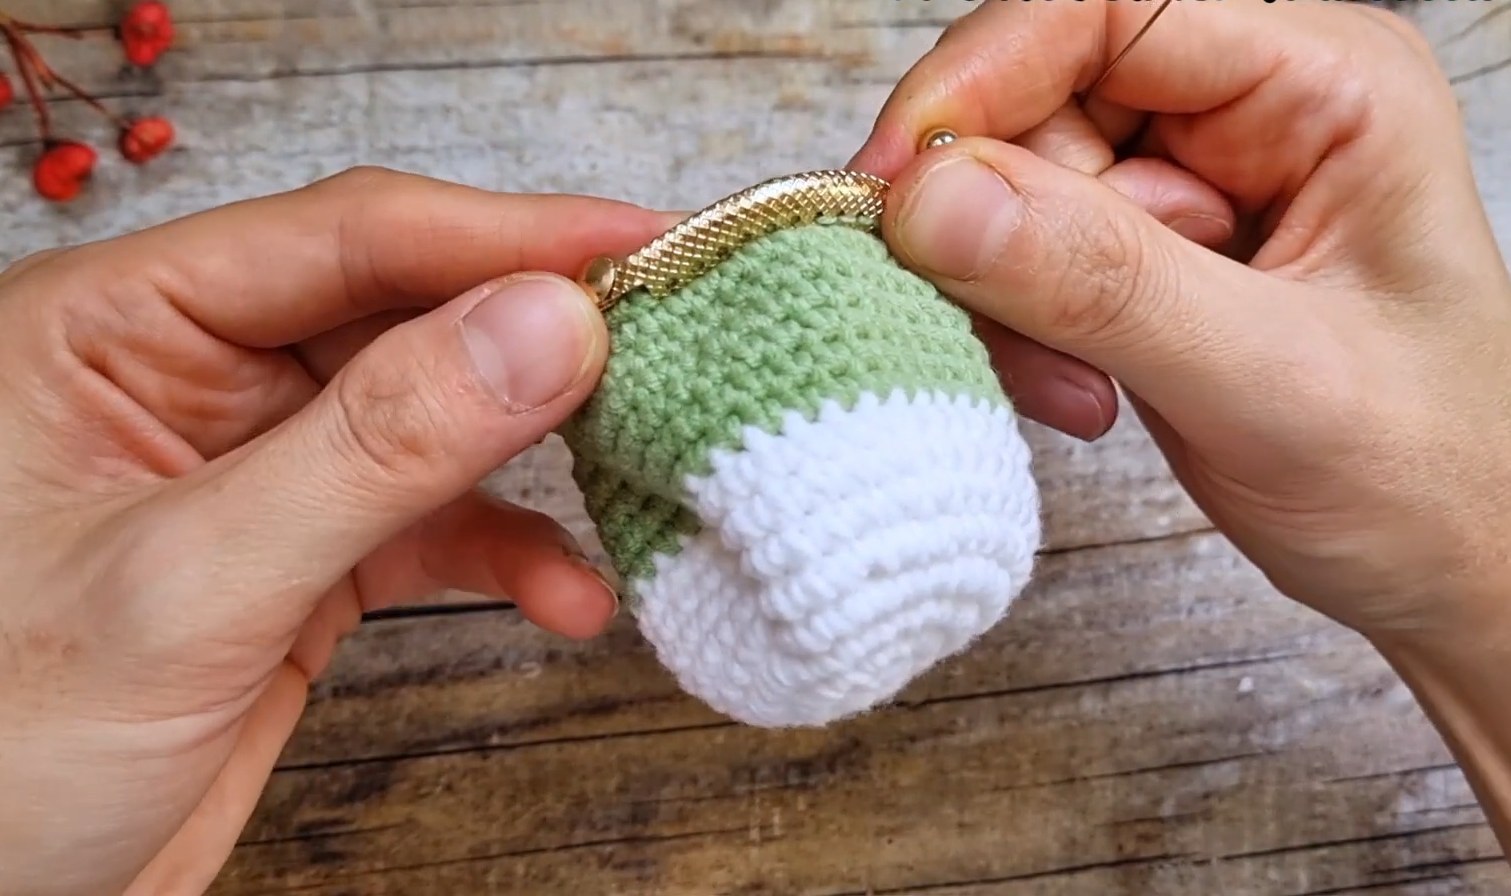
With the metal frame, the chain keyring, and the golden bell locket, this mini snake is very professional. The pattern is small and low-sew. Support her for this, so unique idea.

Bi do Handmade has been an expert in crocheting and designing crochet amigurumi, bag charms, and pouches. Also visit her YouTube channel for more exciting projects.
More Chinese New Year Patterns
Crochet Chinese Snake Pouch
Here is the complete pattern for crocheting the chinese snake pouch that is a must-have for kids:
Materials
-
Yarn: Milk Cotton (Green and White)
-
Hook: 2.5 mm
-
Other: Mini purse frame, fiberfill, safety eyes, pink yarn, yarn needle.
Abbreviations (US Terms)
-
MR: Magic Ring
-
ch: Chain
-
sc: Single Crochet
-
inc: Increase (2 sc in one stitch)
-
sl st: Slip Stitch
-
st(s): Stitch(es)
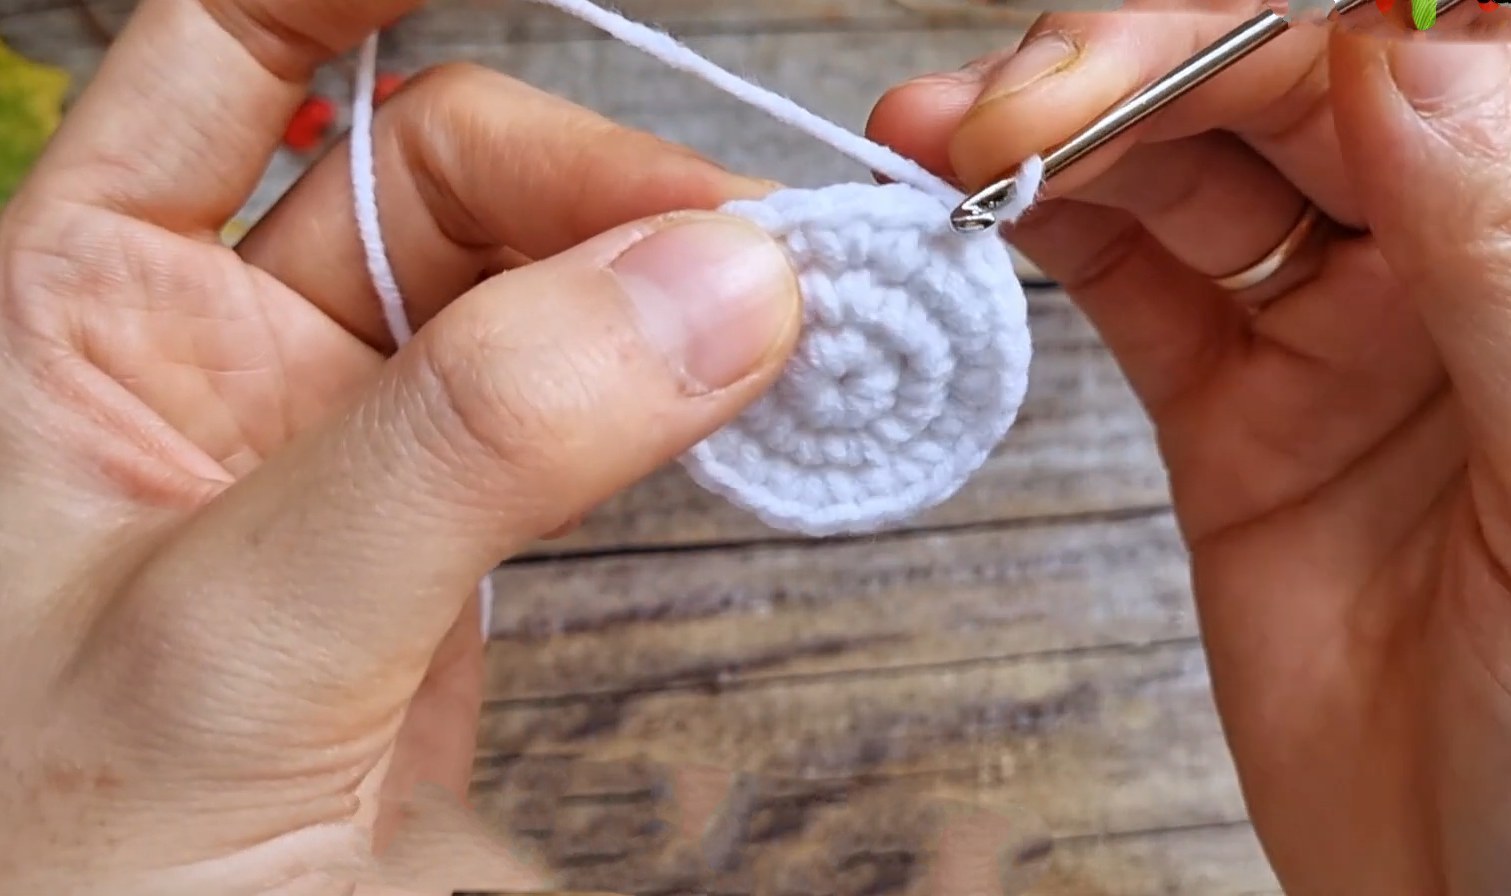
Main Body (Bag)
-
R1: (White) MR, 8 sc, sl st to join. (8)
-
R2: 8 inc, sl st. (16)
-
R3: (1 sc, inc) x 8, sl st. (24)
-
R4: (3 sc, inc) x 6, sl st. (30)
-
R5: (2 sc, inc, 2 sc) x 6, sl st. (36)
-
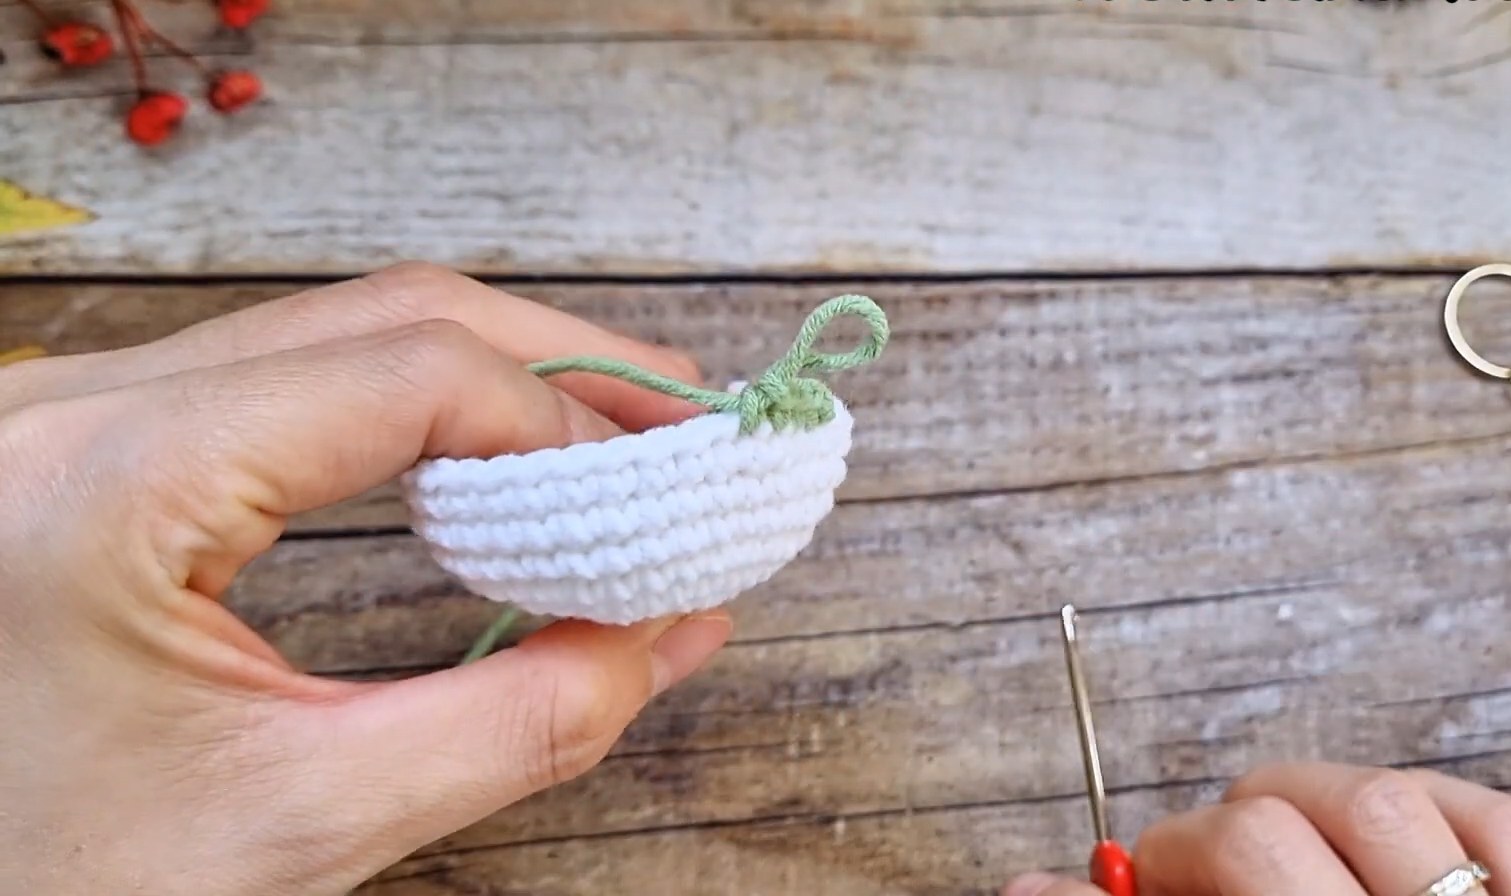
R6 – R8: 36 sc, sl st. (36)
-
R9: (Change to Green) 36 sc, sl st. (36)
-
R10 – R15: 36 sc, sl st. (36)
-
Fasten off. Leave a long tail to sew the edge into the metal purse frame.
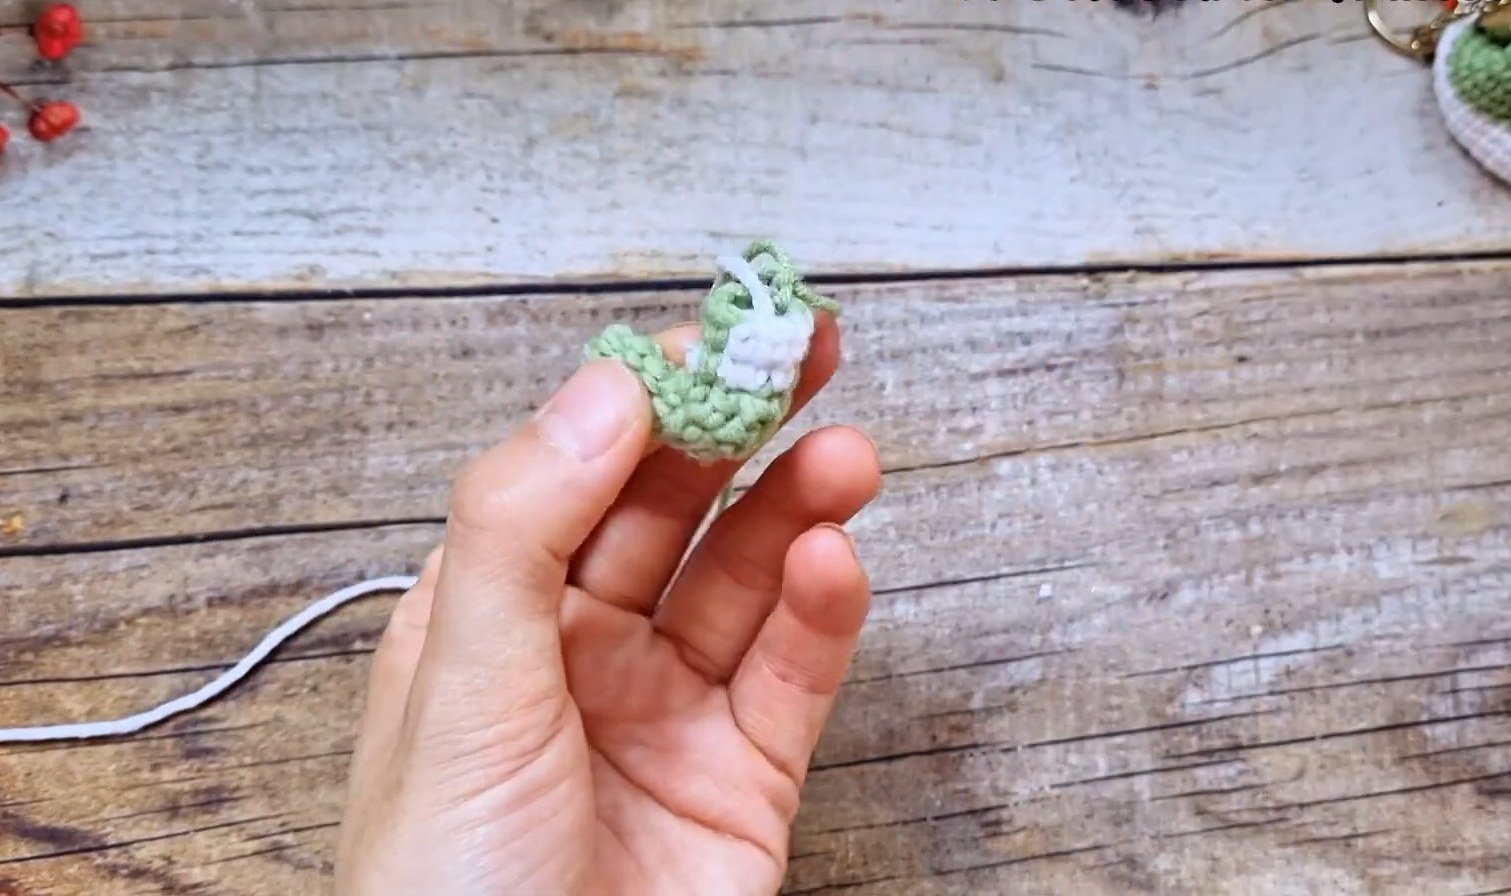
Snake Tail & Neck
-
R1: (Green) MR, 6 sc, sl st. (6)
-
R2: 6 sc, sl st. (6)
-
R3: 3 sc, 3 ch (skip remaining 3 sts), sl st to first sc. (6)
-
R4: 3 sc (into R3 sts), 3 sc (into the 3 skipped sts of R2), sl st. (6)
-
R5: 3 sc, 3 ch (skip 3), sl st. (6)
-
R6: 3 sc, 3 ch (skip 3), sl st. (6)
-
R7: 3 sc, 1 sc into base of last st, 3 sc into skipped sts below, 1 sc into first st of row above, sl st. (8)
-
R8: 4 sc, 4 ch (skip 4), sl st. (8)
-
R9: 4 sc, 4 sc into skipped sts of R7, sl st. (8)
-
R10: (Adding White belly) 2 sc (Green), change to White, 1 sc, change to Green, 1 sc, inc (Green), (3 sc, inc) in Green/White pattern, sl st. (10)
-
R11: 10 sc (matching colors), sl st. (10)
-
R12: 2 sc (Green), change to White, 2 sc, change to Green, 2 sc, inc, 4 sc, inc, sl st. (12)
-
R13: 12 sc (matching colors), sl st. (12)
-
R14: 6 sc (Green/White mix), inc, 6 sc, inc, sl st. (14)
-
R15: 14 sc (matching colors), sl st. (14)
-
R16: 6 sc (Green/White mix), inc, 7 sc, inc, sl st. (16)
-
Fasten off. Stuff tail with fiberfill.
Assembly & Face
-
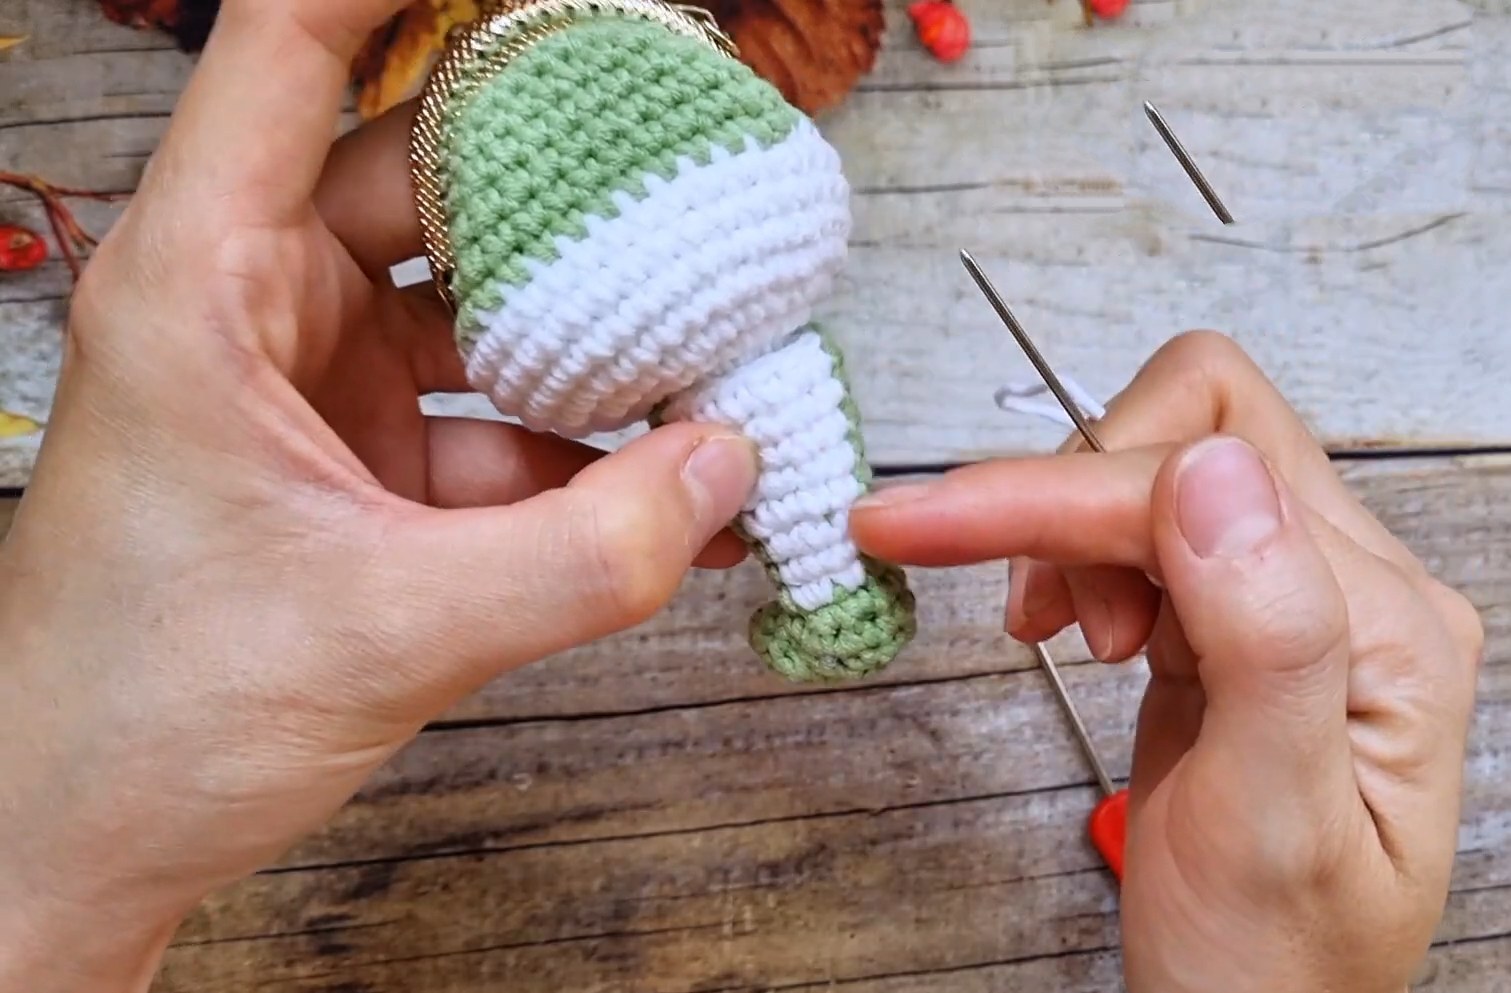
Tail: Sew R16 of the tail to the center bottom of the bag (between R2 and R3 of the bag base).
-
Eyes: Glue or attach eyes to the Green section (head) of the bag.
-
Mouth: Using red/pink yarn, embroider a small “V” shape at the center front.
-
Blush: Embroider small horizontal pink lines just below the eyes.
Pattern In UK Terms:
Main Body (Bag)
-
R1: (White) MR, 8 dc, ss to join. (8)
-
R2: 8 inc, ss. (16)
-
R3: (1 dc, inc) x 8, ss. (24)
-
R4: (3 dc, inc) x 6, ss. (30)
-
R5: (2 dc, inc, 2 dc) x 6, ss. (36)
-
R6 – R8: 36 dc, ss. (36)
-
R9: (Change to Green) 36 dc, ss. (36)
-
R10 – R15: 36 dc, ss. (36)
-
Fasten off, leave a long tail. Sew the top edge into the mini purse frame.
Snake Tail & Neck
-
R1: (Green) MR, 6 dc, ss. (6)
-
R2: 6 dc, ss. (6)
-
R3: 3 dc, 3 ch (skip remaining 3 sts), ss to first dc. (6)
-
R4: 3 dc (into R3 sts), 3 dc (into the 3 skipped sts of R2), ss. (6)
-
R5: 3 dc, 3 ch (skip 3), ss. (6)
-
R6: 3 dc, 3 ch (skip 3), ss. (6)
-
R7: 3 dc, 1 dc into the base of the last st, 3 dc into the skipped sts below, 1 dc into the first st of the row above, ss. (8)
-
R8: 4 dc, 4 ch (skip 4), ss. (8)
-
R9: 4 dc, 4 dc into skipped sts of R7, ss. (8)
-
R10: (Adding White belly) 2 dc (Green), change to White, 1 dc, change to Green, 1 dc, inc (Green), (3 dc, inc) in Green/White pattern, ss. (10)
-
R11: 10 dc (matching colors from previous row), ss. (10)
-
R12: 2 dc (Green), change to White, 2 dc, change to Green, 2 dc, inc, 4 dc, inc, ss. (12)
-
R13: 12 dc (matching colors), ss. (12)
-
R14: 6 dc (Green/White mix), inc, 6 dc, inc, ss. (14)
-
R15: 14 dc (matching colors), ss. (14)
-
R16: 6 dc (Green/White mix), inc, 7 dc, inc, ss. (16)
-
Fasten off. Stuff tail with fiberfill.
Assembly & Face
-
Tail Attachment: Sew the R16 of the tail to the center bottom of the bag (between R2 and R3 of the bag base).
-
Eyes: Attach safety eyes or glue beads onto the Green section of the bag (snake head area).
-
Mouth: * Use Red or Pink yarn.
-
Insert the needle from inside to outside at the center front.
-
Skip 1 st, insert needle back in, creating a small “V” or straight line for the mouth.
-
Secure inside.
-
-
Blush: Embroider two small horizontal lines with pink yarn just below the eyes.
-
Optional: Add a bell or small charm to the purse frame for decoration.